How To Install My PetSafe® SmartDoor™ Connected Pet Door in a Wall That Does Not Contain Metal
Table of Contents
Important Information
Before installing the SmartDoor™, make sure:
- You have completed the instructions in Planning My PetSafe® SmartDoor™ Connected Pet Door Installation.
- You have all the tools and materials listed in Tools and Materials Needed for My PetSafe® SmartDoor™ Connected Pet Door Installation.
- You have set up your pet door in the app and tested it in the location where you would like to install it. For detailed information, visit How To Connect My PetSafe® Smartdoor™ Connected Pet Door to the App.
- You have removed the batteries from the pet door prior to installation.
The following instructions explain how to install your SmartDoor™ in a wall using traditional framing and drywall/plasterboard construction. To install the SmartDoor™ in brick or masonry, please consult a licensed builder.
For installation in a wall, you will need:
- SmartDoor™ Connected Pet Door Installation Adaptor in the size that corresponds with your pet door.
- SmartDoor™ Connected Pet Door Tunnel Extension in the size that corresponds with your pet door. The number of tunnel extensions you will need will depend on the thickness of your wall.
- The tunnel of the medium SmartDoor™ is 2 ⅝ inches long, and the tunnel of the large SmartDoor™ is 2 ¹¹⁄₁₆ inches long.
- Each tunnel extension adds another 2 inches.
- The last tunnel extension needs to stick out of the wall by at least 1 ¼ inches.
Measure and Mark
It is important to your pet’s well-being to measure and mark your pet’s shoulder height for proper installation placement. If there are multiple pets, use the tallest pet’s shoulder height.
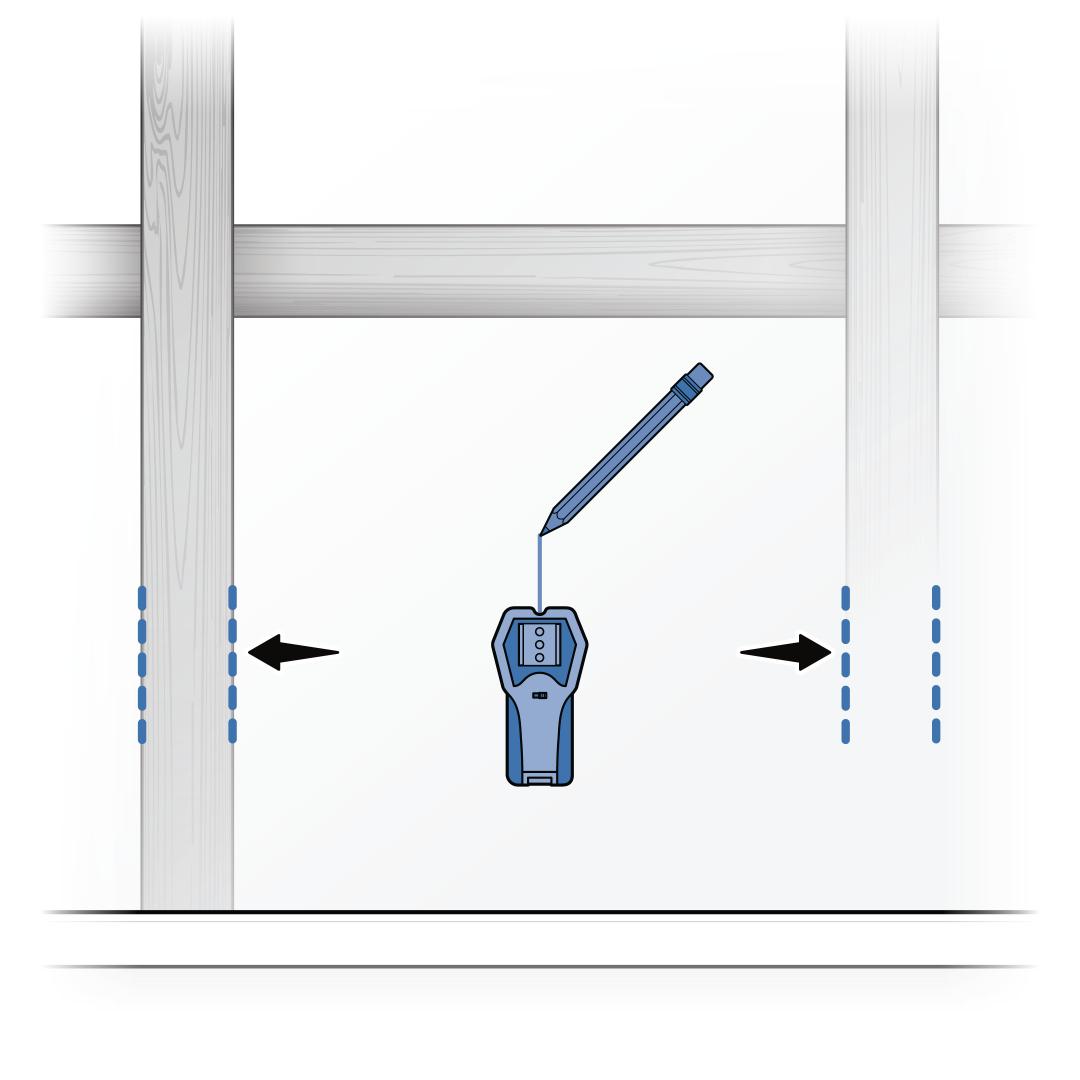
Choose a location for the SmartDoor™. It should be in a section of wall that is easily accessible by your pet. Use a stud finder to locate the studs in the wall and mark their location with a pencil. Draw a vertical line midway between the studs, 10 to 12 inches (25.4 to 30.5 cm) above the floor.
Make a second pencil mark on your wall, 3 ½ inches above the floor.
Check for electrical/plumbing fixtures that are in the wall where you wish to place the pet door by cutting a small hole in the wall and looking inside.
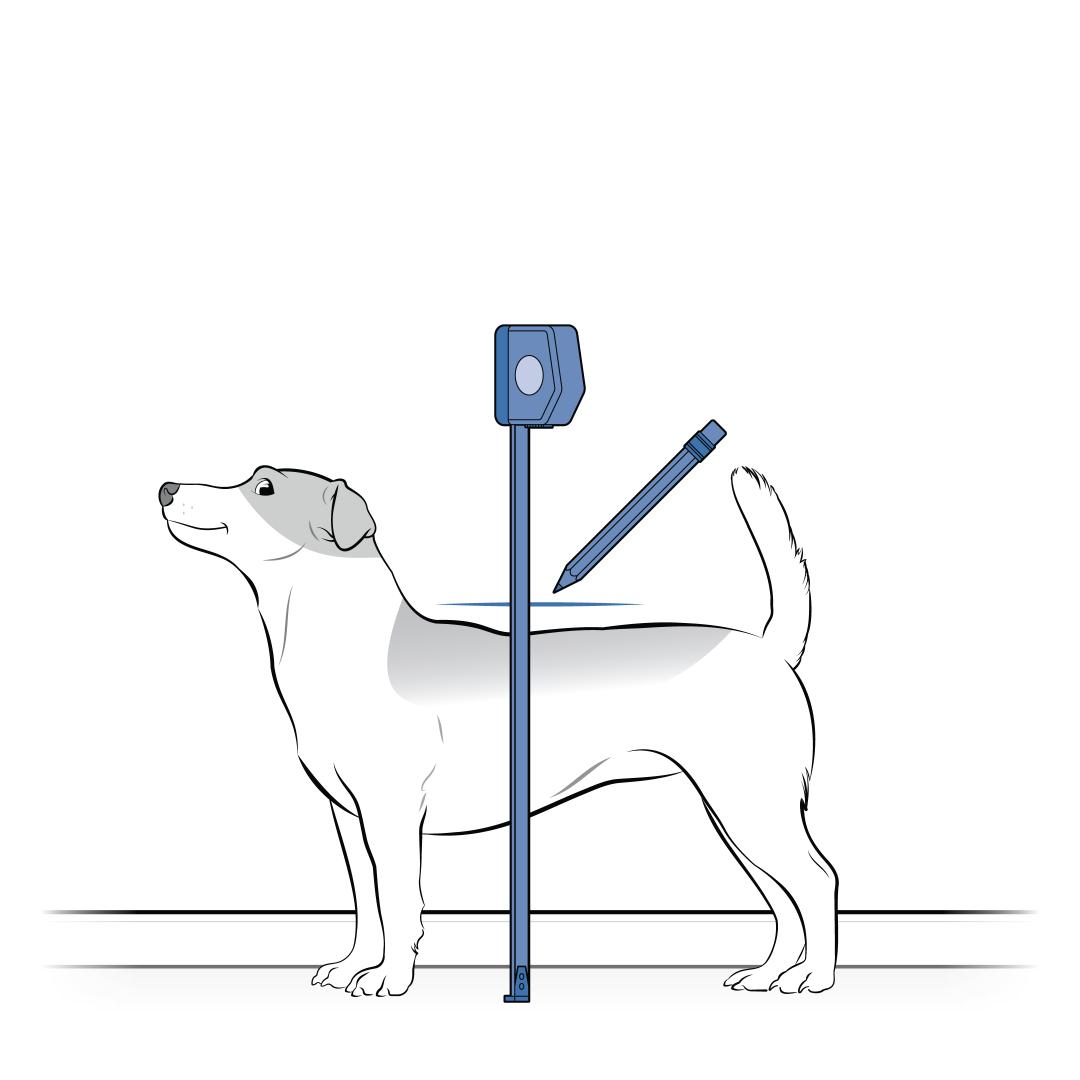
Measure and mark your pet’s shoulder height on the wall between the stud marks using either method:
- Have your pet stand next to the wall and mark their shoulder height.
- Use a measuring tape to measure your pet from the floor to their shoulder. Then apply that measurement to the wall.
Use a level to extend the mark into a line.
Position the Cutting Template
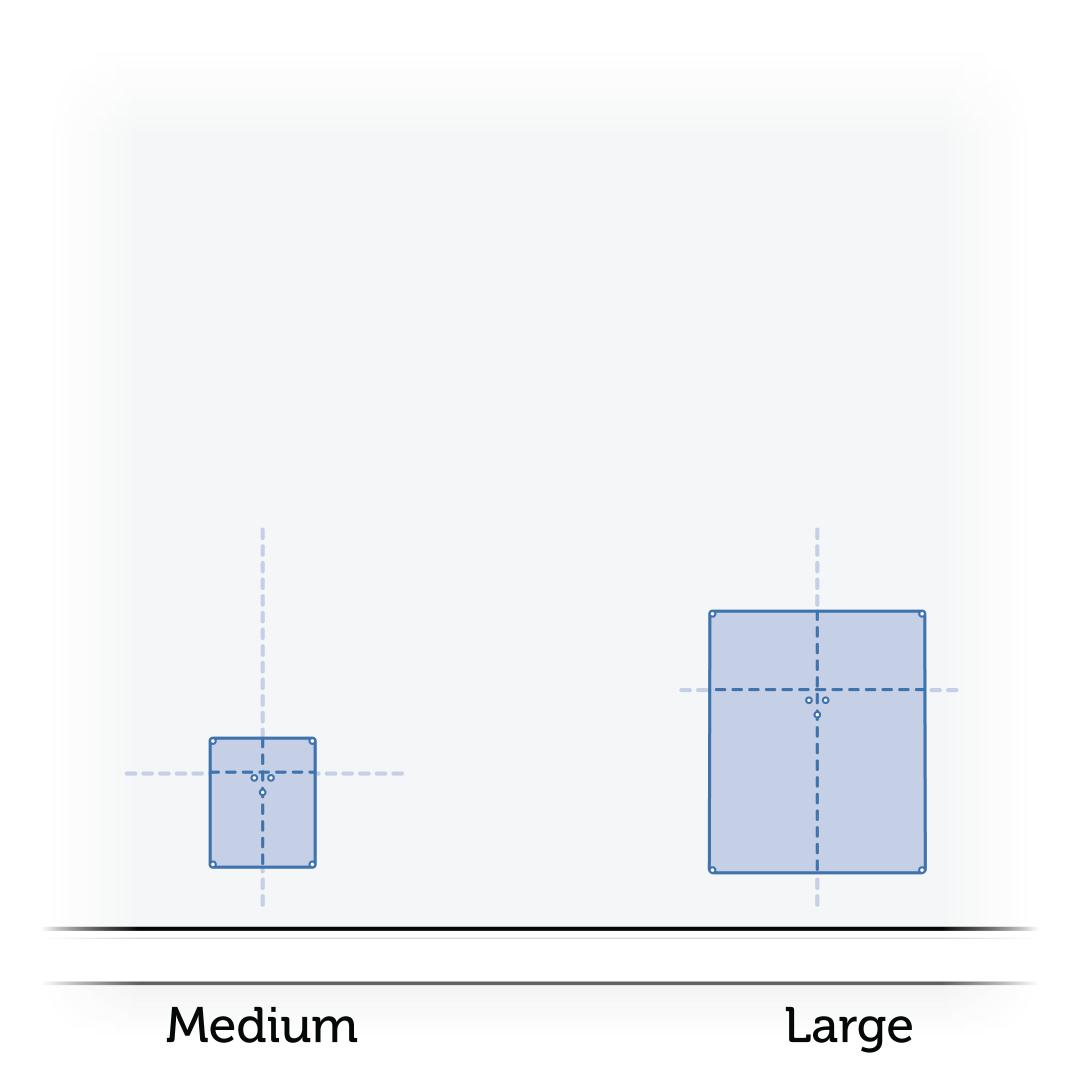
Cut out the cutting template for wall installation.
Hold the cutting template up to the interior side of the wall, matching the shoulder and center lines on the cutting template with the shoulder and center lines you drew on the wall.
Note where the bottom of the cutting template is and make any necessary adjustments:
- The bottom of the cutting template must be at or above the line you drew 3 ½ inches above the floor. This is to allow room for the installation adaptor.
- If you have both large and small pets, make sure your shorter pets will be able to step up over the bottom edge of the pet door.
Once you are satisfied with the placement of the cutting template, tape it to the wall.
Cut the Interior Pet Door Opening
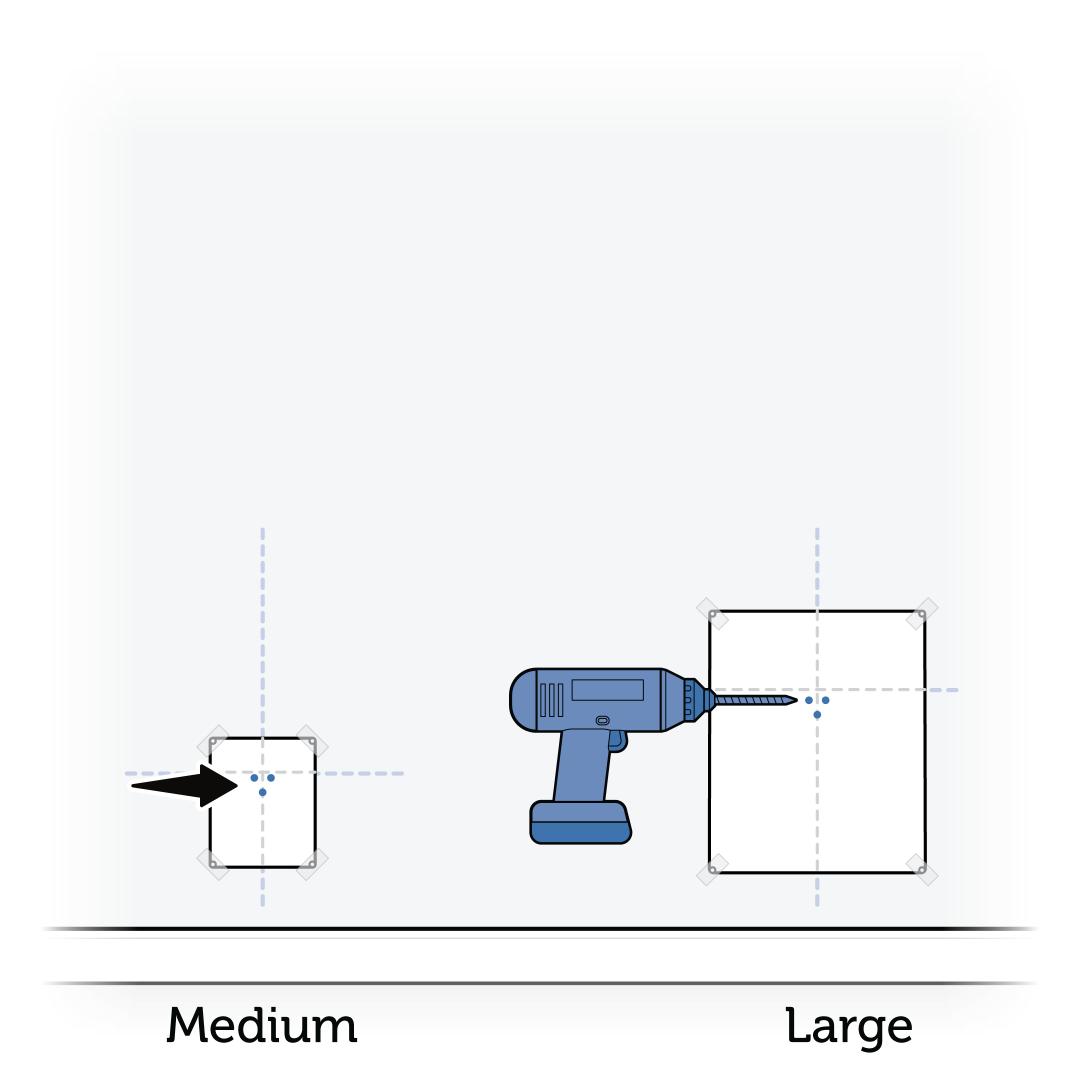
Use a long drill bit to drill three holes through the center locator holes on the cutting template and all the way through the interior and exterior surfaces of the wall. Use both hands to hold the drill steady, straight and level.
You will use these holes to align the cutting template on the exterior side of the wall.
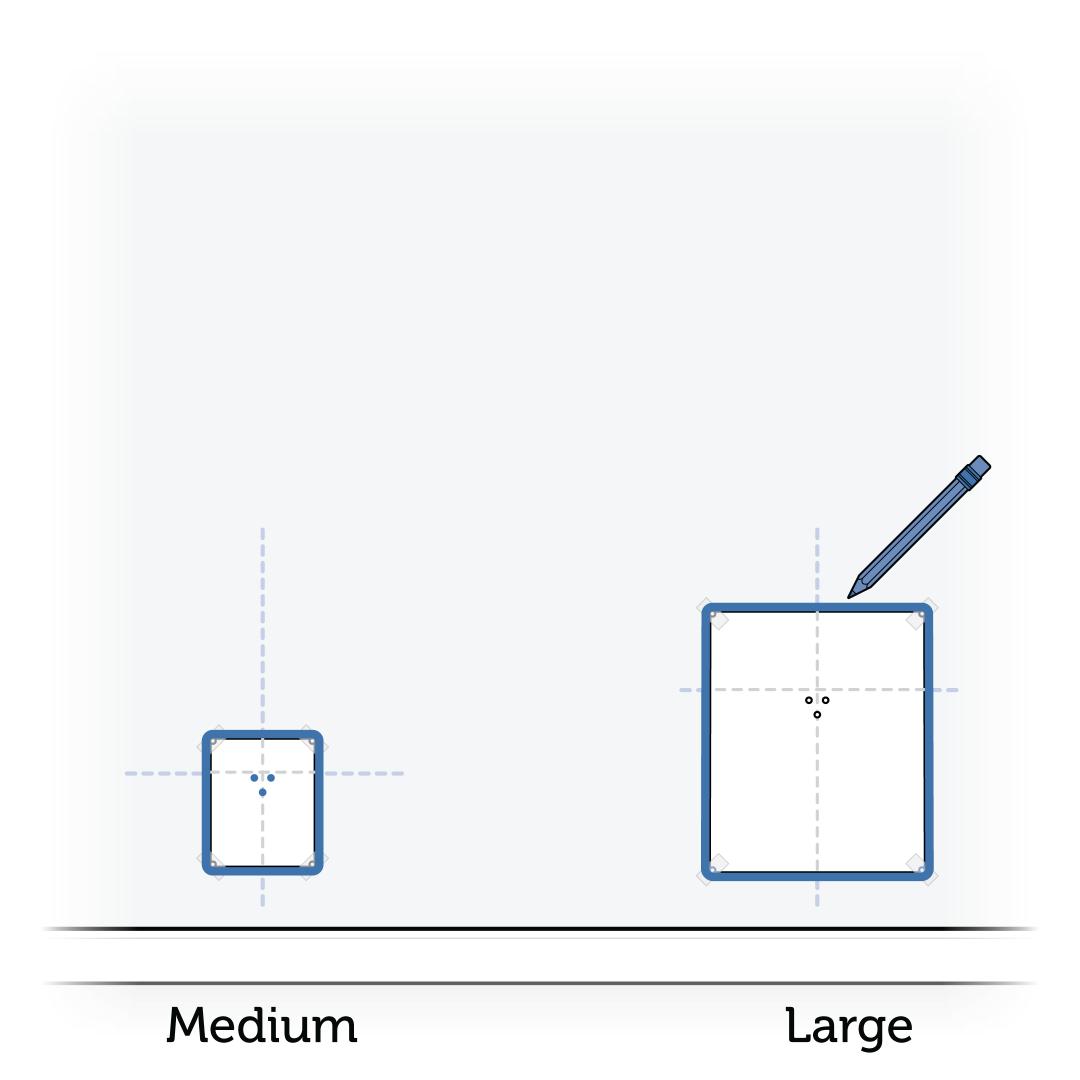
Trace the outside edge of the cutting template. Remember to connect the corners.
Make sure the cutting line is clearly marked on the wall, and then carefully remove the cutting template and excess tape.
Save the cutting template; you will need it for the exterior side of the wall.
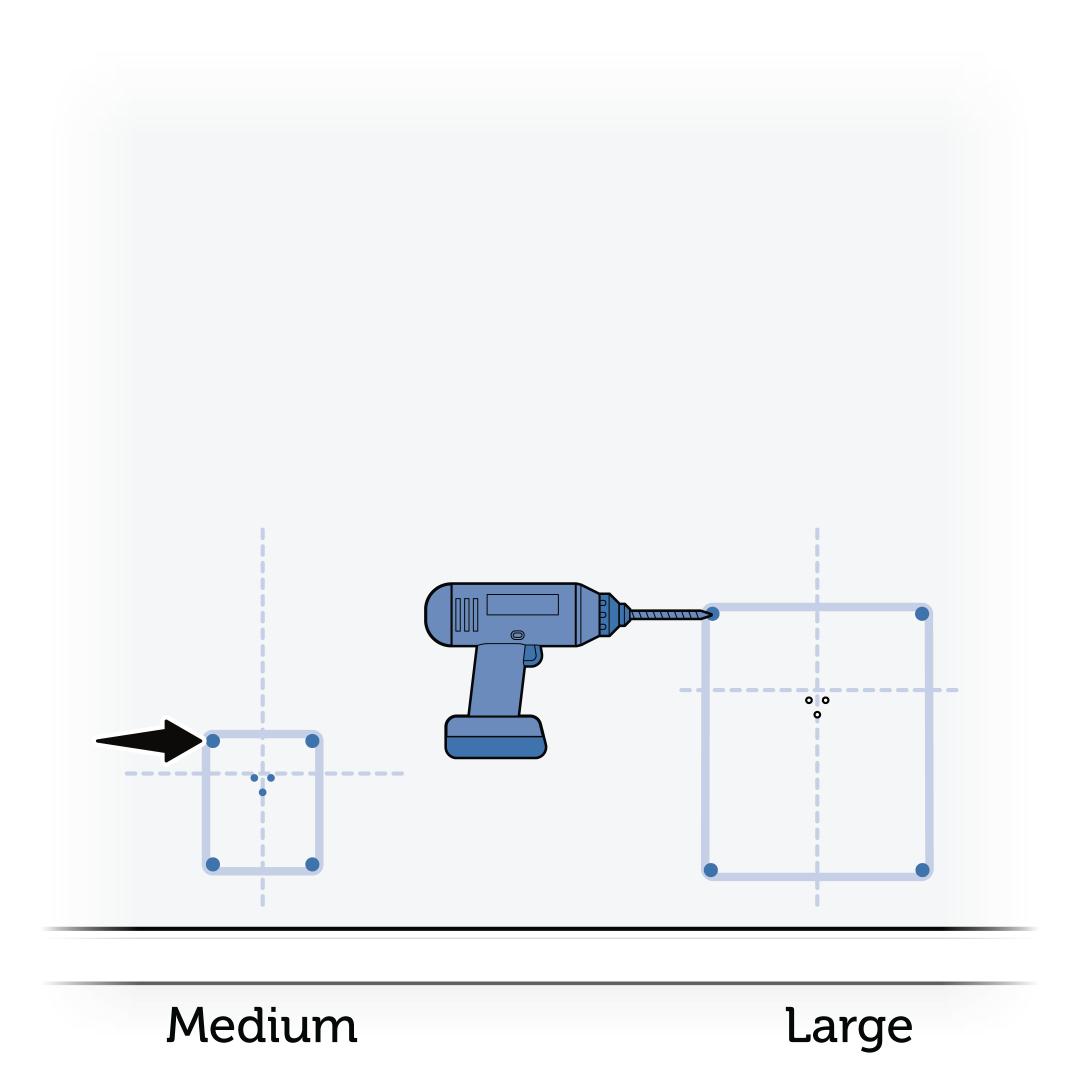
Drill ½-inch (12 mm) holes through the interior wall, just inside the corners of the cutting line.
These holes will be the pilot holes for the jigsaw blade.
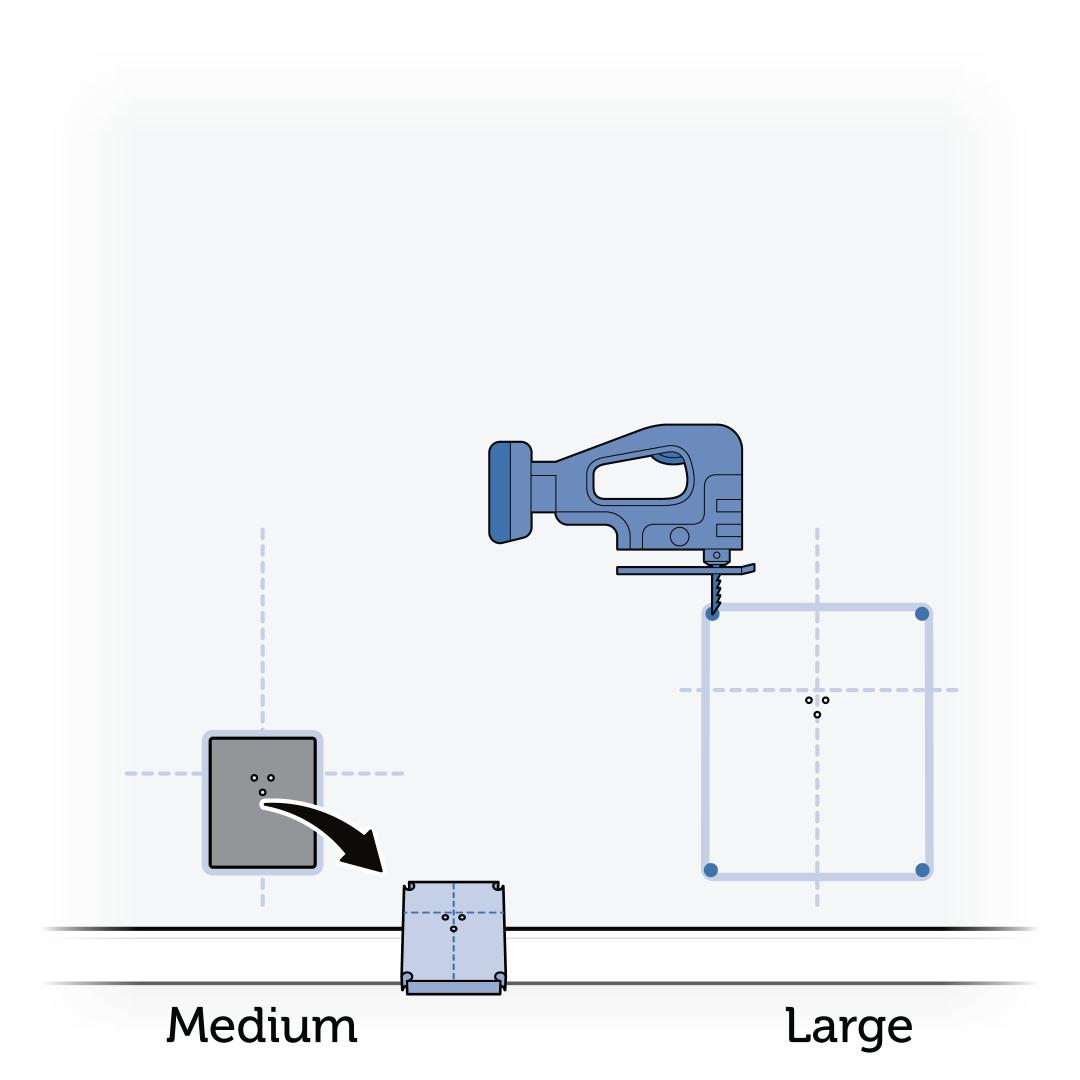
Using a jigsaw, cut the interior wall between the holes you just drilled, along the cutting line.
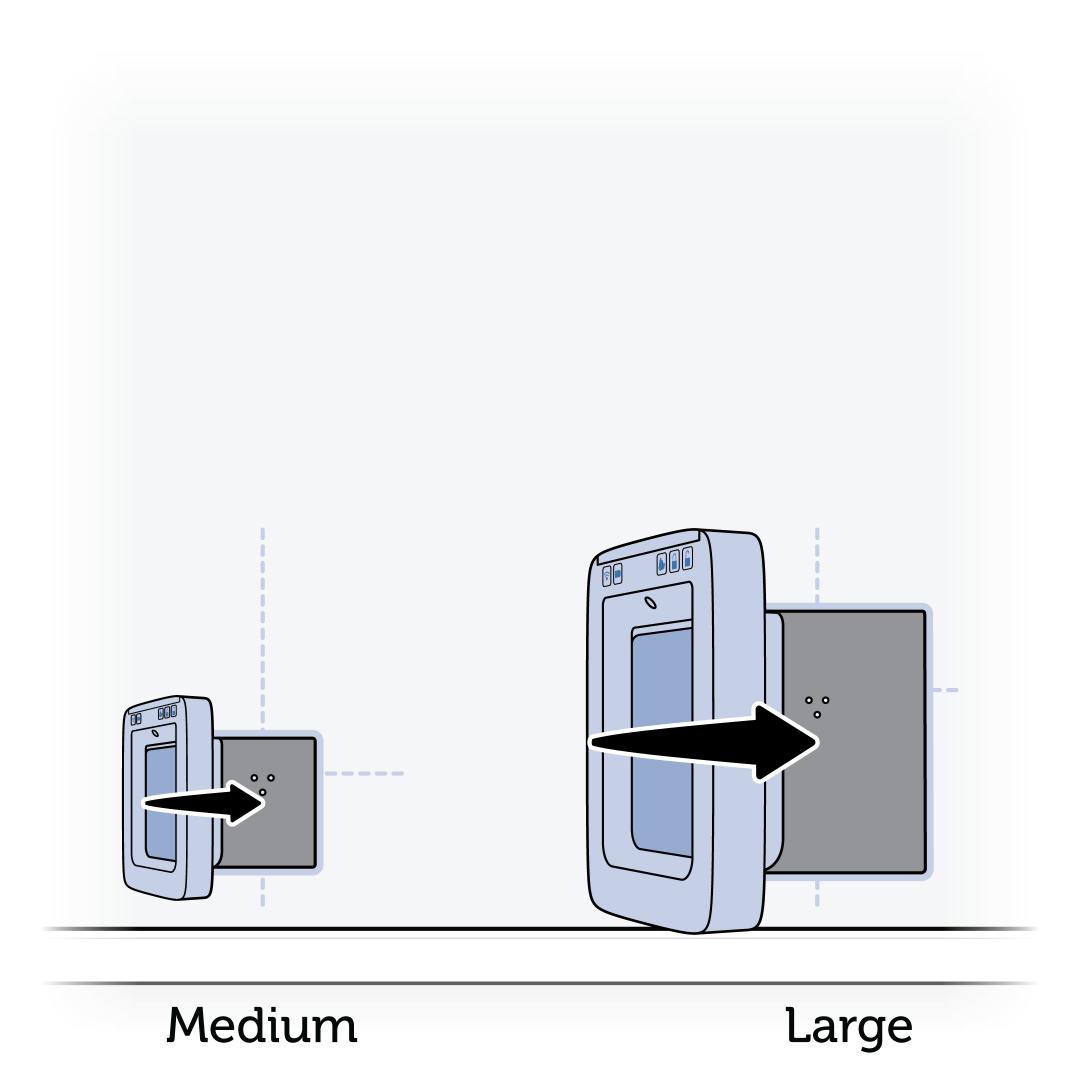
Insert the interior frame of the pet door into the opening to check the fit.
Do not force the interior frame into the opening if it is too tight. If the opening is too small, remove the interior frame and recut or file the opening slightly to enlarge it.
Once the interior frame fits into the opening, make any necessary adjustments to the opening to ensure the pet door sits level.
Cut the Exterior Pet Door Opening
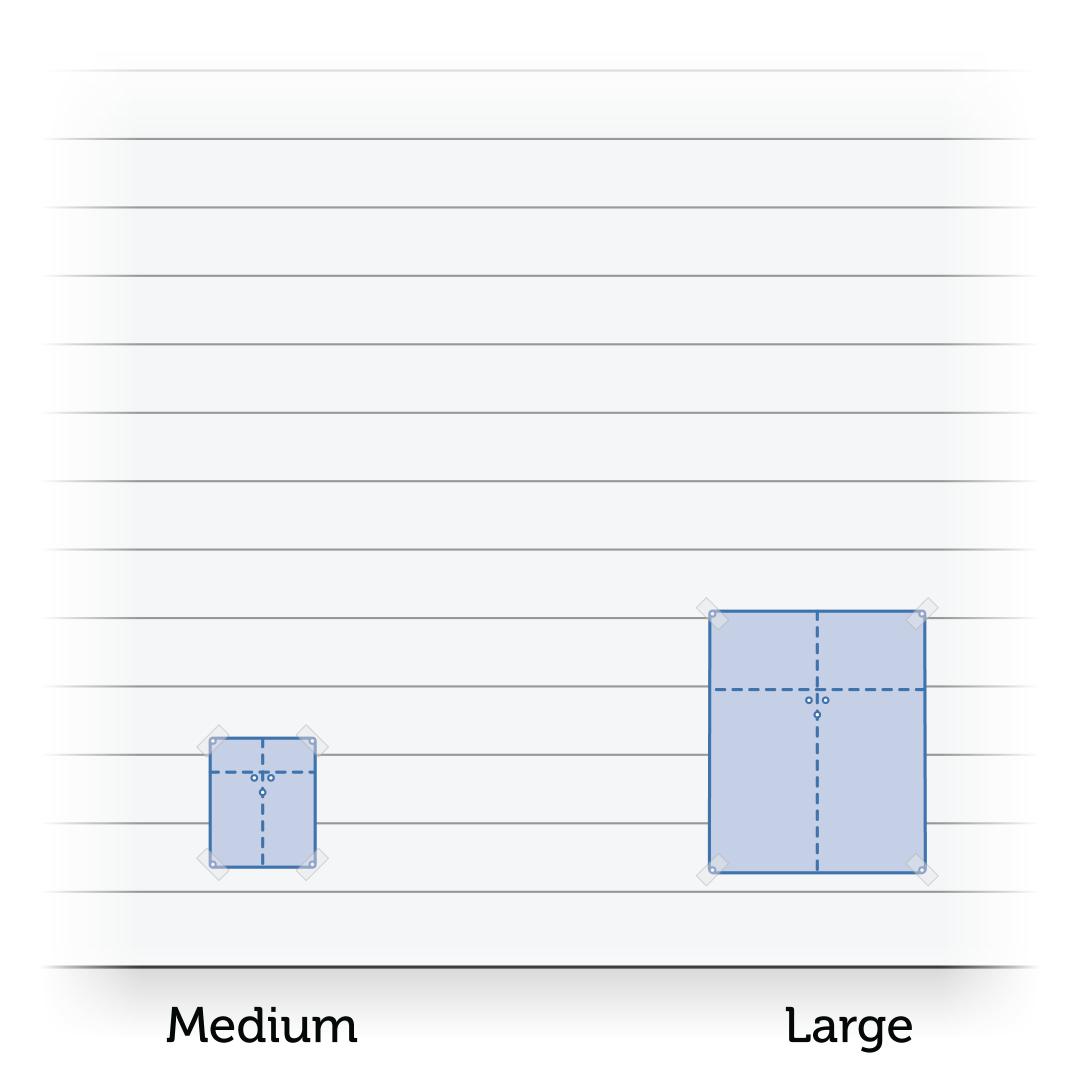
On the exterior side of the wall, line up the three holes in the cutting template with the three holes you drilled through the wall. Make sure the cutting template is level and then tape it into position.
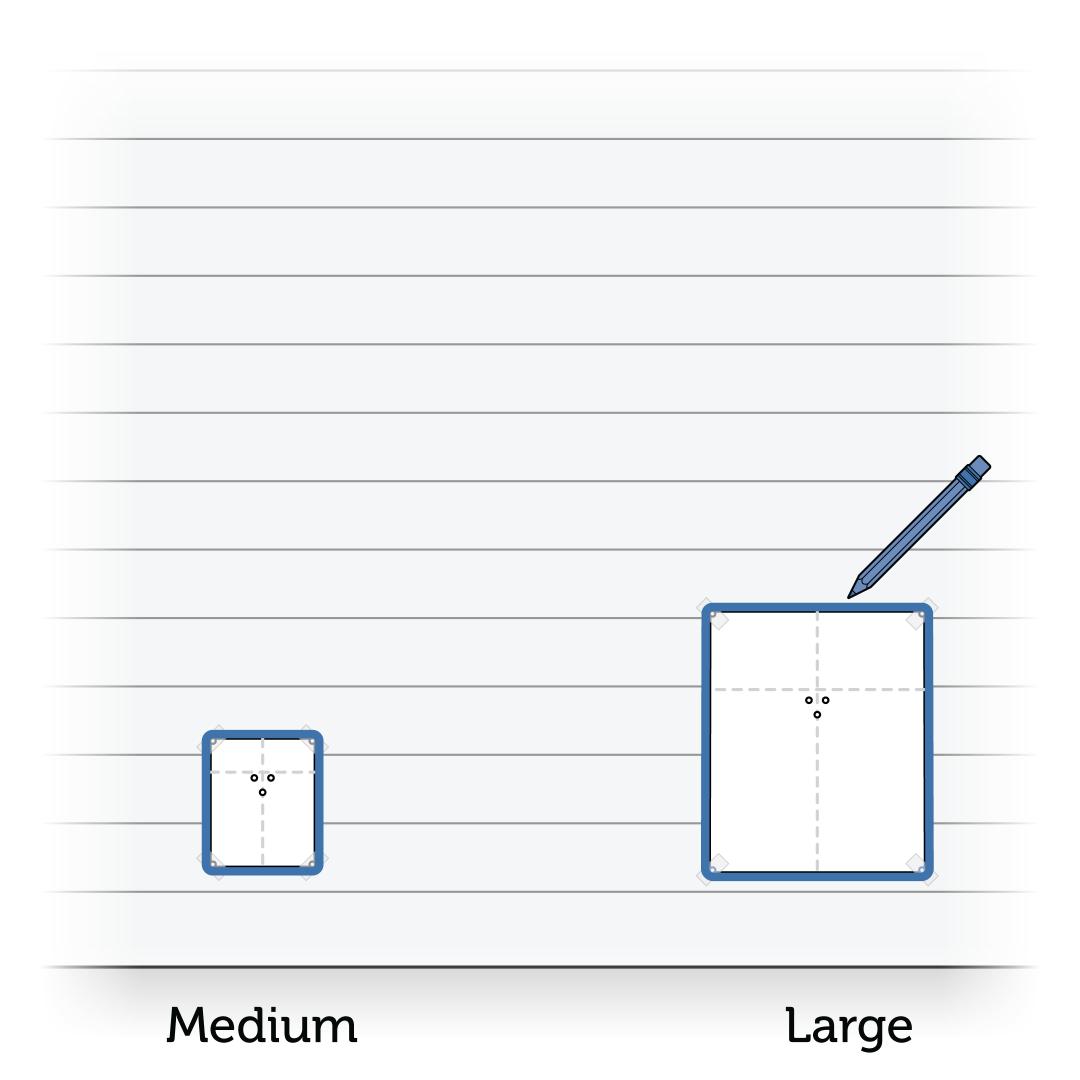
Use a pencil to trace the outside edge of the cutting template. Remember to connect the corners. Make sure the cutting line is clearly marked on the wall, and then carefully remove the cutting template and excess tape.
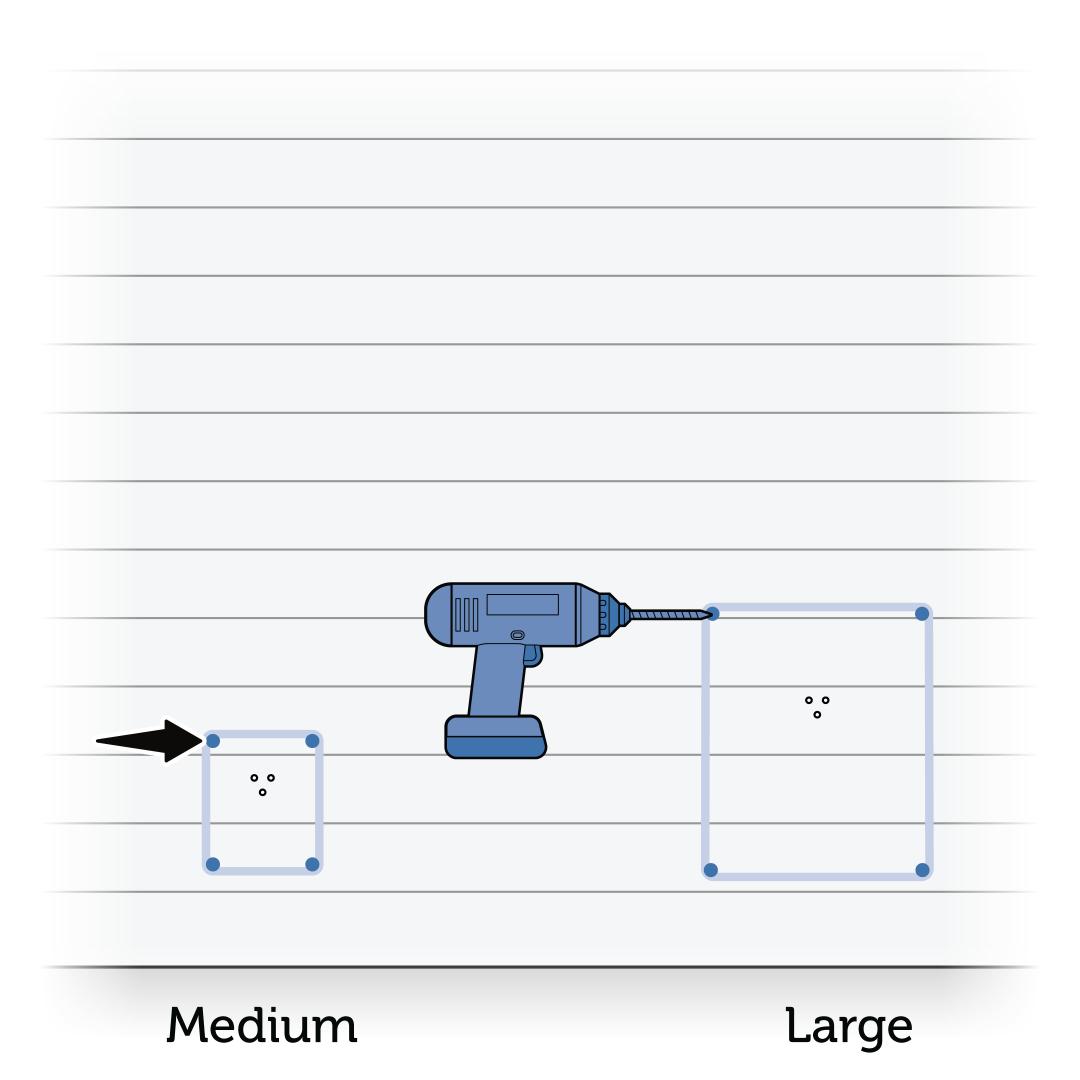
Drill ½-inch (12 mm) holes through the exterior wall, just inside the corners of the cutting line.
These holes will be the pilot holes for the jigsaw blade.
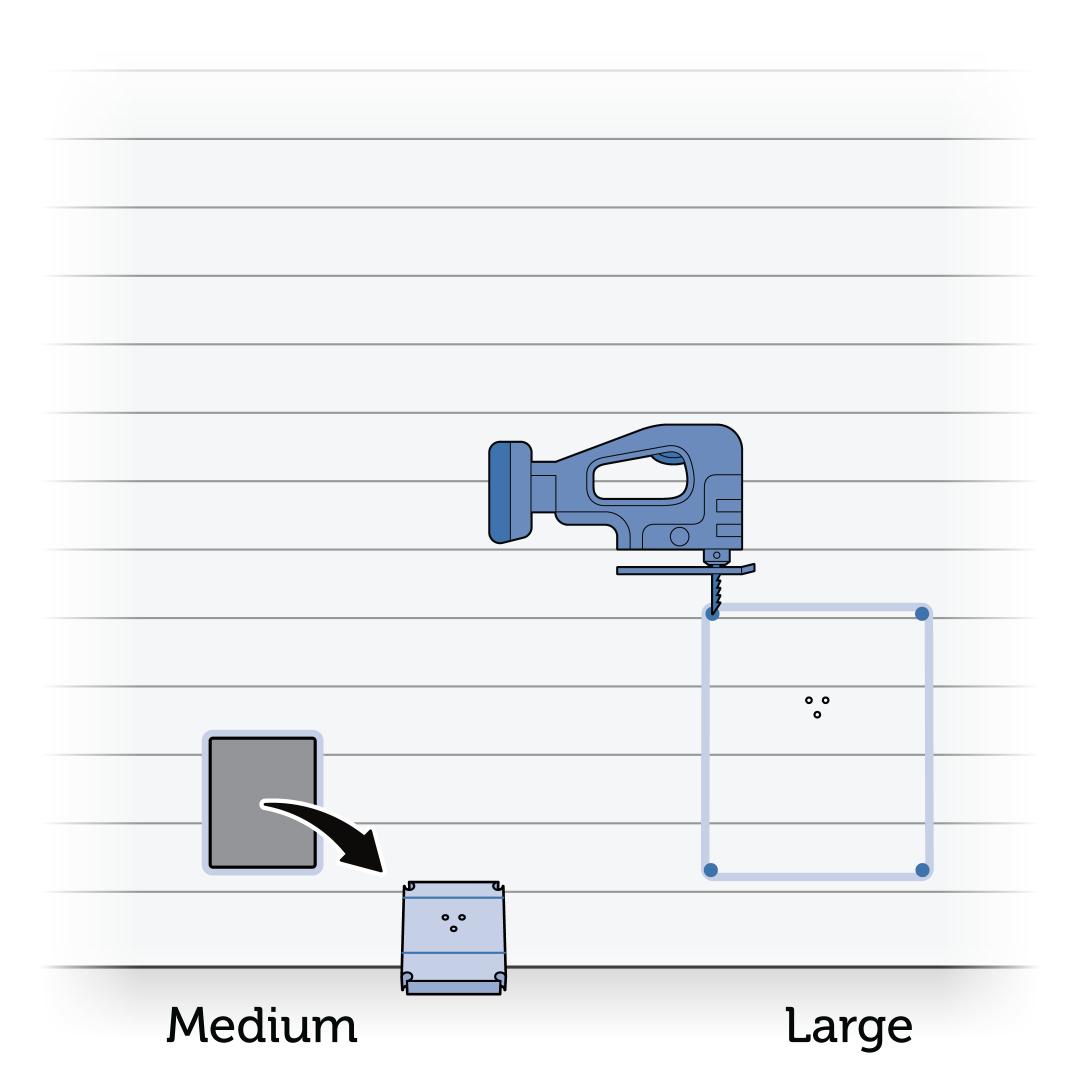
Using a jigsaw, cut the exterior wall between the holes you just drilled, along the cutting line.
If the exterior wall has vinyl siding, carefully score and cut the siding before cutting through the wood behind it.
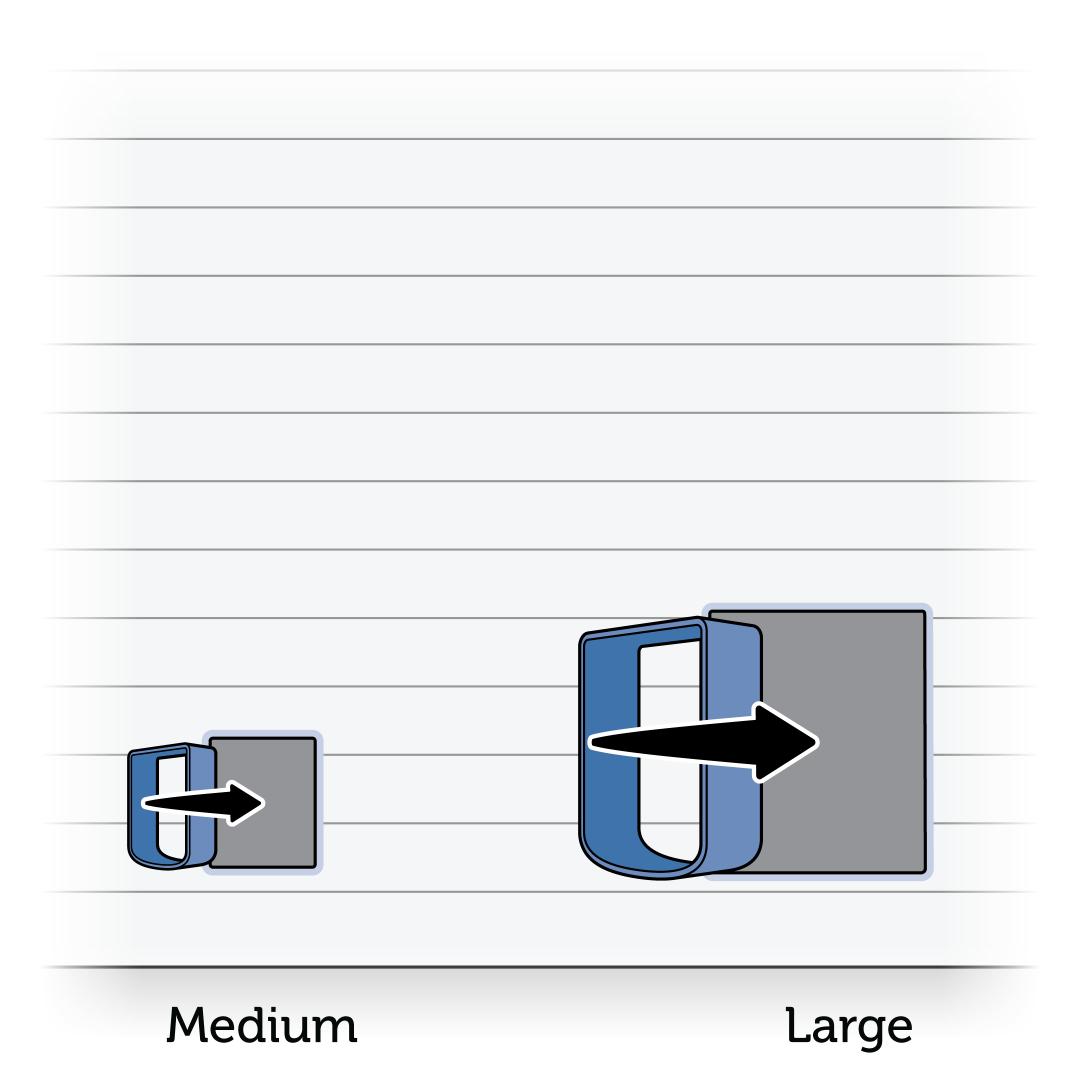
Insert a tunnel extension into the opening to check the fit.
Do not force the tunnel extension into the opening if it is too tight. If the opening is too small, remove the tunnel extension and re-cut or file the opening slightly to enlarge it.
Once the tunnel extension fits into the opening, make any necessary adjustments to the opening to ensure the tunnel extension sits level.
Prepare the Interior Frame
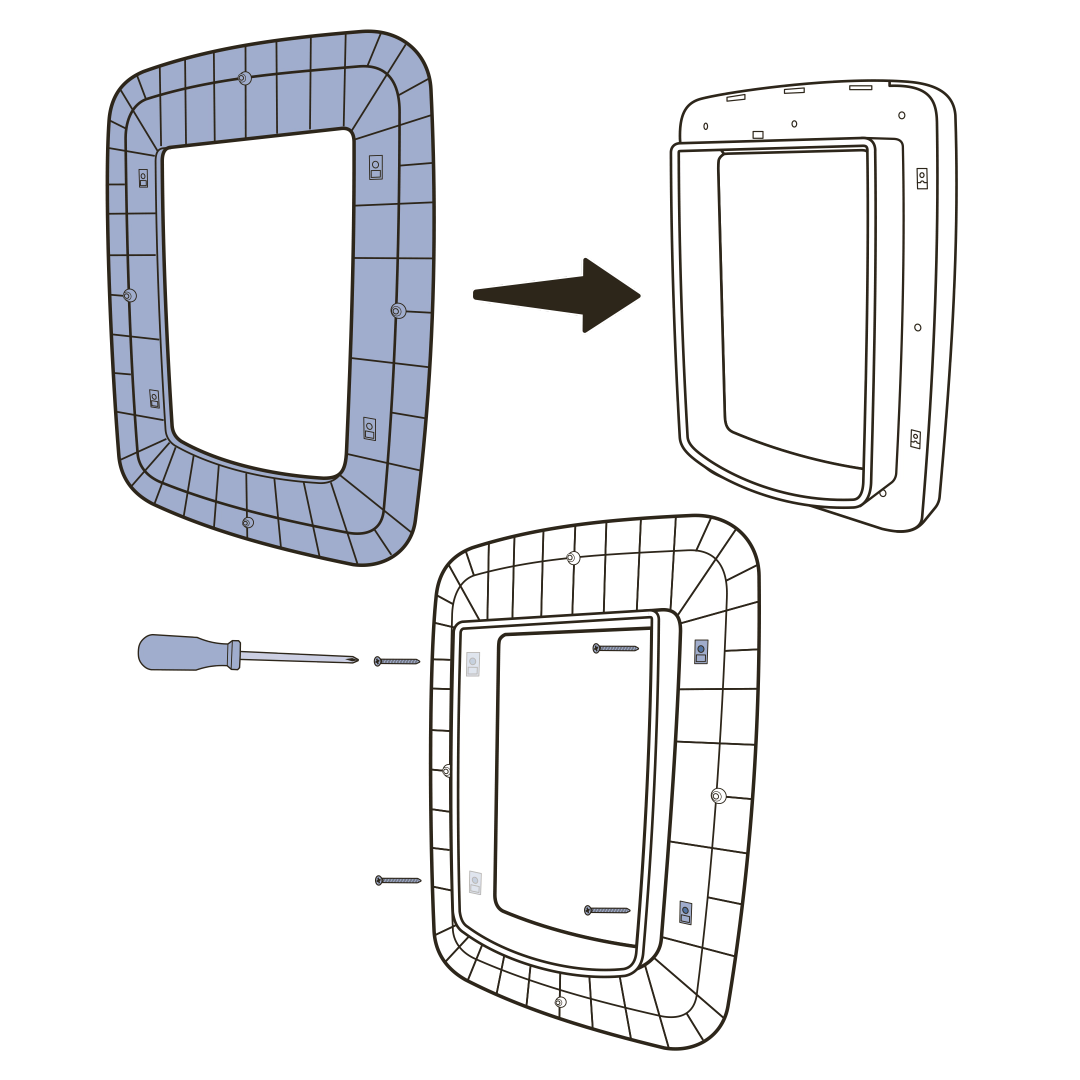
Fit an installation adaptor over the tunnel of the interior frame. The smooth side of the installation adaptor should face the front.
Use four short screws to secure the installation adaptor to the back of the interior frame.
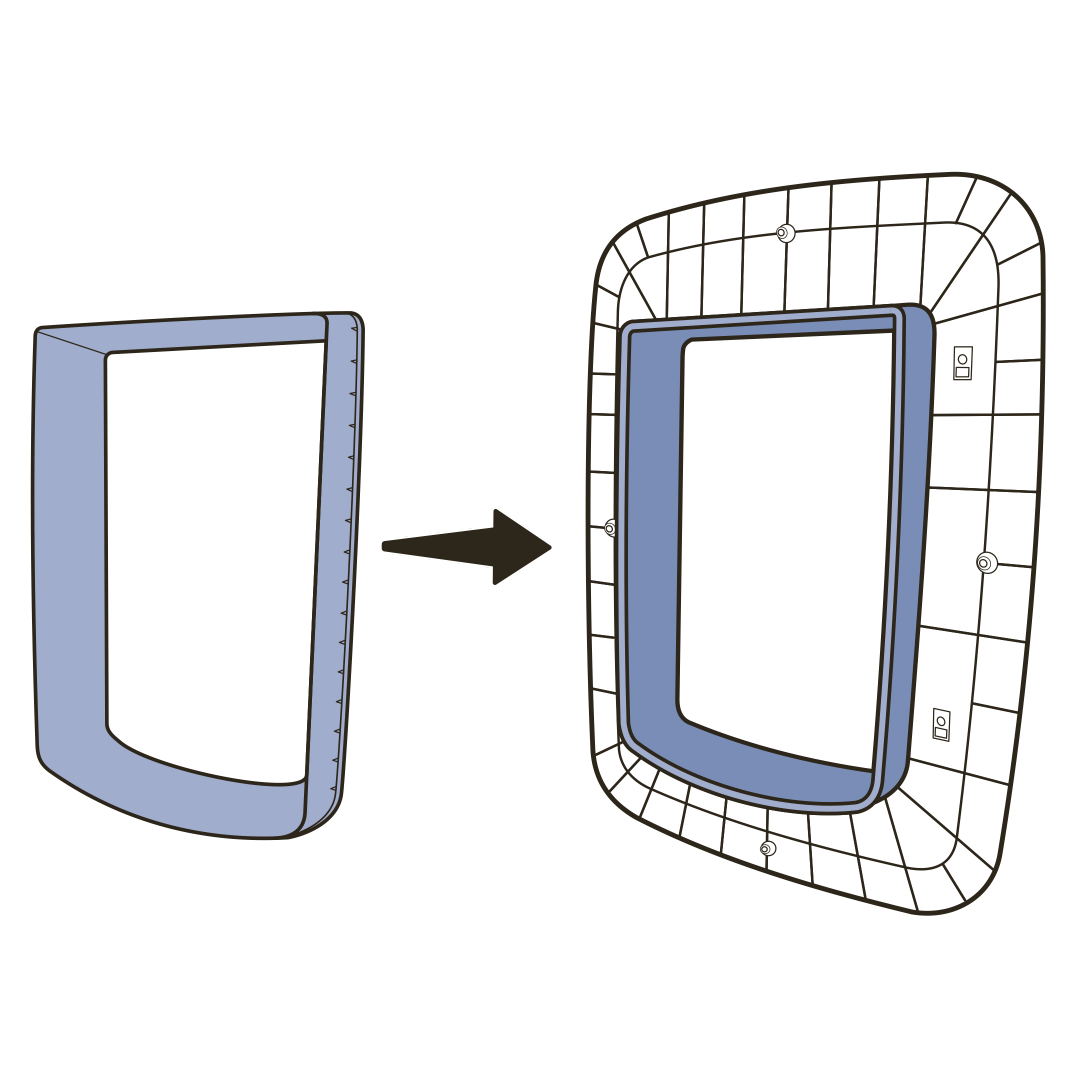
Connect a tunnel extension to the pet door by fitting the lip of the tunnel extension over the tunnel of the pet door.
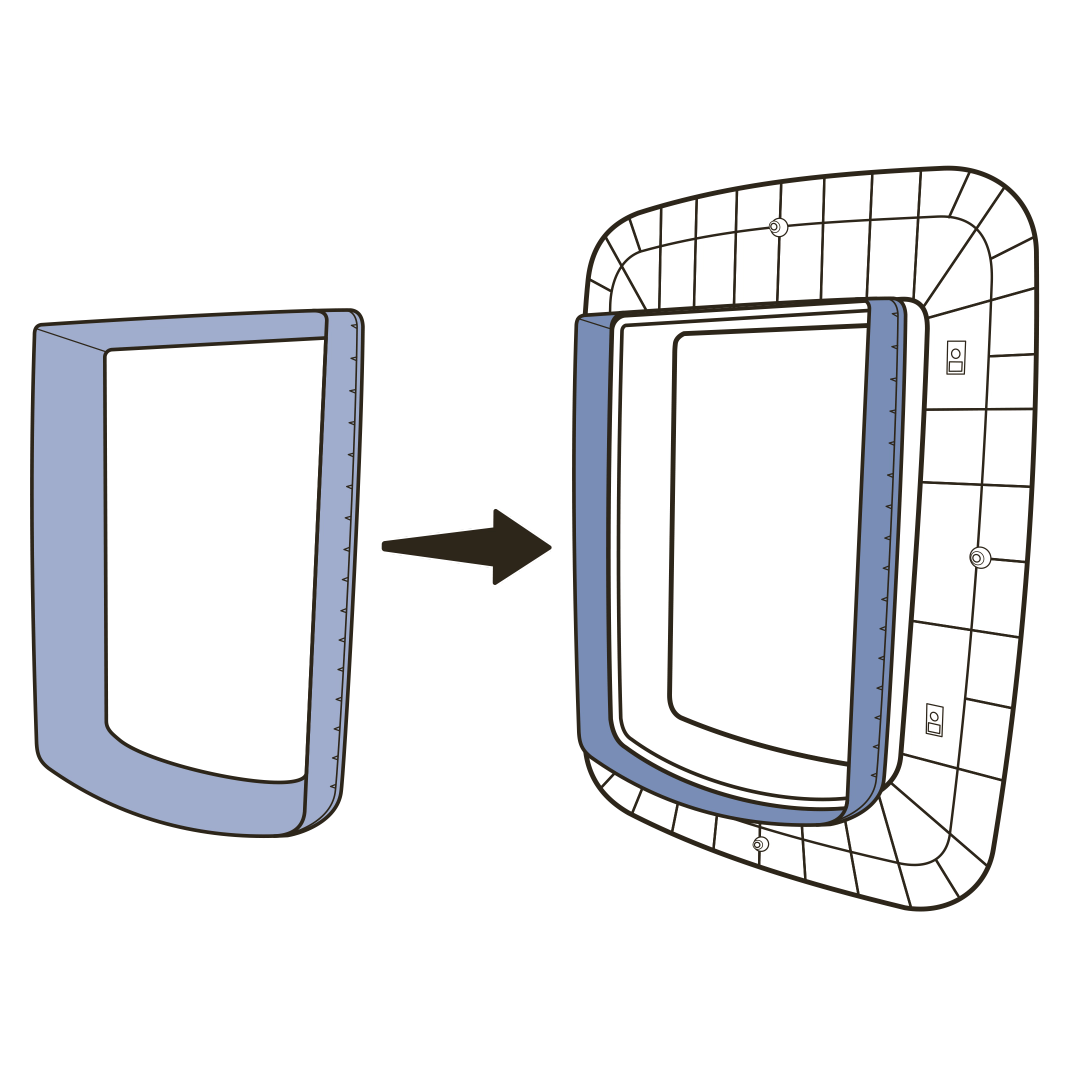
Connect additional tunnel extensions as needed.
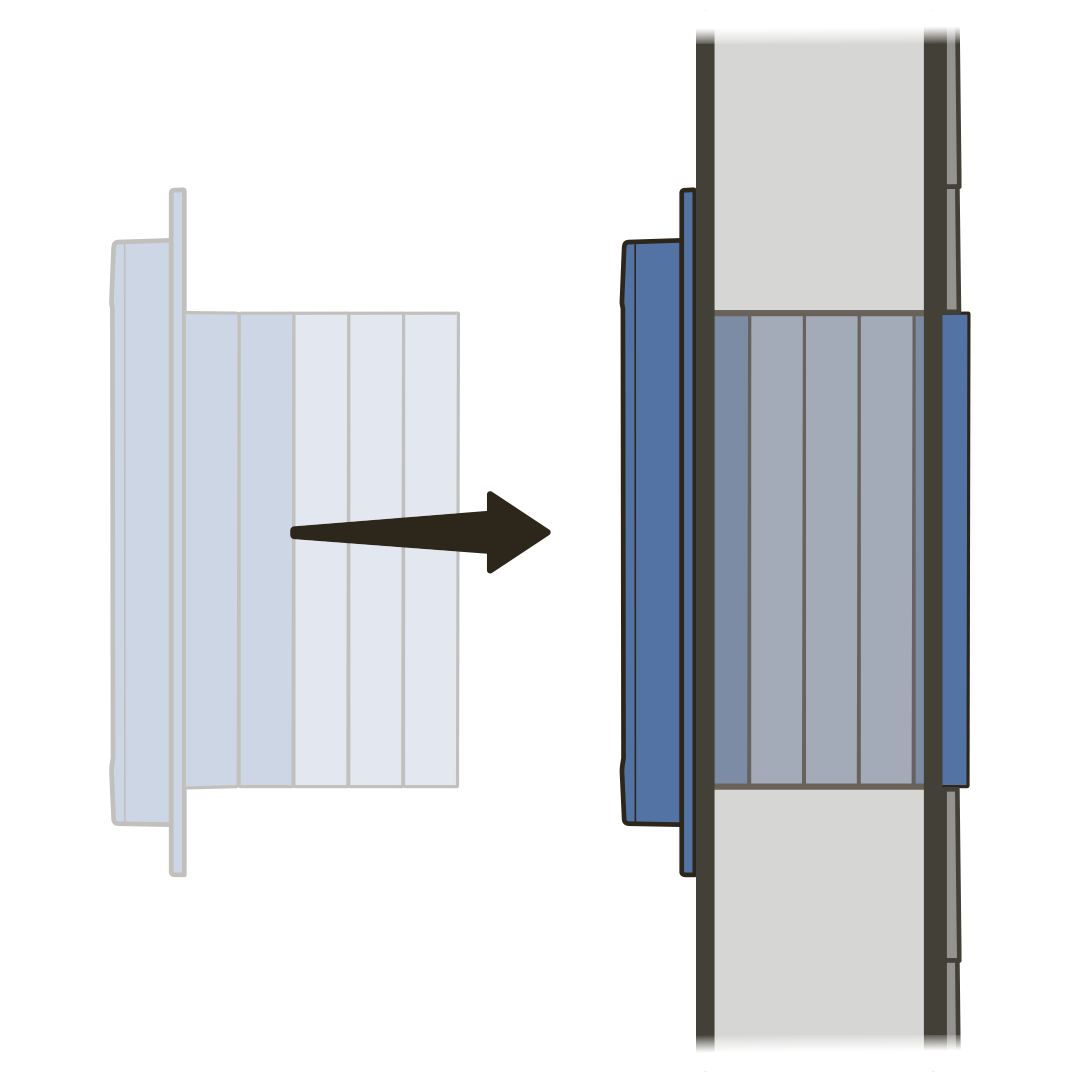
Test fit the interior frame (with installation adaptor and tunnel extensions attached) in the opening. The last tunnel extension needs to protrude from the wall by at least 1 ¼ inches (33 mm).
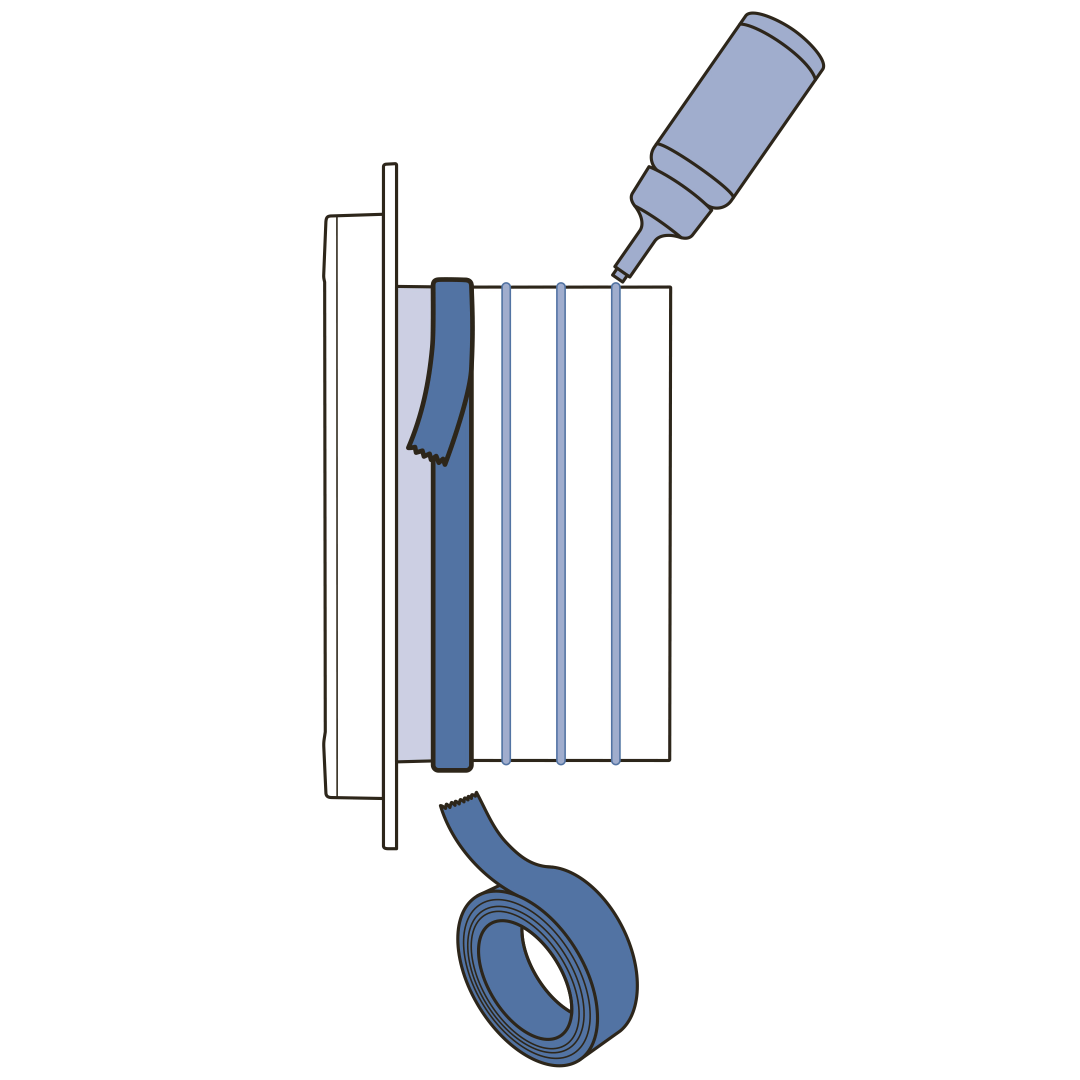
Once you are satisfied that you have connected the appropriate number of tunnel extensions, remove the tunnel extensions from the pet door and use permanent glue to attach the tunnel extensions to one another.
Attach the tunnel extensions to the interior frame using all-weather tape. Do not glue the tunnel extensions to the interior frame.
Install the Interior Frame
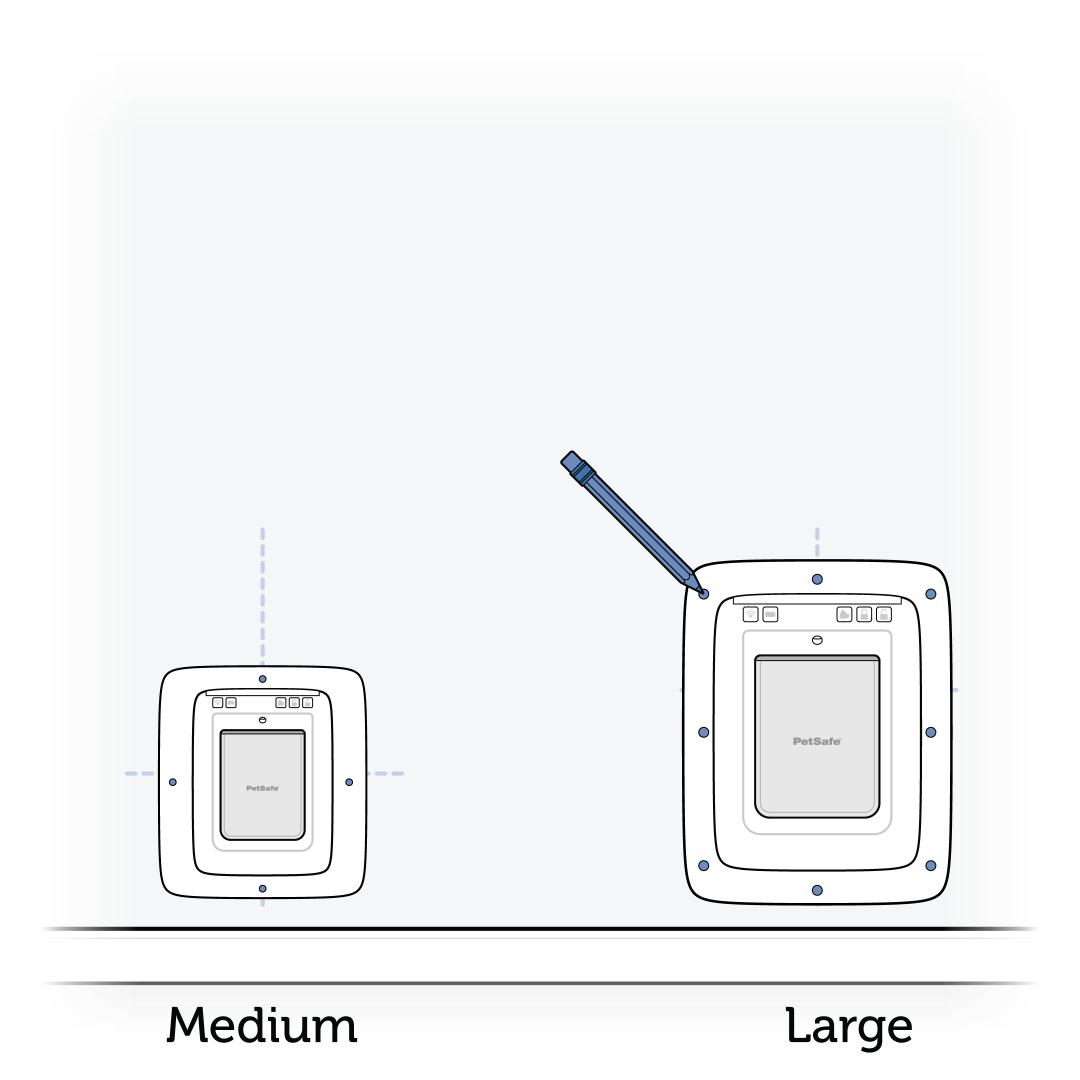
Insert the interior pet door assembly (interior frame with attached installation adaptor and tunnel extensions) into the opening in the interior wall.
Hold the interior pet door assembly in place and use a pencil to mark the location of the holes for the screws.
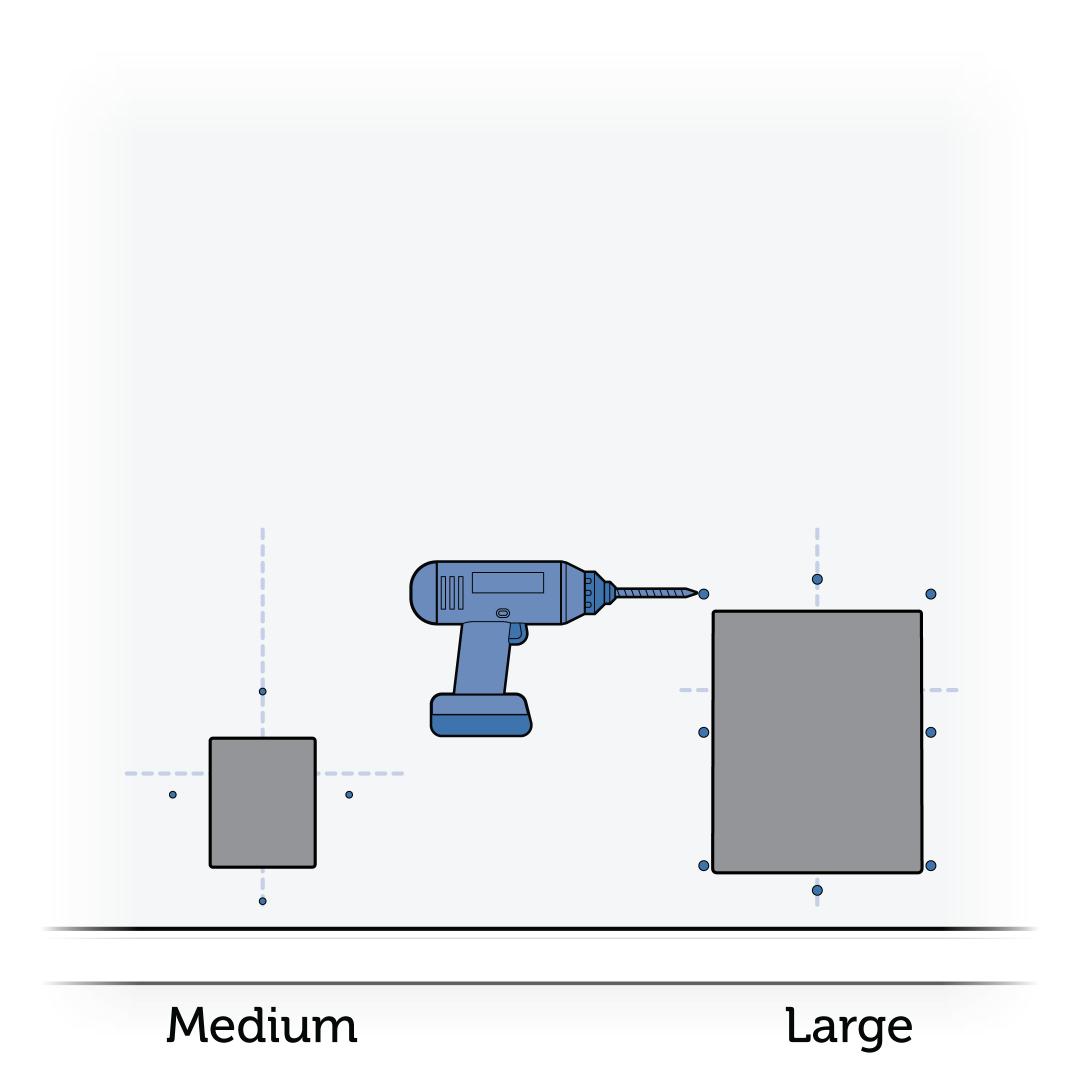
Remove the interior pet door assembly. Drill holes in the marked locations, making sure the holes are the appropriate size for the hardware you selected based on your wall construction.
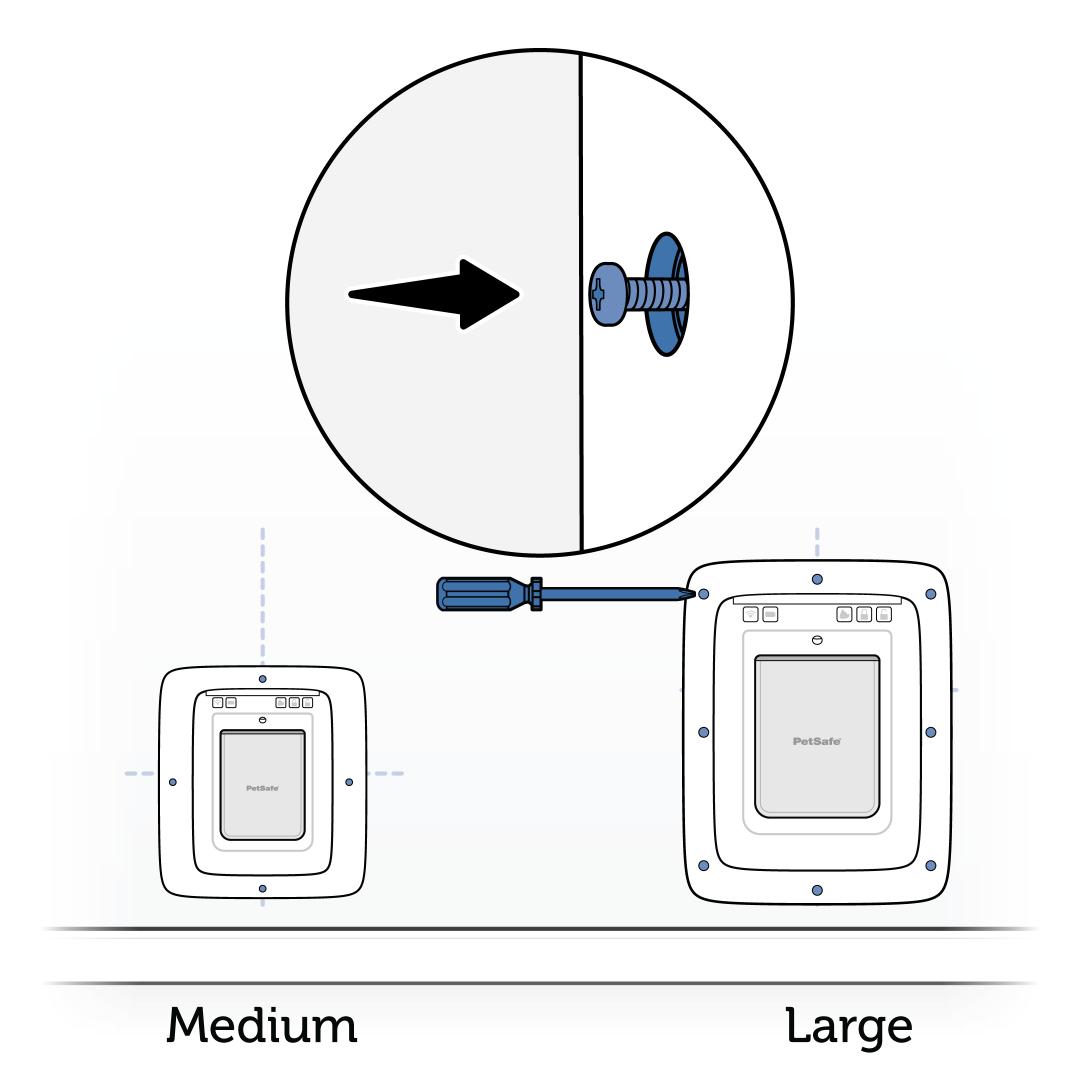
Replace the interior pet door assembly in the opening and secure it to the wall with appropriate hardware for your construction (not included).
Prepare the Exterior Frame
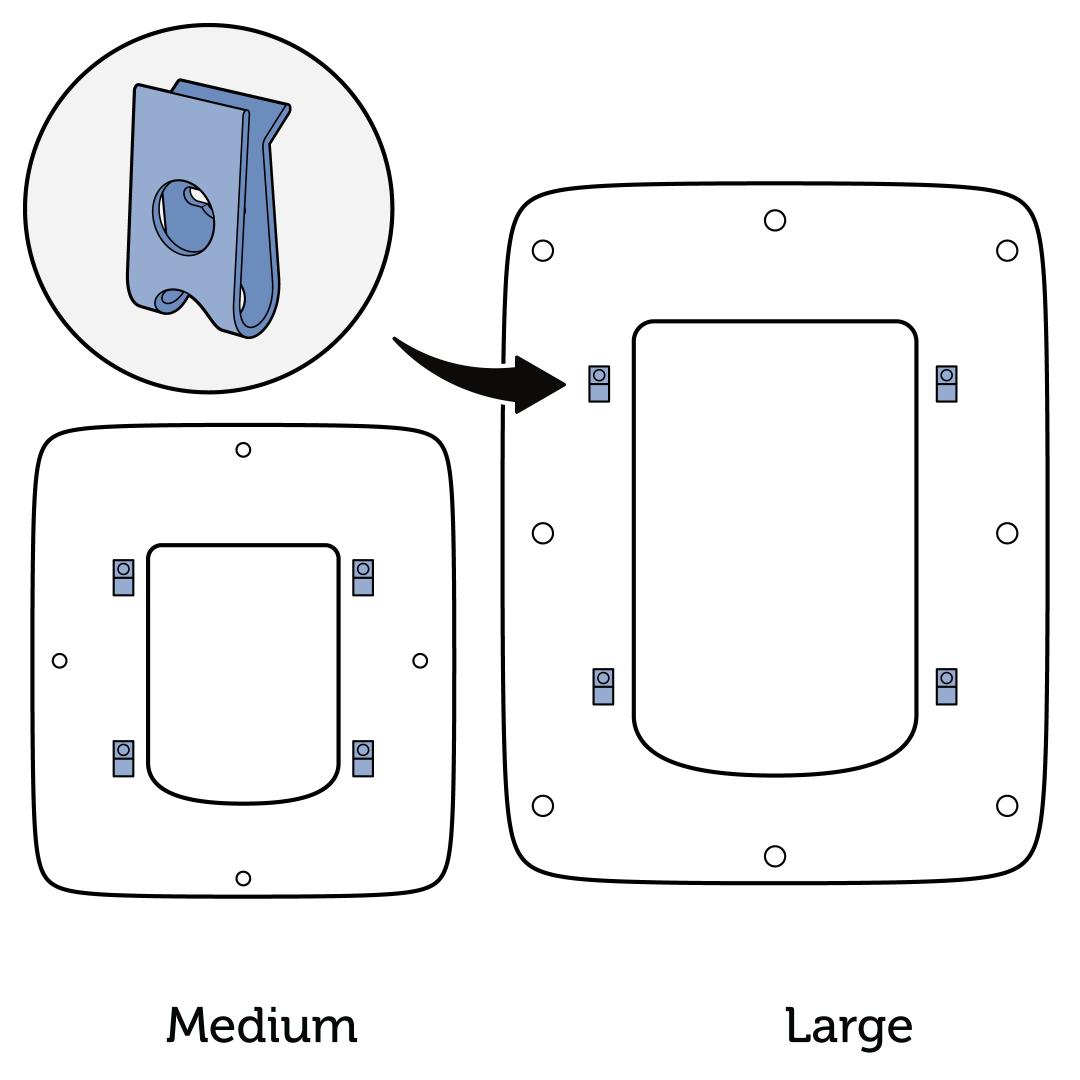
Place the second installation adaptor on a flat surface, smooth side up. Install a spire clip in each of the four rectangular holes in the installation adaptor. The spire clips were provided with the installation adaptors.)
The flat side of the spire clip should face the front, and the round hole in the spire clip should line up with the round hole in the installation adaptor.
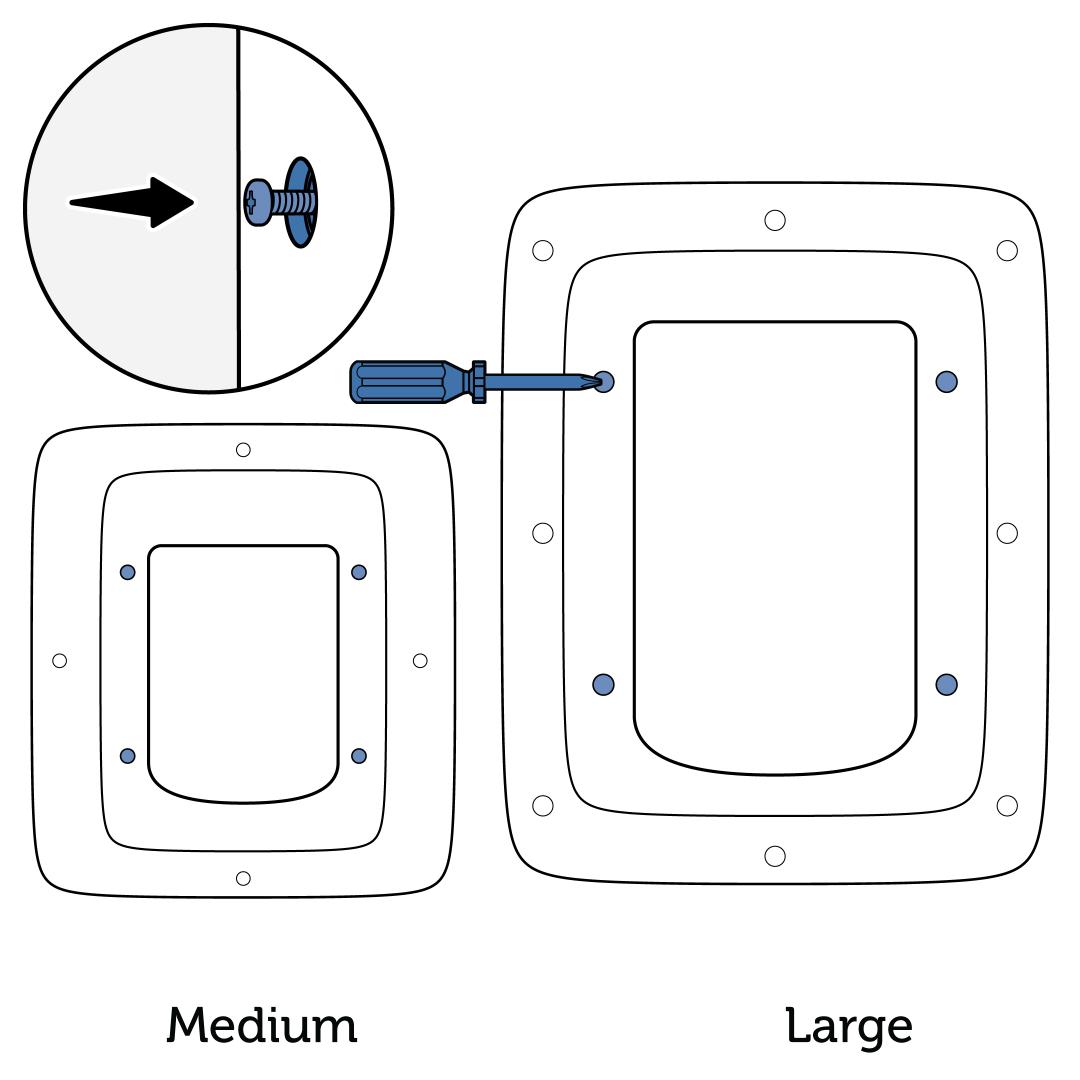
Place the exterior frame of the pet door on top of the installation adaptor. Use four short screws to secure the exterior frame to the installation adaptor.
Install the Exterior Frame
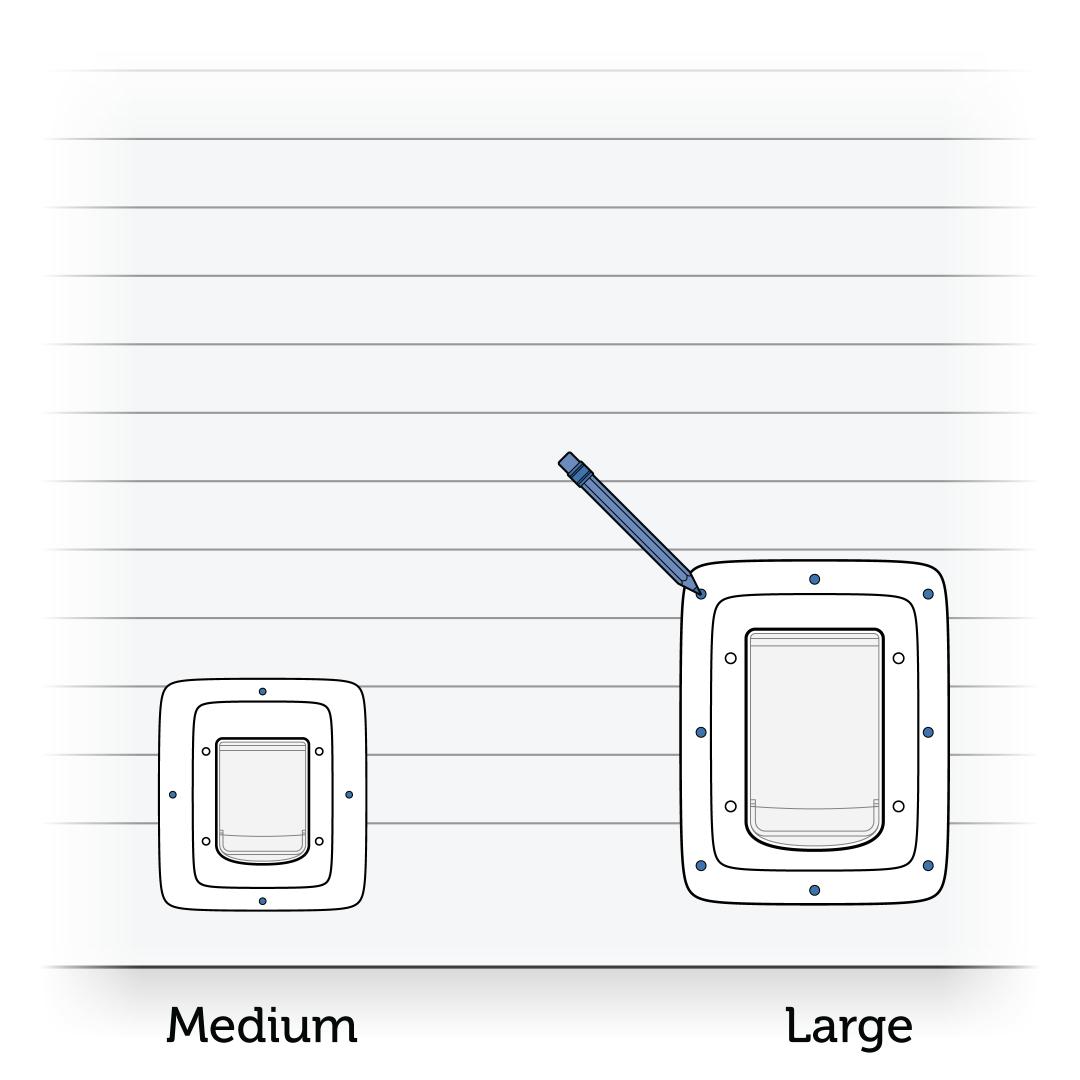
On the exterior side of the wall, line up the exterior pet door assembly (exterior frame with attached installation adaptor) with the tunnel of the pet door.
Hold the exterior pet door assembly in place and use a pencil to mark the location of the holes for the screws.
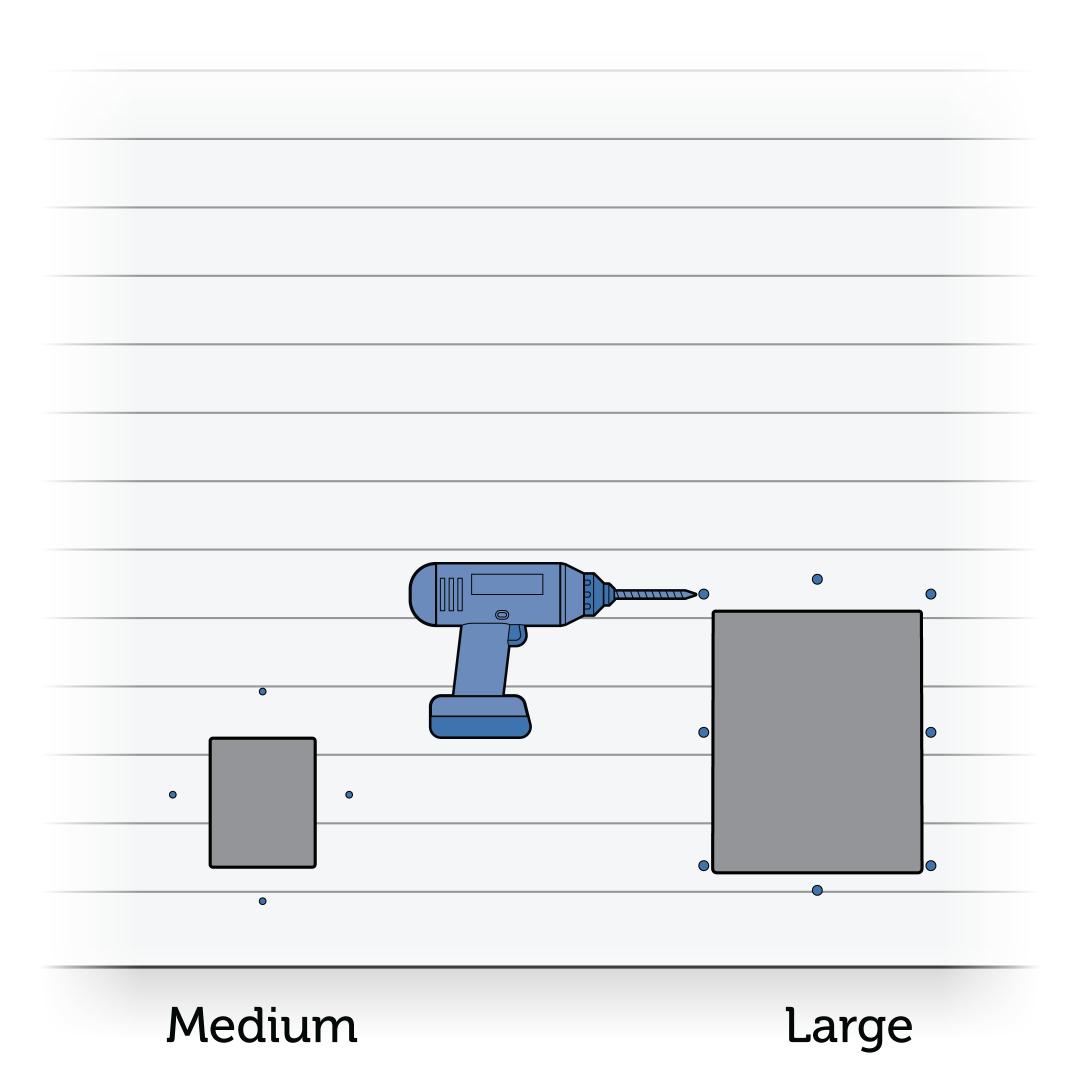
Remove the exterior pet door assembly. Drill holes in the marked locations, making sure the holes are the appropriate size for the hardware you selected based on your wall construction.
If inserting screws through vinyl siding, first drill holes through the siding slightly larger than the screw heads. This will allow the screws to tighten flush with the wood and not buckle the vinyl siding.
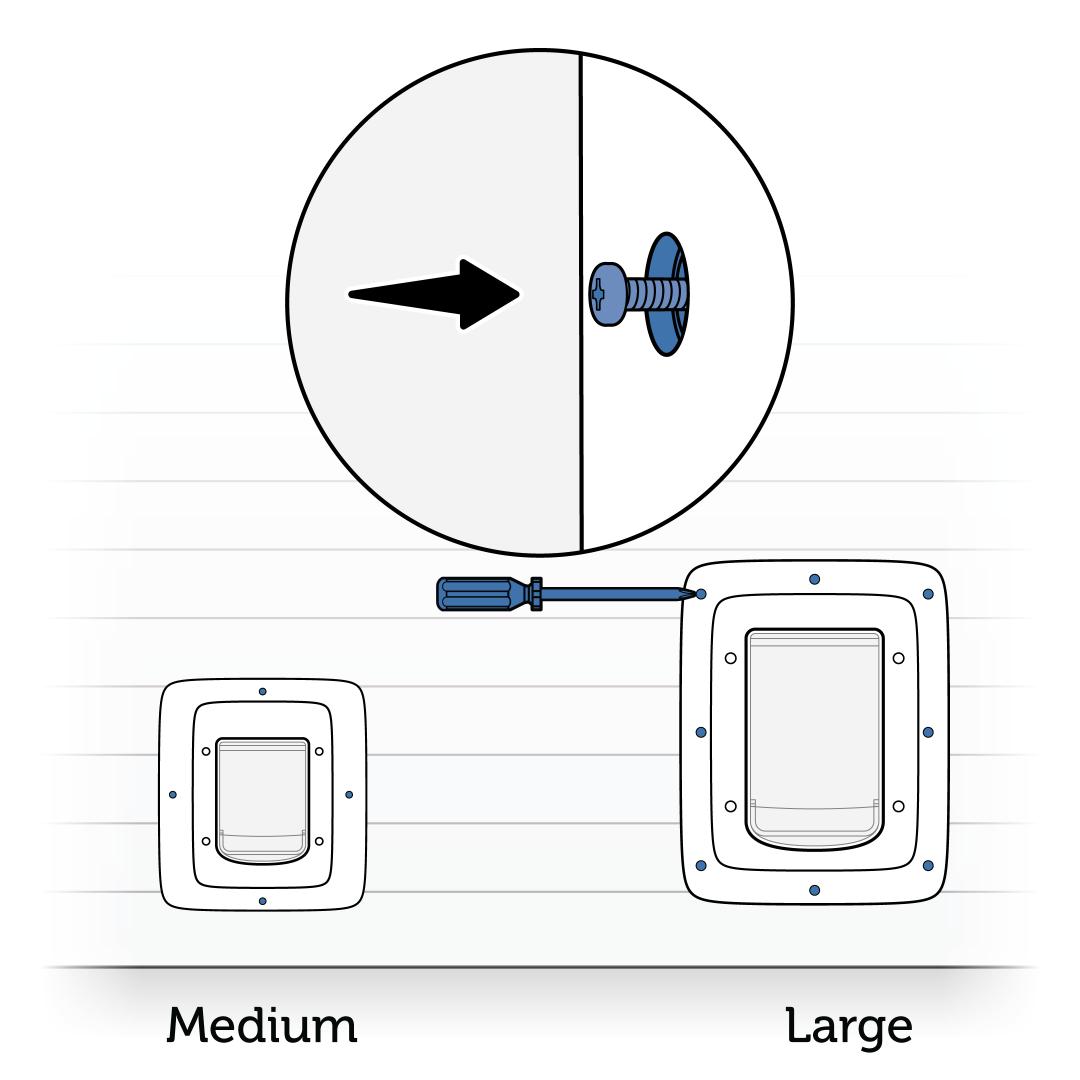
Replace the exterior pet door assembly and secure it to the exterior wall with appropriate hardware for your construction (not included).
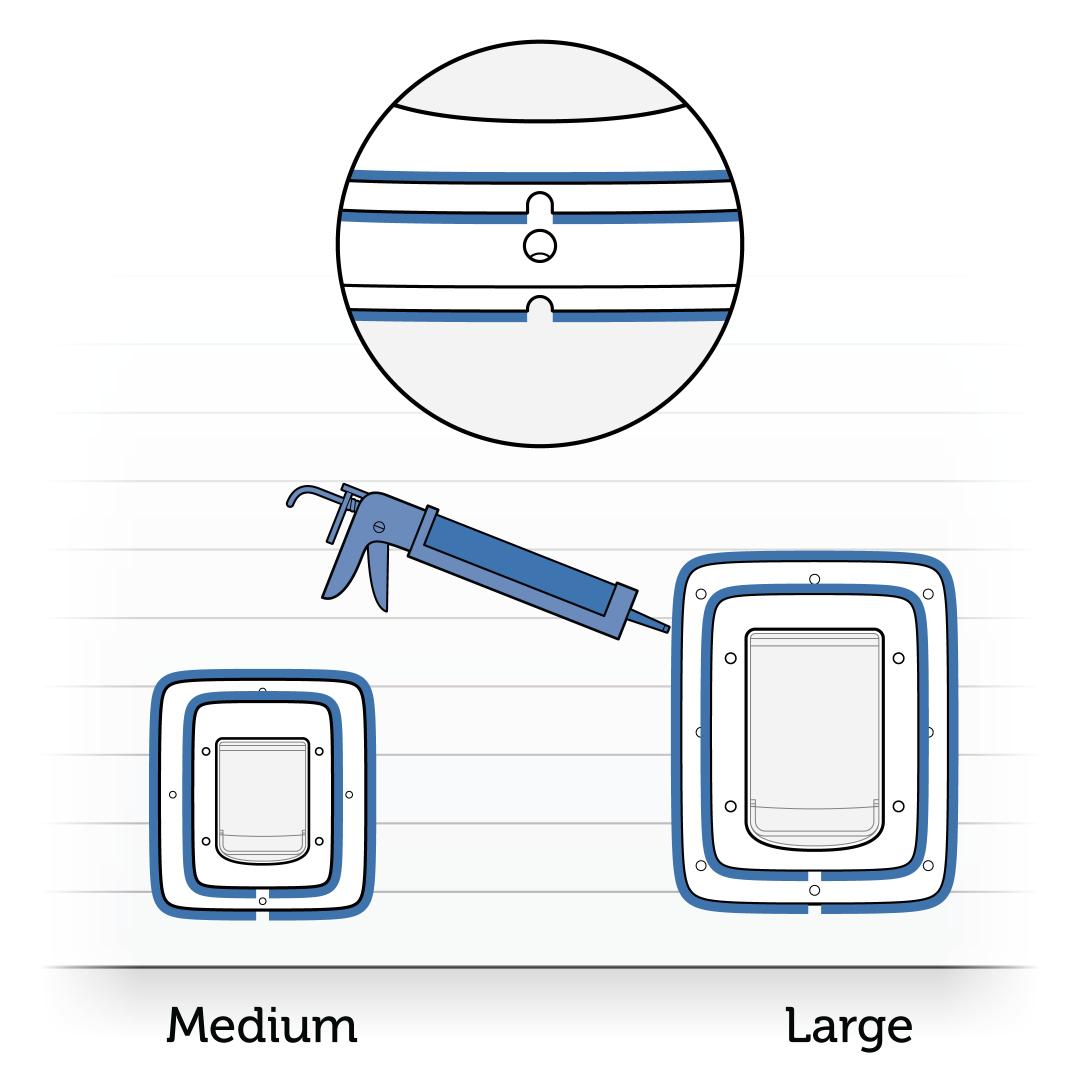
On the exterior side of the wall, apply exterior-grade caulk around the edges of the installation adaptor and the exterior frame, making sure to leave the weep holes open.
If there are any gaps larger than ¼ inch (6 mm), you will need to fill them with foam backer rod or other appropriate material before applying caulk.
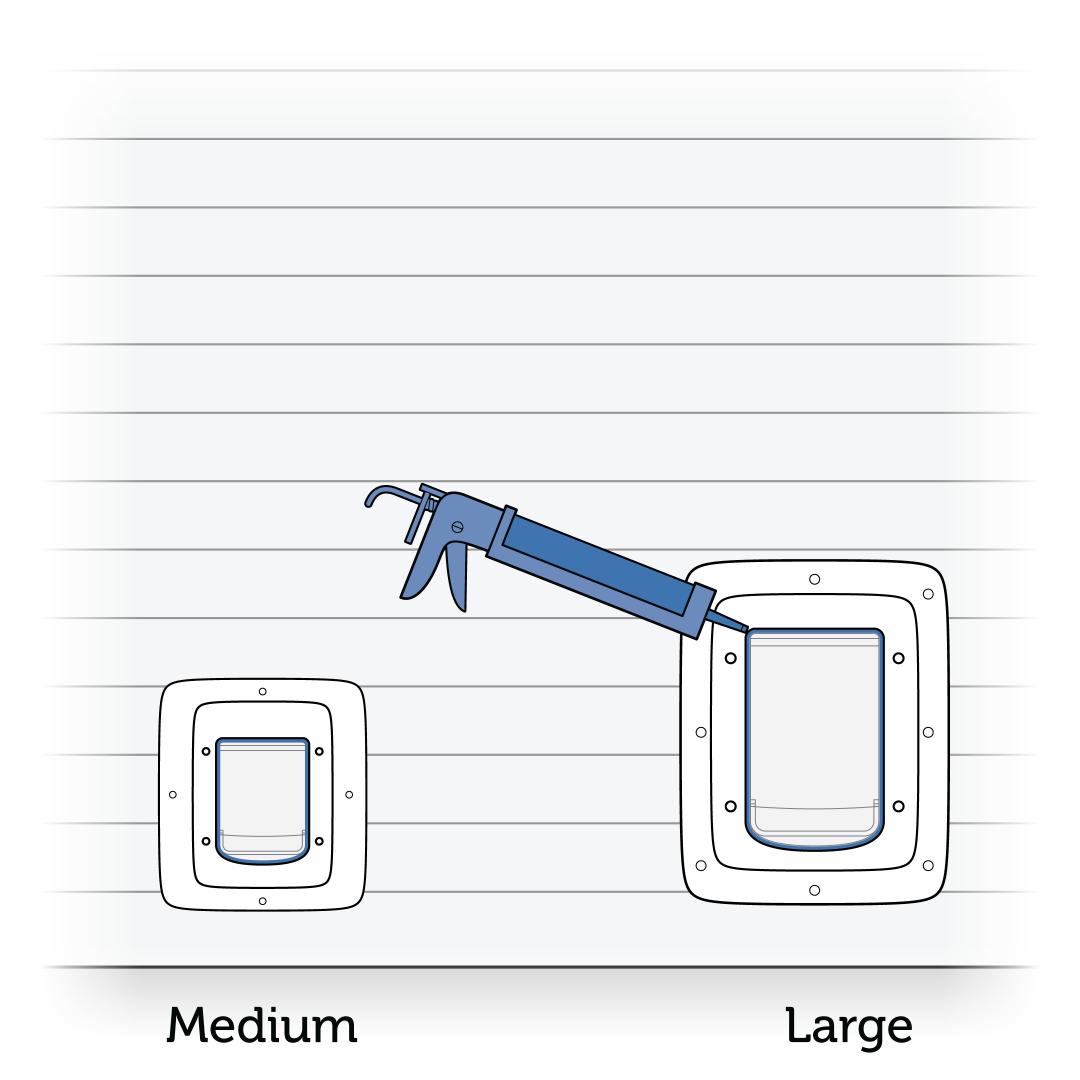
Apply exterior-grade caulk around the edge of the pet door tunnel where it meets the exterior frame.
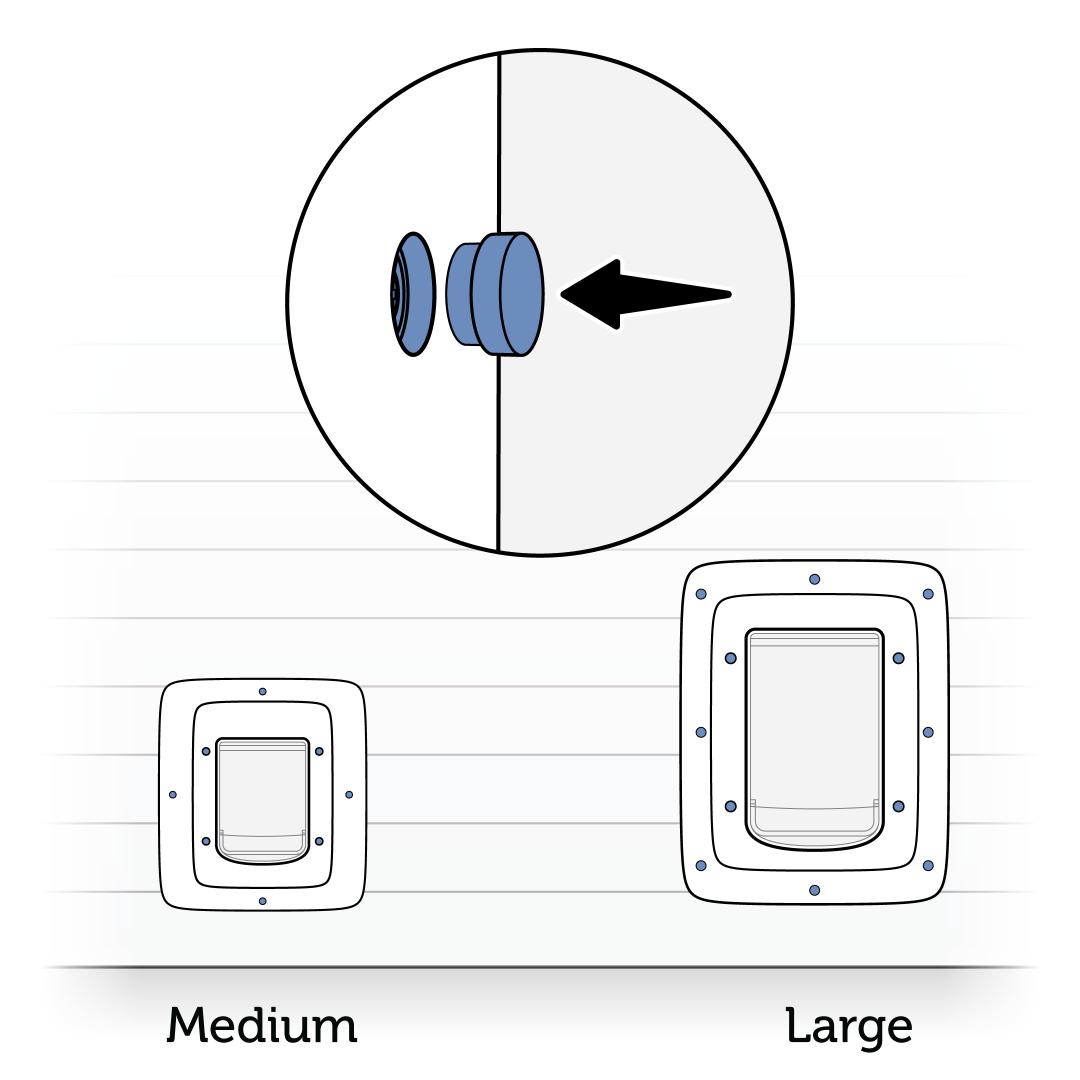
Insert blanking plugs into the holes in the exterior frame.
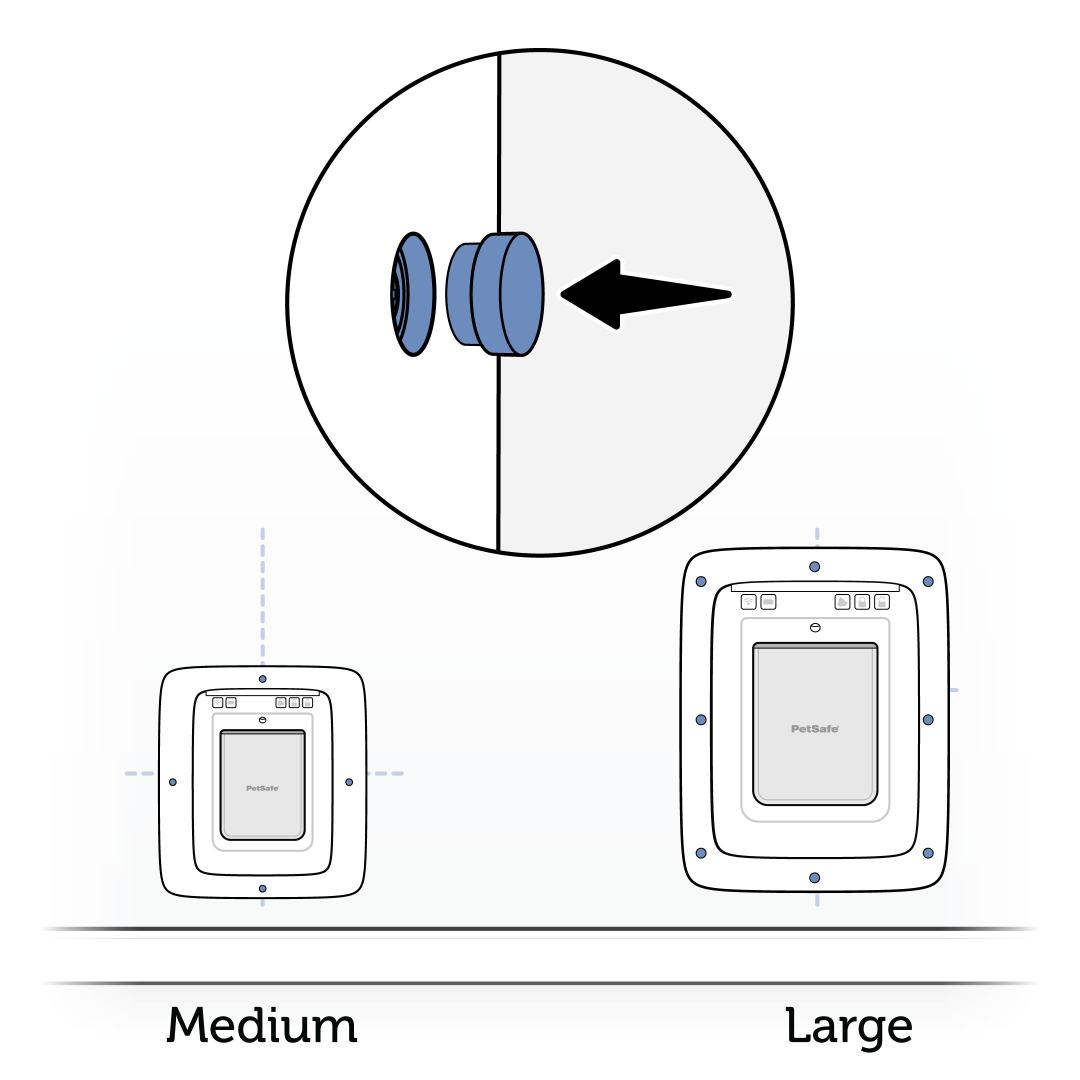
On the interior side of the wall, insert blanking plugs into the holes in the installation adaptor.
Reinstall the batteries in the pet door. For more information, visit How To Replace the Batteries in My PetSafe® SmartDoor™ Connected Pet Door.
Now that your pet door is installed, it is time to train your pet to use it! Visit our article How To Train My Pet To Use My PetSafe® SmartDoor™ Connected Pet Door for more information.