How To Install the Medium SmartDoor™ Connected Pet Door in a Metal Door with Installation Adaptors
Table of Contents
Before installing the SmartDoor™, make sure:
- You have completed the instructions in How to Prepare for the SmartDoor™ Connected Pet Door Installation.
- You have all the tools and materials listed in Tools and Materials Needed for SmartDoor™ Connected Pet Door Installation.
Important: Remove the batteries from the pet door prior to installation.
Mark the Pet Door Location
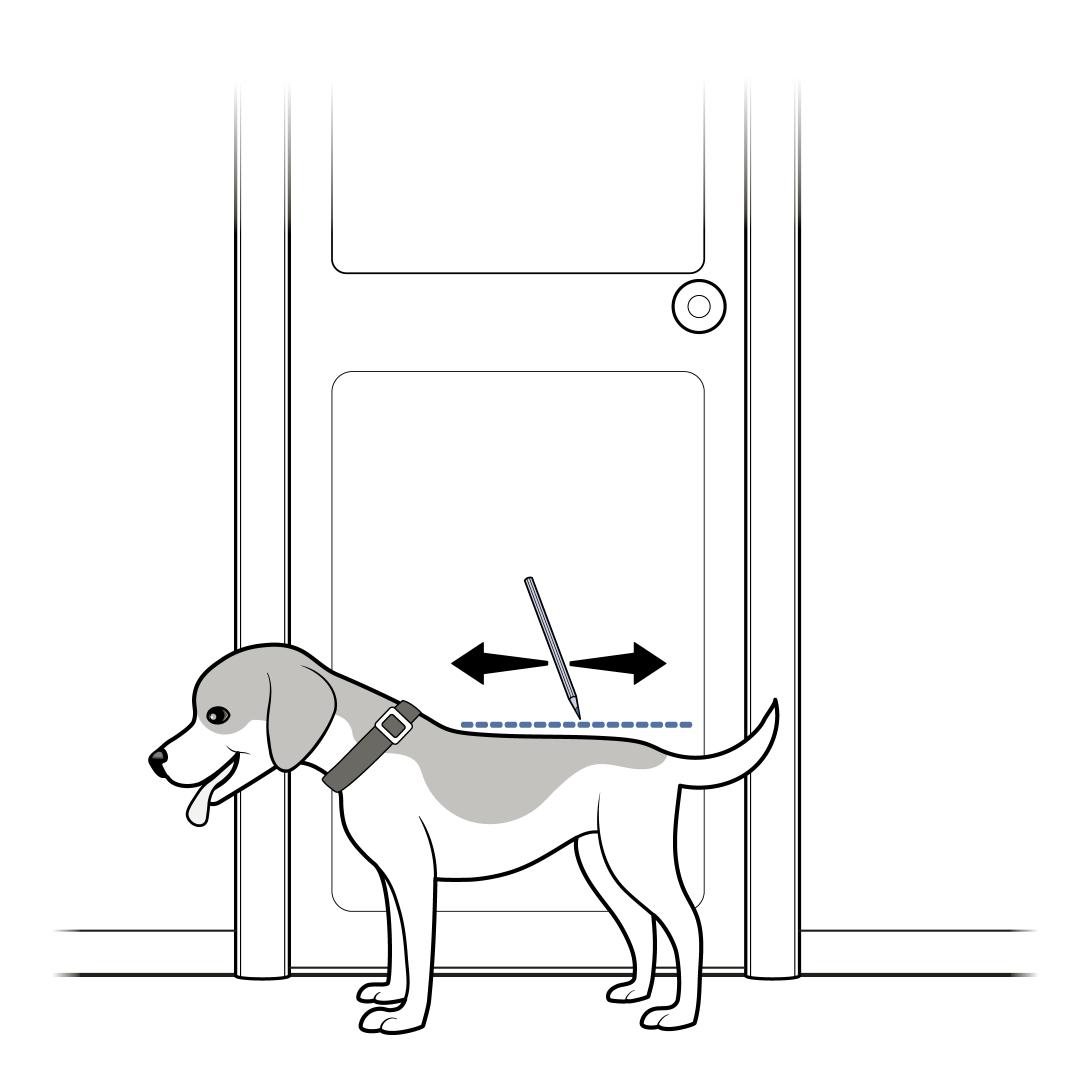
Measure your pet’s shoulder height when standing. Make a note of this measurement.
If you have more than one pet, measure the tallest one.
Make a pencil mark at your pet’s shoulder height on the interior side of the door. Using a level, extend the line several inches in both directions.
This will help you place the cutting template correctly. The pet door must be installed level to work properly.
Make a second pencil mark on your door, 3 inches above the floor.
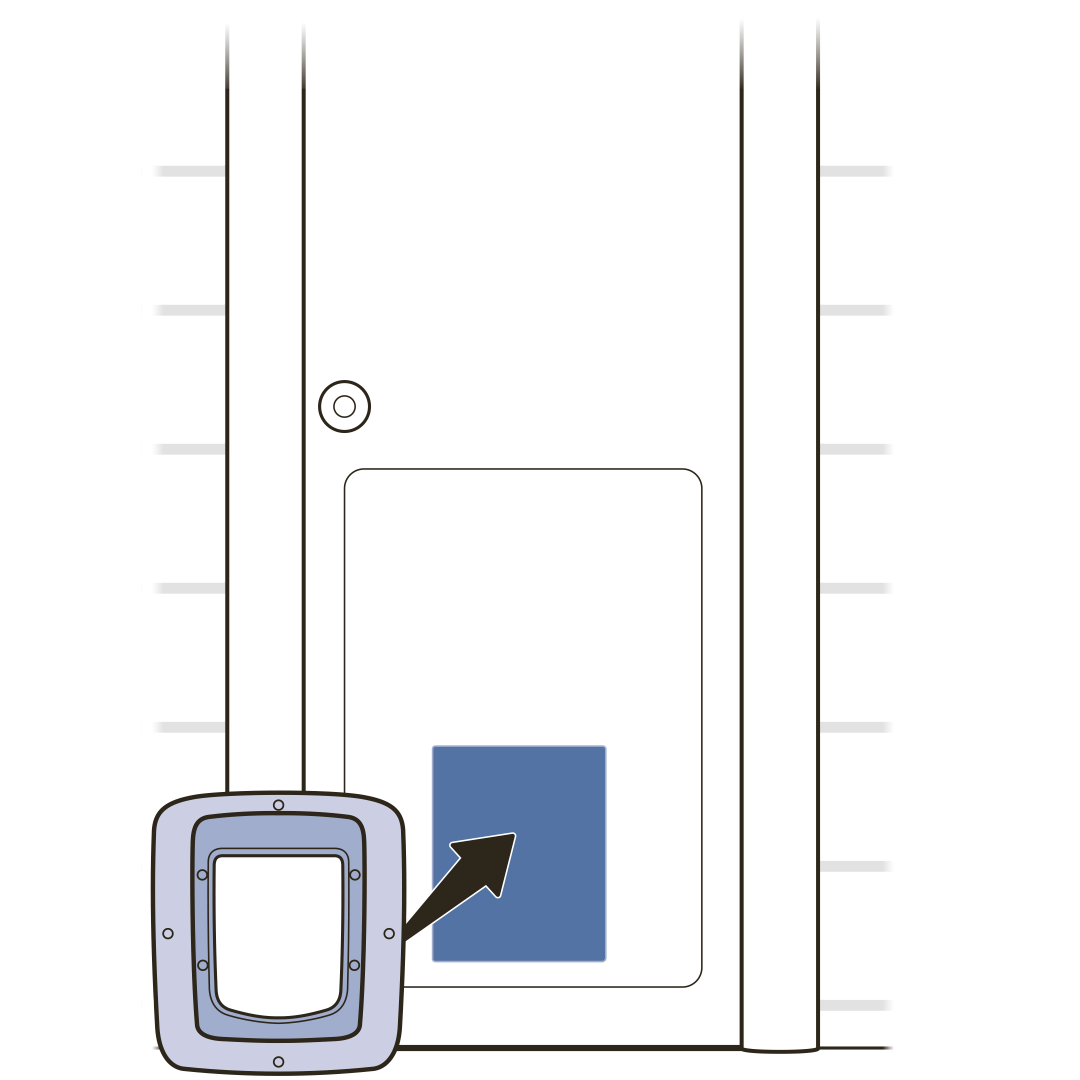
Draw a vertical line where you want the center of the pet door to be. Using a level, extend the line several inches in both directions.
If your door has inset panels, consider how best to position the pet door to avoid gaps between the pet door frames and the door.
Position the Cutting Template
Cut out the cutting template for installation in metal doors with adaptors.
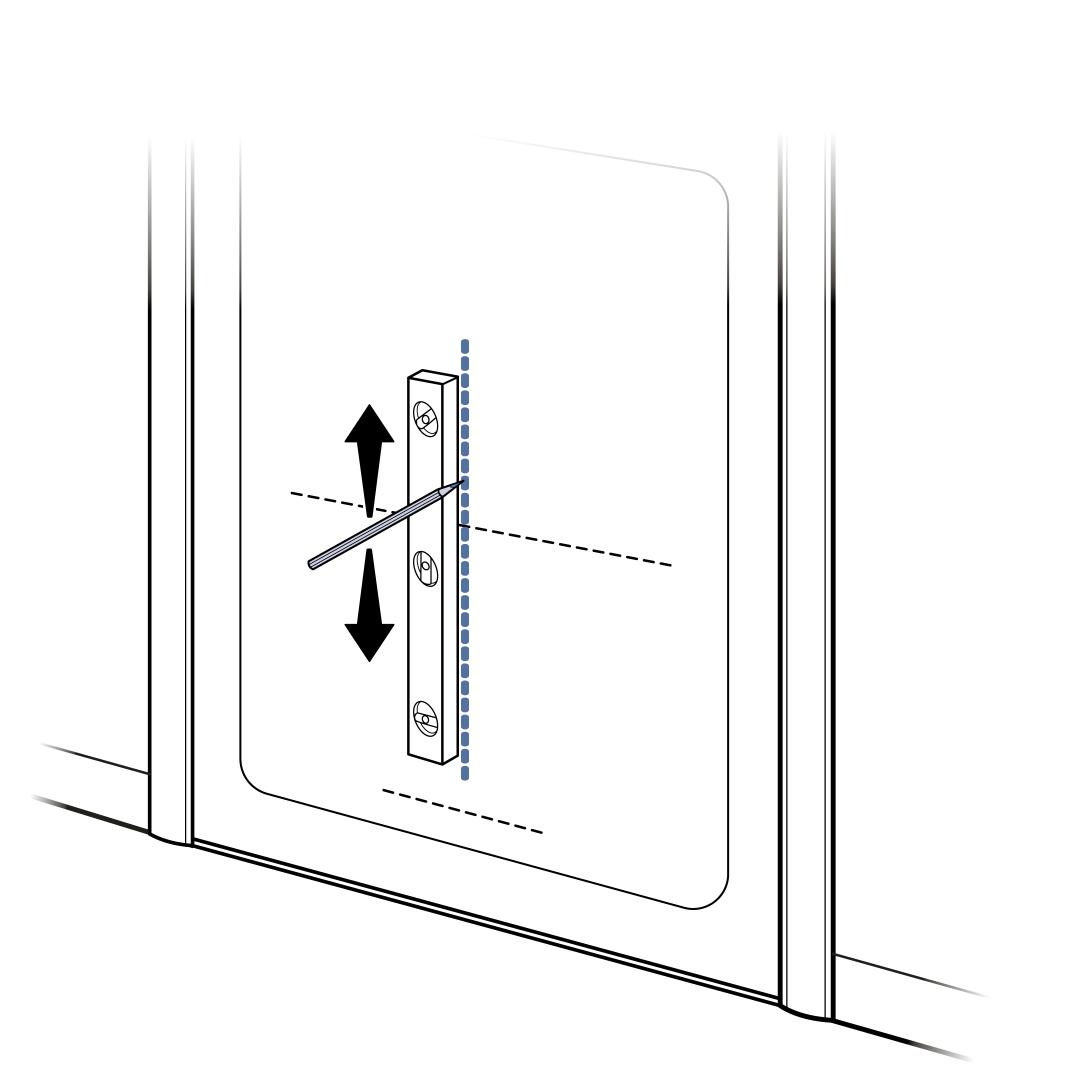
Hold the cutting template up to the interior side of your door, matching the shoulder and center lines on the cutting template with the shoulder and center lines you drew on the door.
Note where the bottom of the cutting template is and make any necessary adjustments:
- The bottom of the cutting template must be at or above the line you drew 3 inches above the floor.
- If you have both large and small pets, make sure your shorter pets will be able to step up over the bottom edge of the pet door.
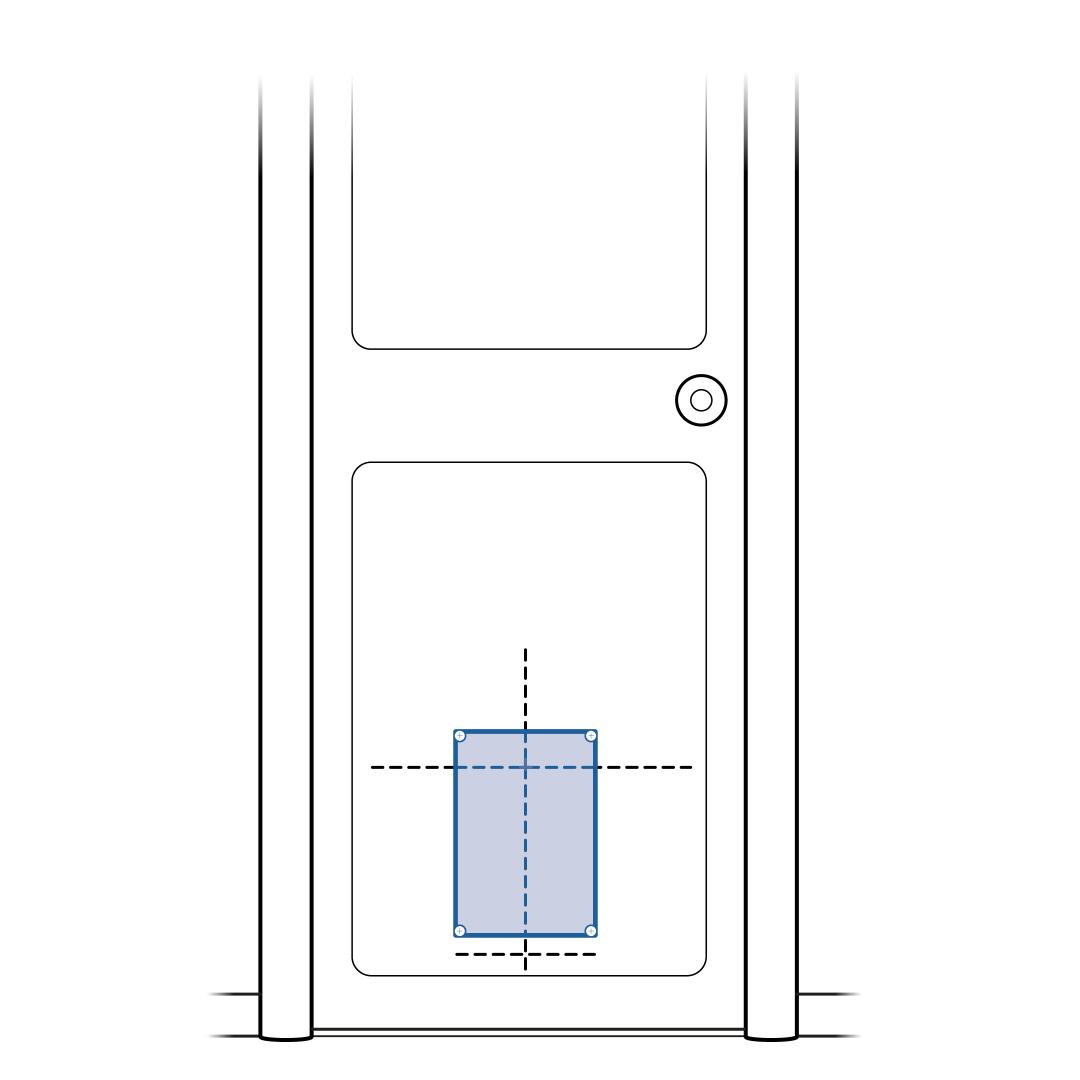
Important: Some doors have internal support frames along the perimeter of the door. To maintain the structural integrity of your door, make sure the cutting template is at least 3 inches from the edge of the door on all sides.
If there is an immediate step down outside the door, you may need to provide an outdoor step for your pets to ensure they can use the pet door easily, both coming and going.
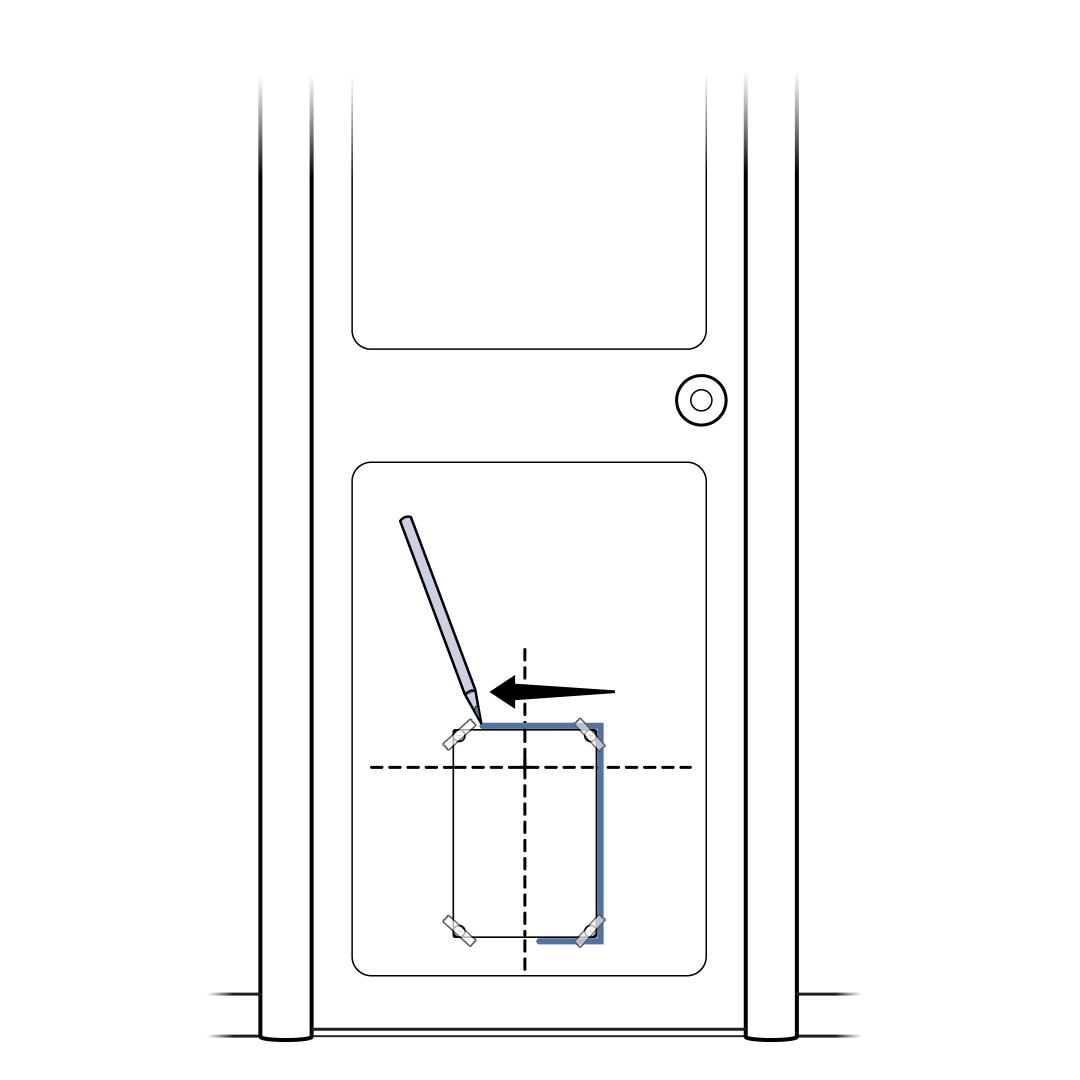
Once you are satisfied with the placement of the cutting template, tape it to the door.
Use a pencil to trace the outside edge of the cutting template. Remember to connect the corners.
Make sure the cutting line is clearly marked on the door, and then carefully remove the cutting template and excess tape.
Cut the Opening
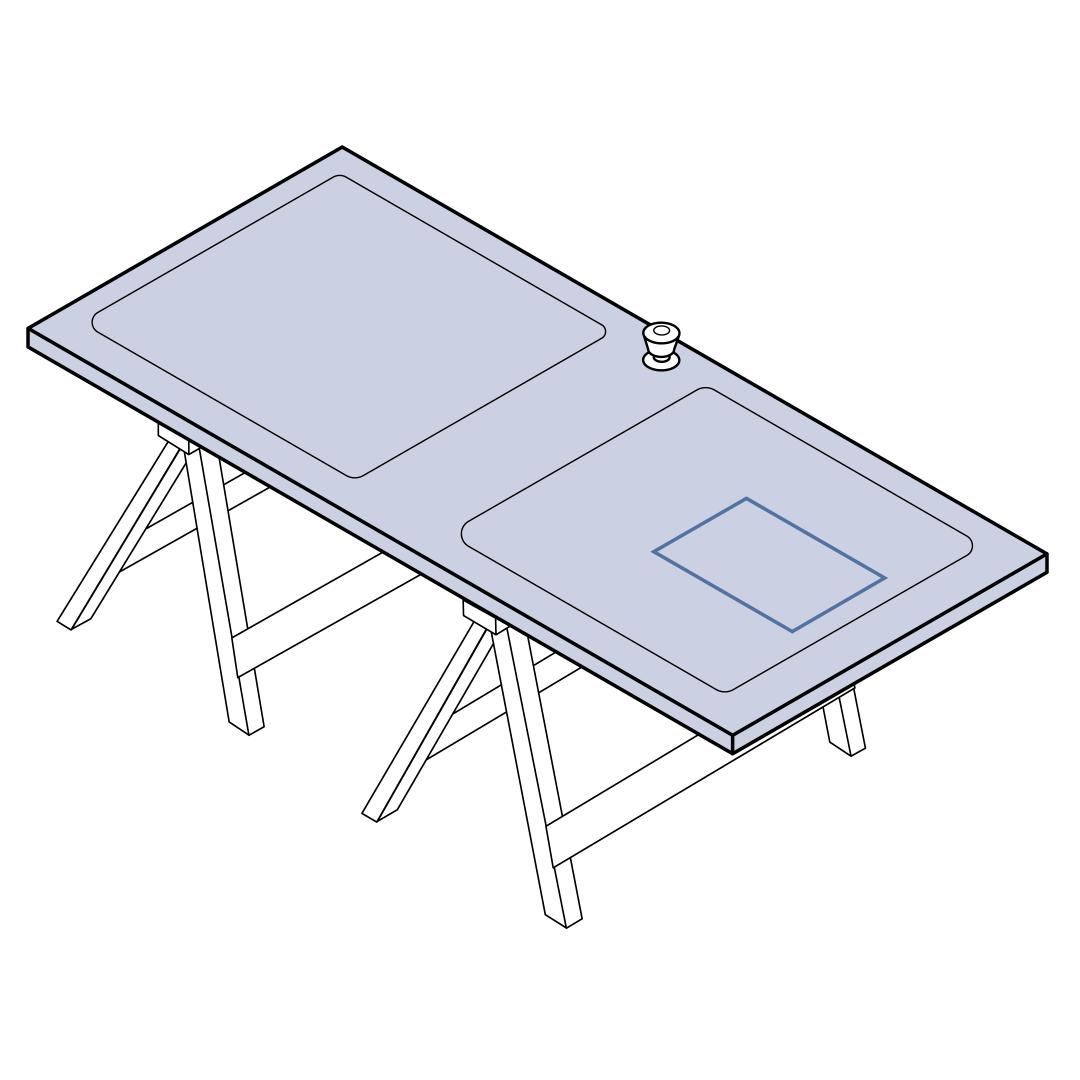
If desired, remove your door from its hinges and place it on a raised, level surface, such as two sawhorses. The interior side of the door should face up.
This is optional but removing the door from its hinges does make it a little easier to cut the opening for the pet door.
Important: Make sure there is nothing behind or underneath the door where you will cut the opening.
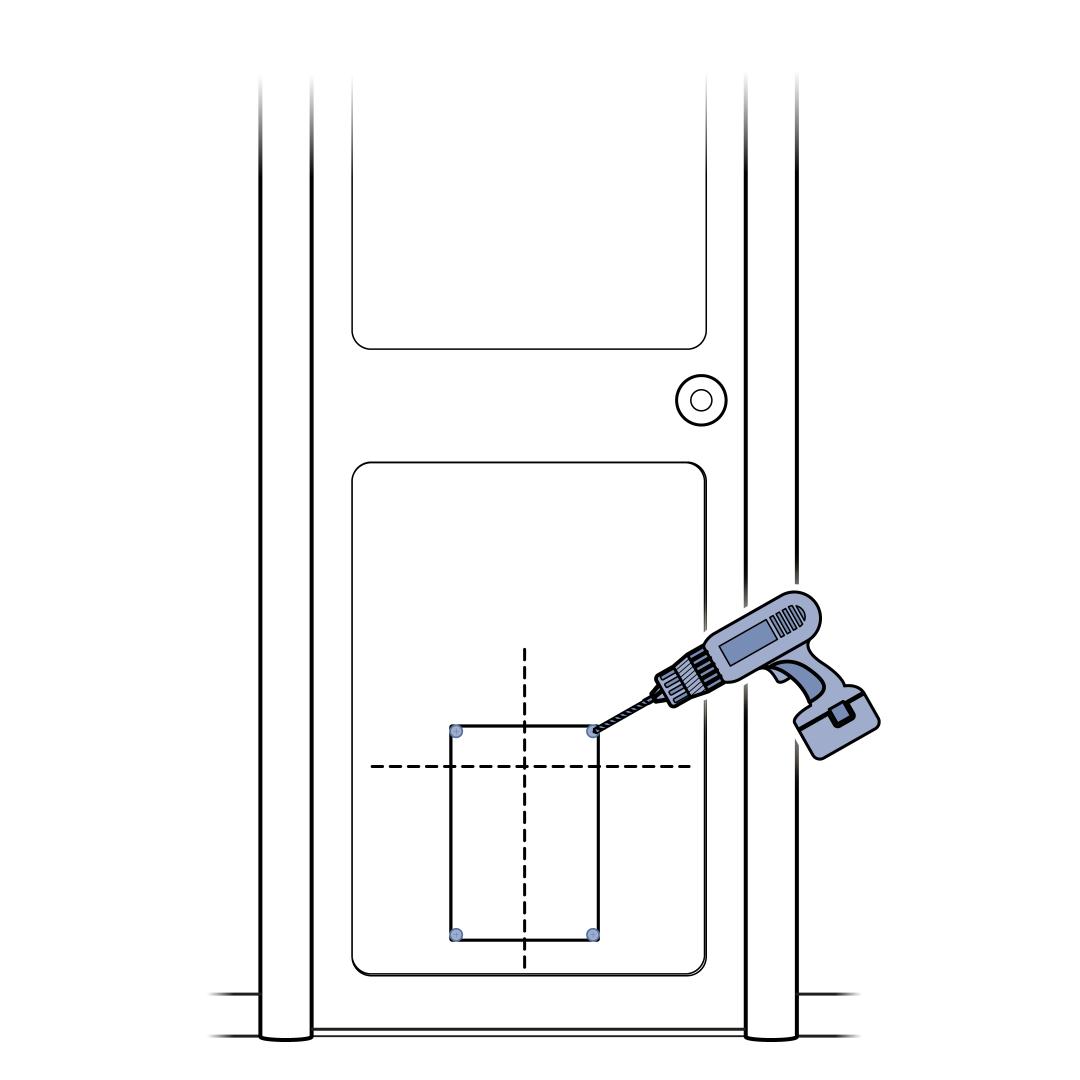
Drill ½-inch (12 mm) holes through the door, just inside the corners of the cutting line. Hold the drill steady, straight and level.
These will be the pilot holes for the jigsaw blade.
Using a jigsaw, cut between the holes you just drilled, along the cutting line. Use both hands to hold the jigsaw firmly against the door.
Make sure your jigsaw blade is appropriate for the door material you are cutting through (wood, PVC, etc.) and at least 1 inch longer than the thickness of the door.
If you removed your door from its hinges, rehang it now.
Install the Pet Door
Measure the thickness of your door and determine which screws you will use for installation. If your door is:
- Less than 1-inch (25 mm) thick, use the 3⁵/₃₂ inch (80 mm) screws. These screws were provided with the SmartDoor™.
- Between 1-inch (25 mm) and 2¼ inches (57 mm) thick, use the 3⁵∕₁₆ inch (100 mm) screws. These screws were provided with the installation adaptors.
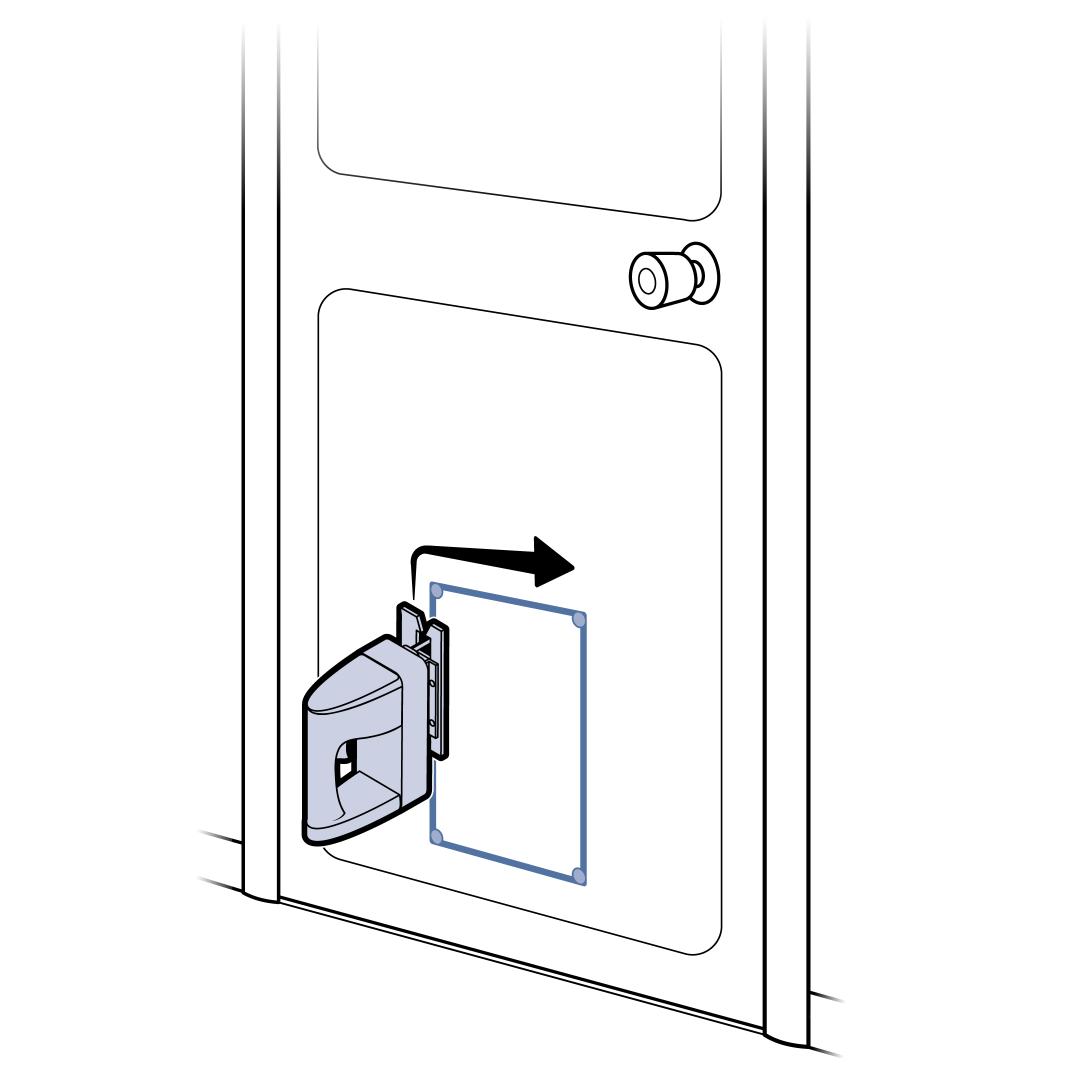
Place the foam spacer (provided with the installation adaptors) at the bottom of the cut opening, in the middle.
Insert the tunnel of the interior frame through the middle of the installation adaptor. The smooth side of the installation adaptor should face the front.
Insert the interior frame, with the installation adaptor, into the opening on the interior side of the door, on top of the spacer.
Make sure the interior frame is horizontally centered and level in the opening.
Have a helper hold the interior frame and installation adaptor for you, or tape them in place while you go to the exterior side of the door to fit the exterior frame.
On the exterior side of the door, line up the second installation adaptor and exterior frame with the pet door tunnel.
Holding the pet door frames and installation adaptors in place, insert the selected screws through the holes in the exterior frame, through the installation adaptors and into the holes on the back of the interior frame. The screws will pass through the cutout opening.
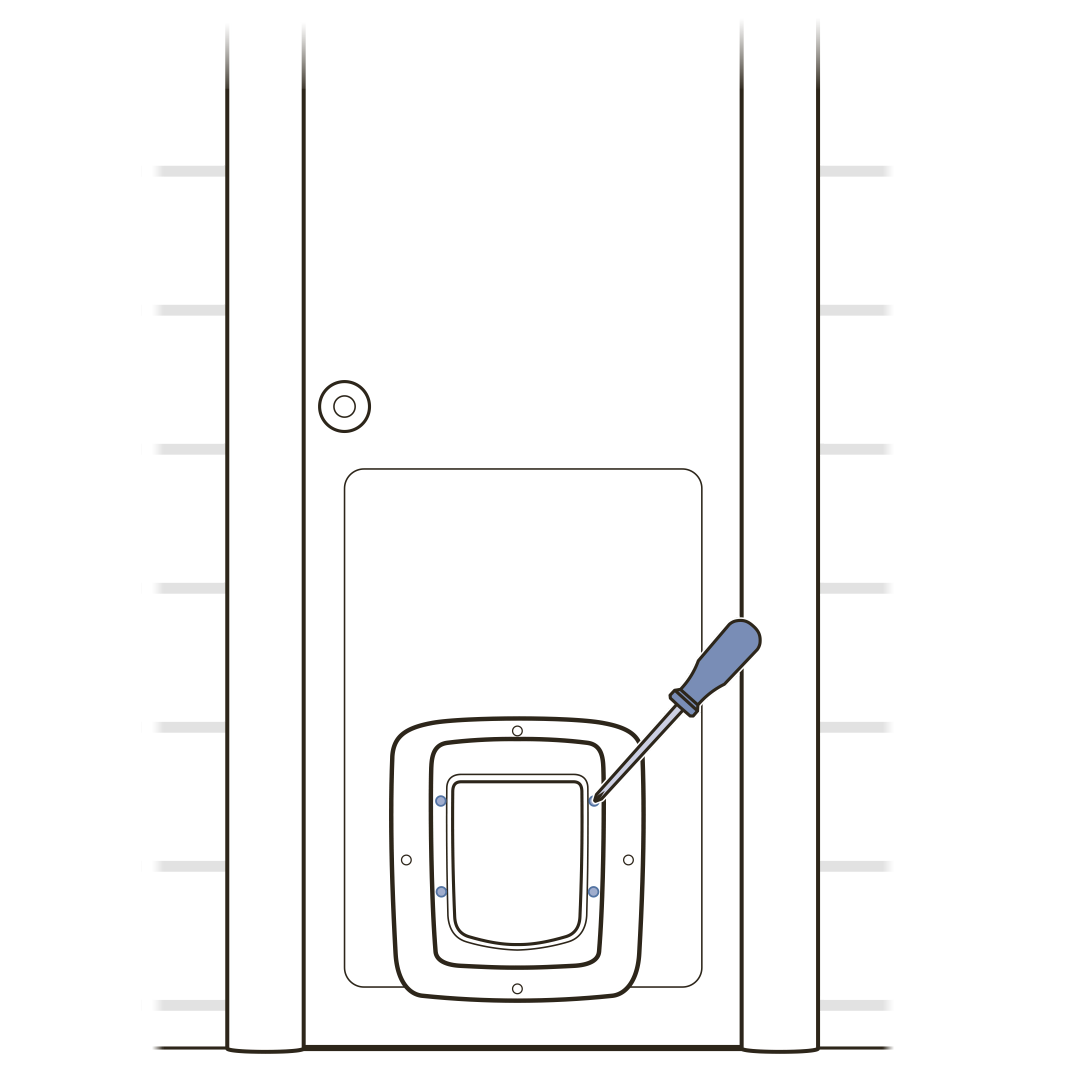
Using a manual #2 Phillips screwdriver, tighten the screws just until the frames are attached.
Before tightening the screws fully, check the position of the pet door and make any necessary adjustments. The pet door should be resting on the spacer, centered horizontally in the opening and level.
Once you are satisfied that the pet door is positioned correctly, finish tightening the screws. Do not overtighten.
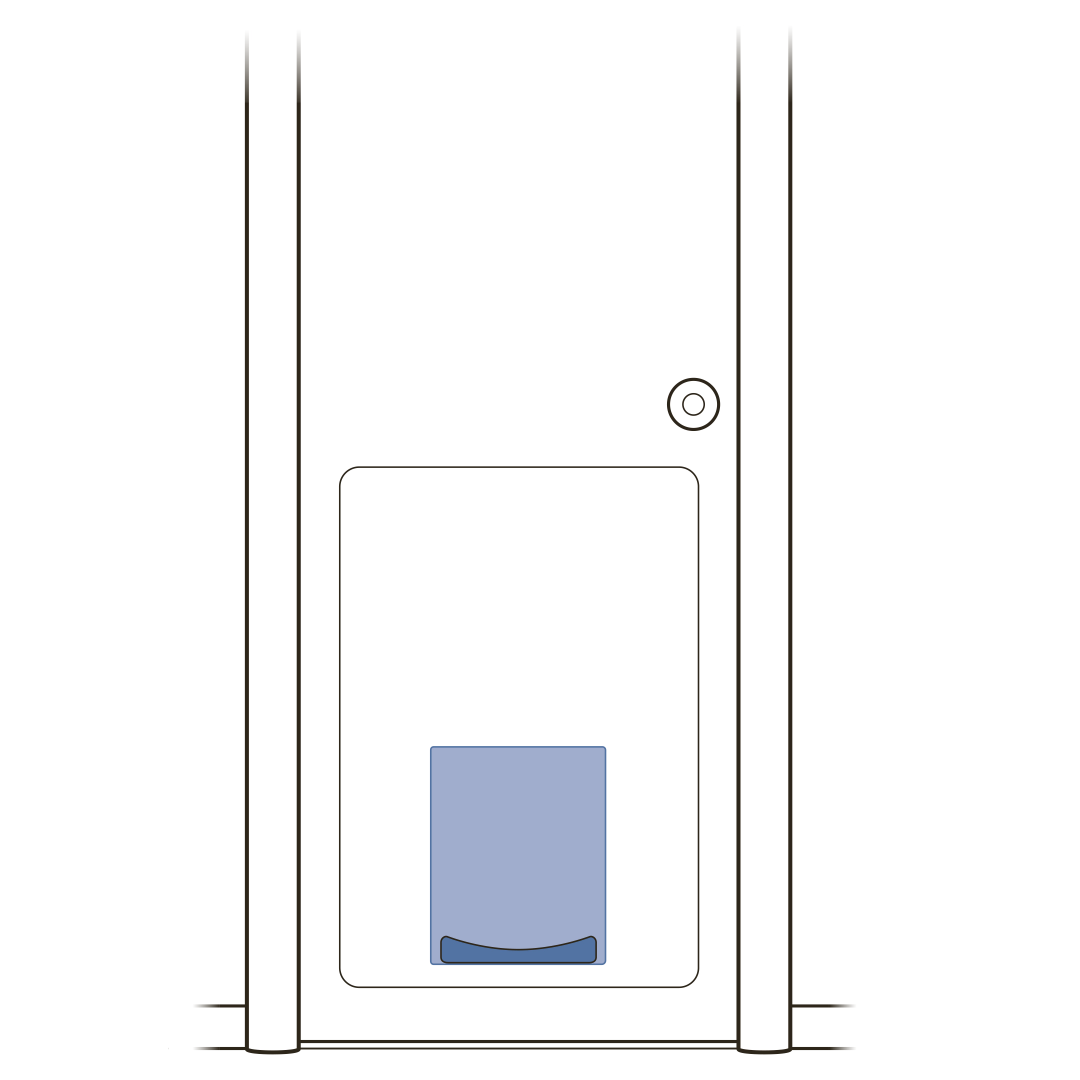
On the interior side of the door, insert blanking plugs into the holes in the installation adaptor.
On the exterior side of the door, insert blanking plugs into the holes in the exterior frame and the installation adaptor.
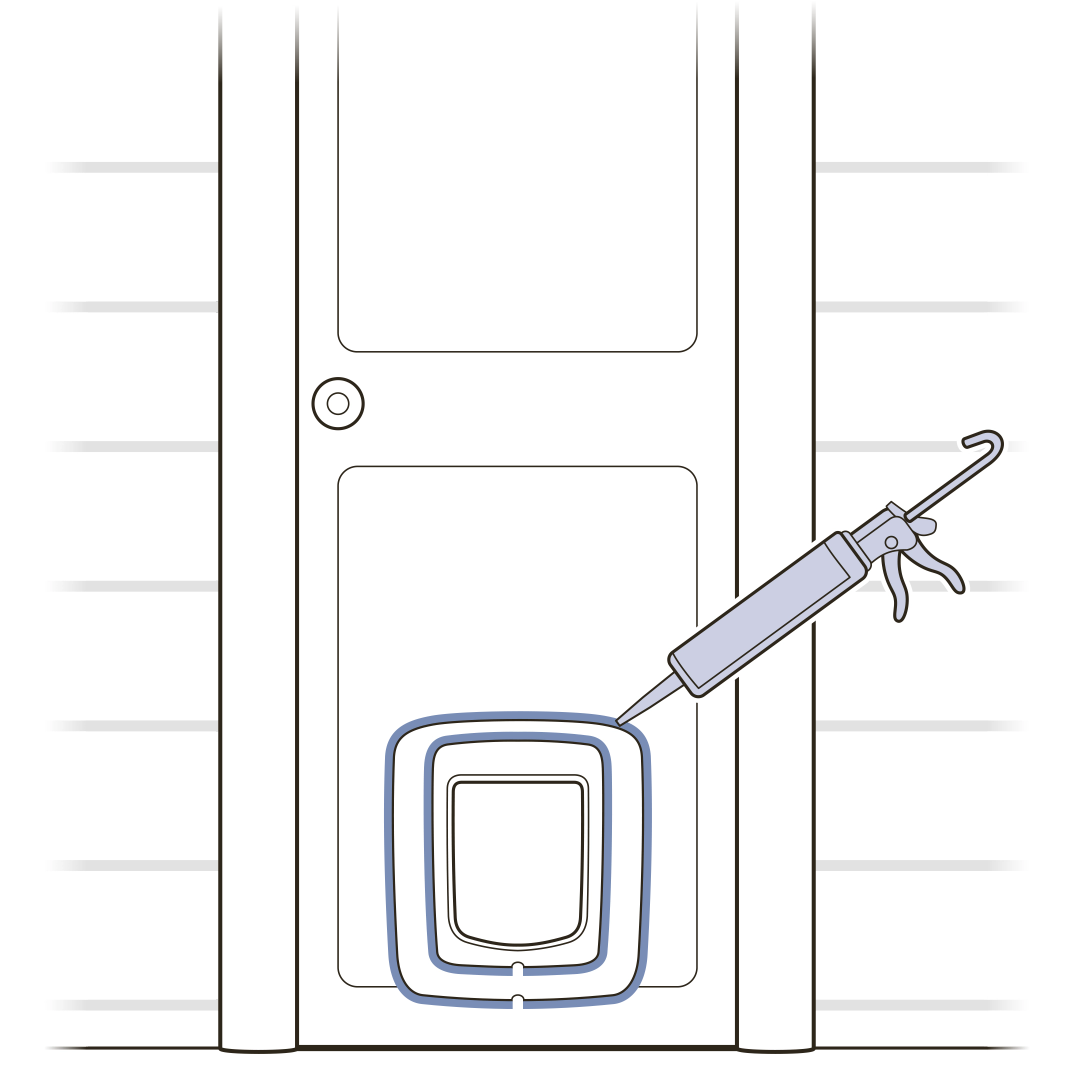
On the exterior side of the door, apply exterior-grade caulk around the edges of the installation adaptor and the exterior frame, making sure to leave the weep holes open.
If there are any gaps larger than ¼ inch (6 mm), you will need to fill them with foam backer rod or other appropriate material before applying caulk.

Apply exterior grade caulk around the edge of the pet door tunnel where it meets the exterior frame.
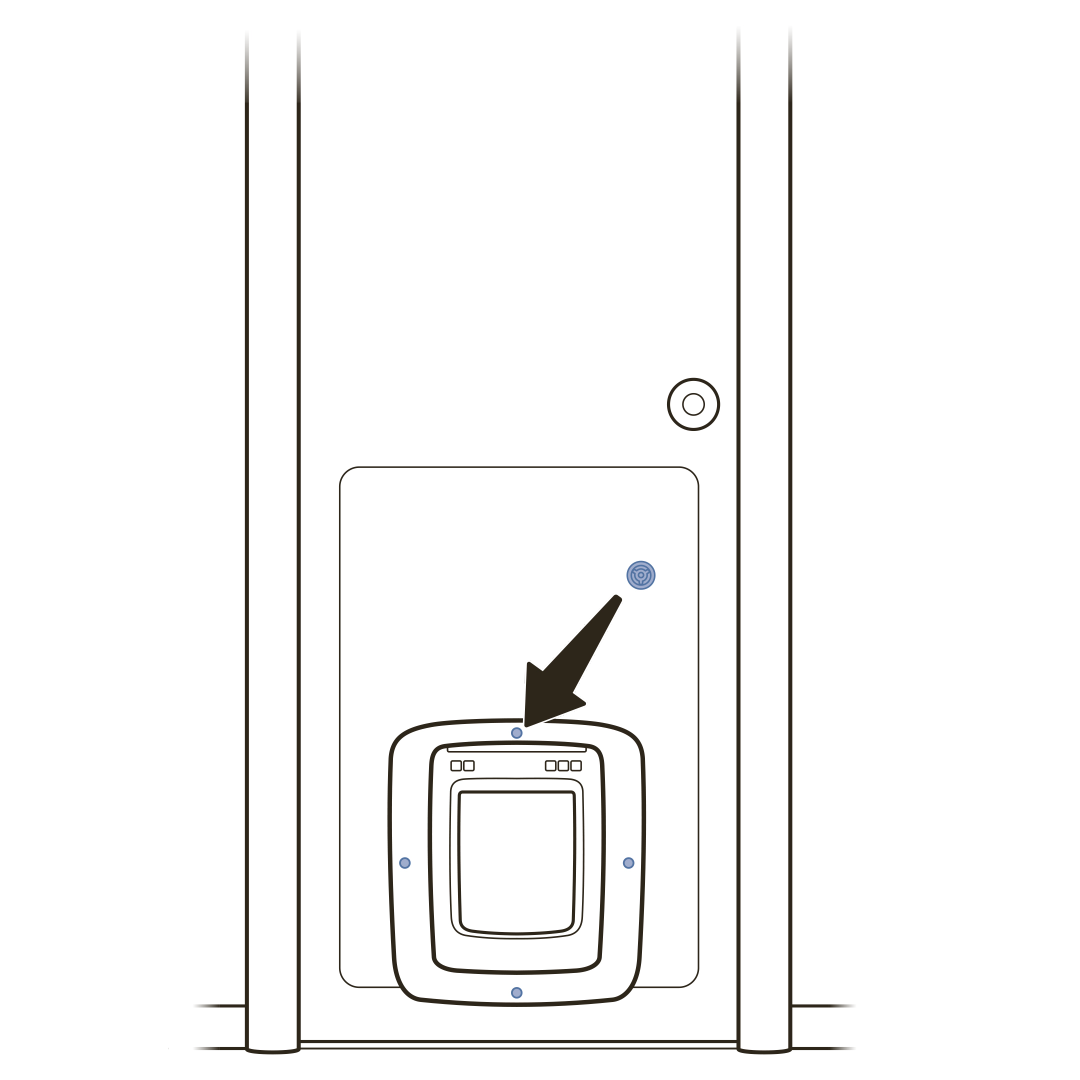
Reinstall the batteries in the pet door.
Now that your pet door is installed, it is time to train your pet to use it! See SmartDoor™ Connected Pet Door – How to Train Your Pet to Use the SmartDoor™.
Contact Customer Care
If you need further assistance, please contact our customer care team.