How To Set Up My PetSafe® Guardian® GPS Connected Customizable Fence
Before You Begin:
- Confirm your property is more than ¾ acre.
- Confirm the location of the base unit is climate-controlled and not in a building with a metal roof.
- Confirm the location of your base unit has access to single-band 2.4 GHz Wi-Fi. Ideally, without the use of a Wi-Fi extender or mesh router system.
- The base unit is at least 5 feet from the ground level.
- The base unit should not be higher than 6.5 feet from the floor you are standing on.
Charge the collar battery. This can take up to 4 hours. Visit How To Charge My PetSafe® Guardian® GPS Connected Customizable Fence Collar for assistance with charging the collar battery.


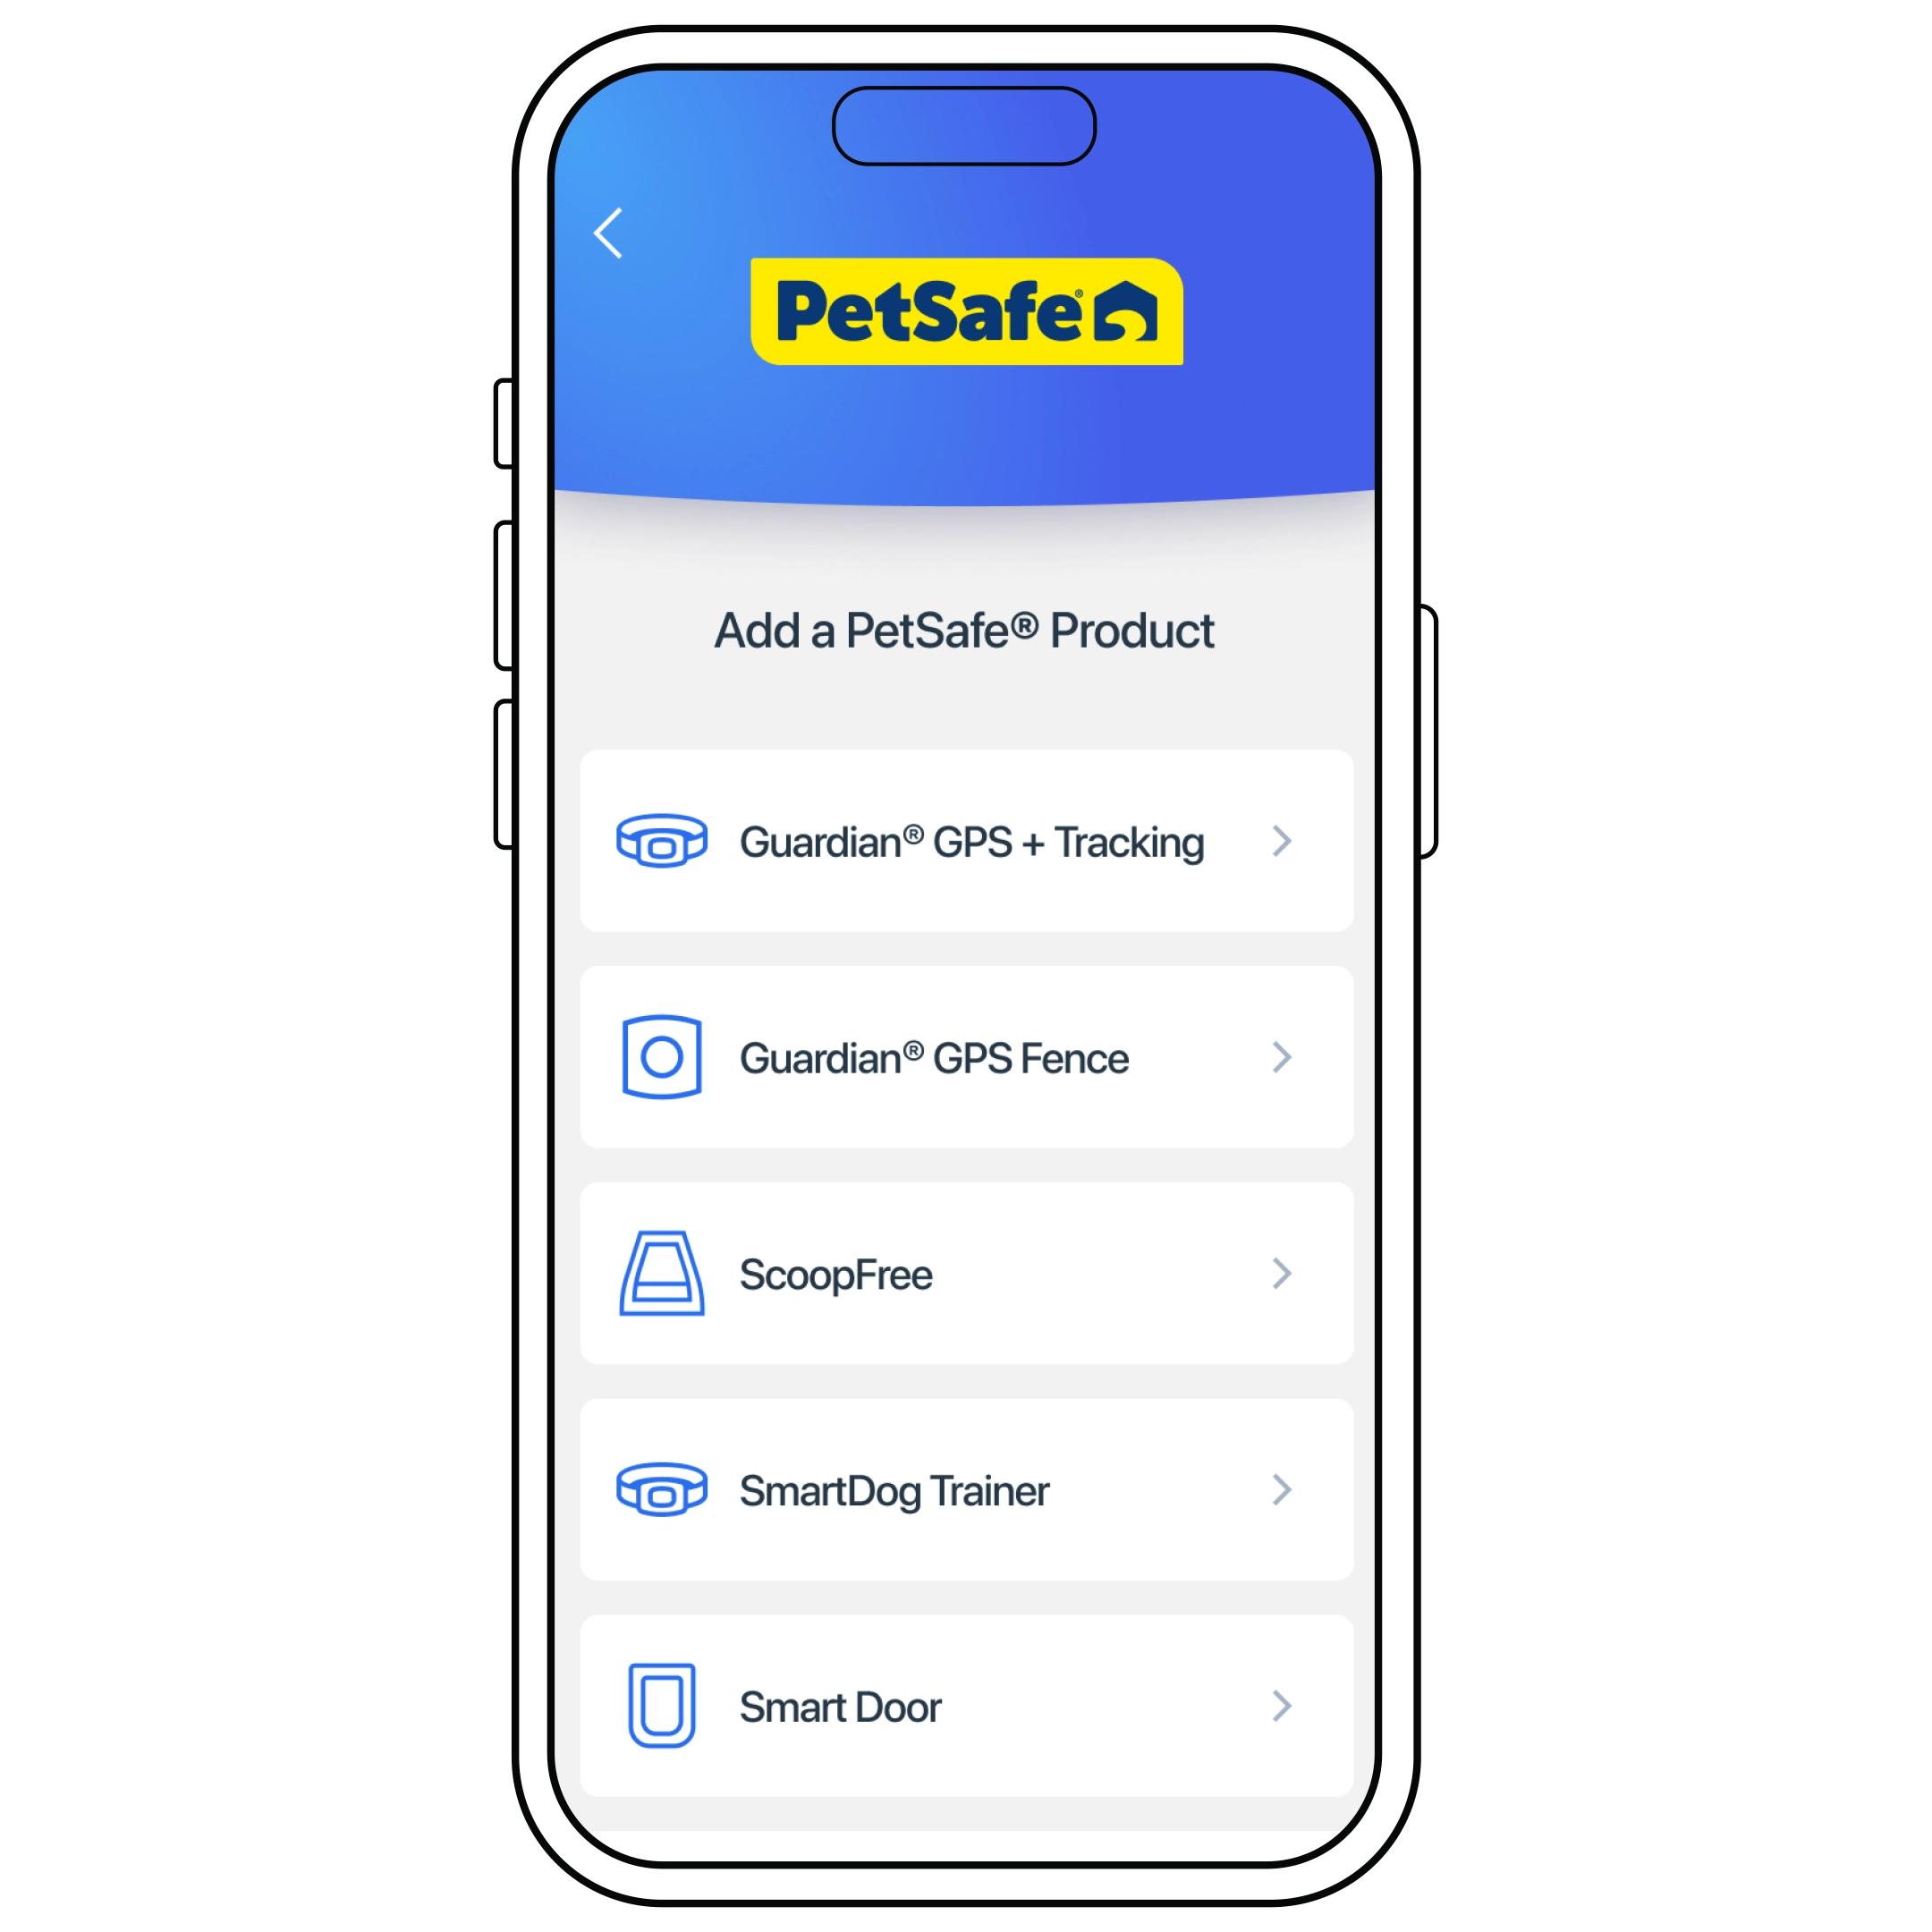
When prompted to add a product, choose Guardian® GPS Fence.

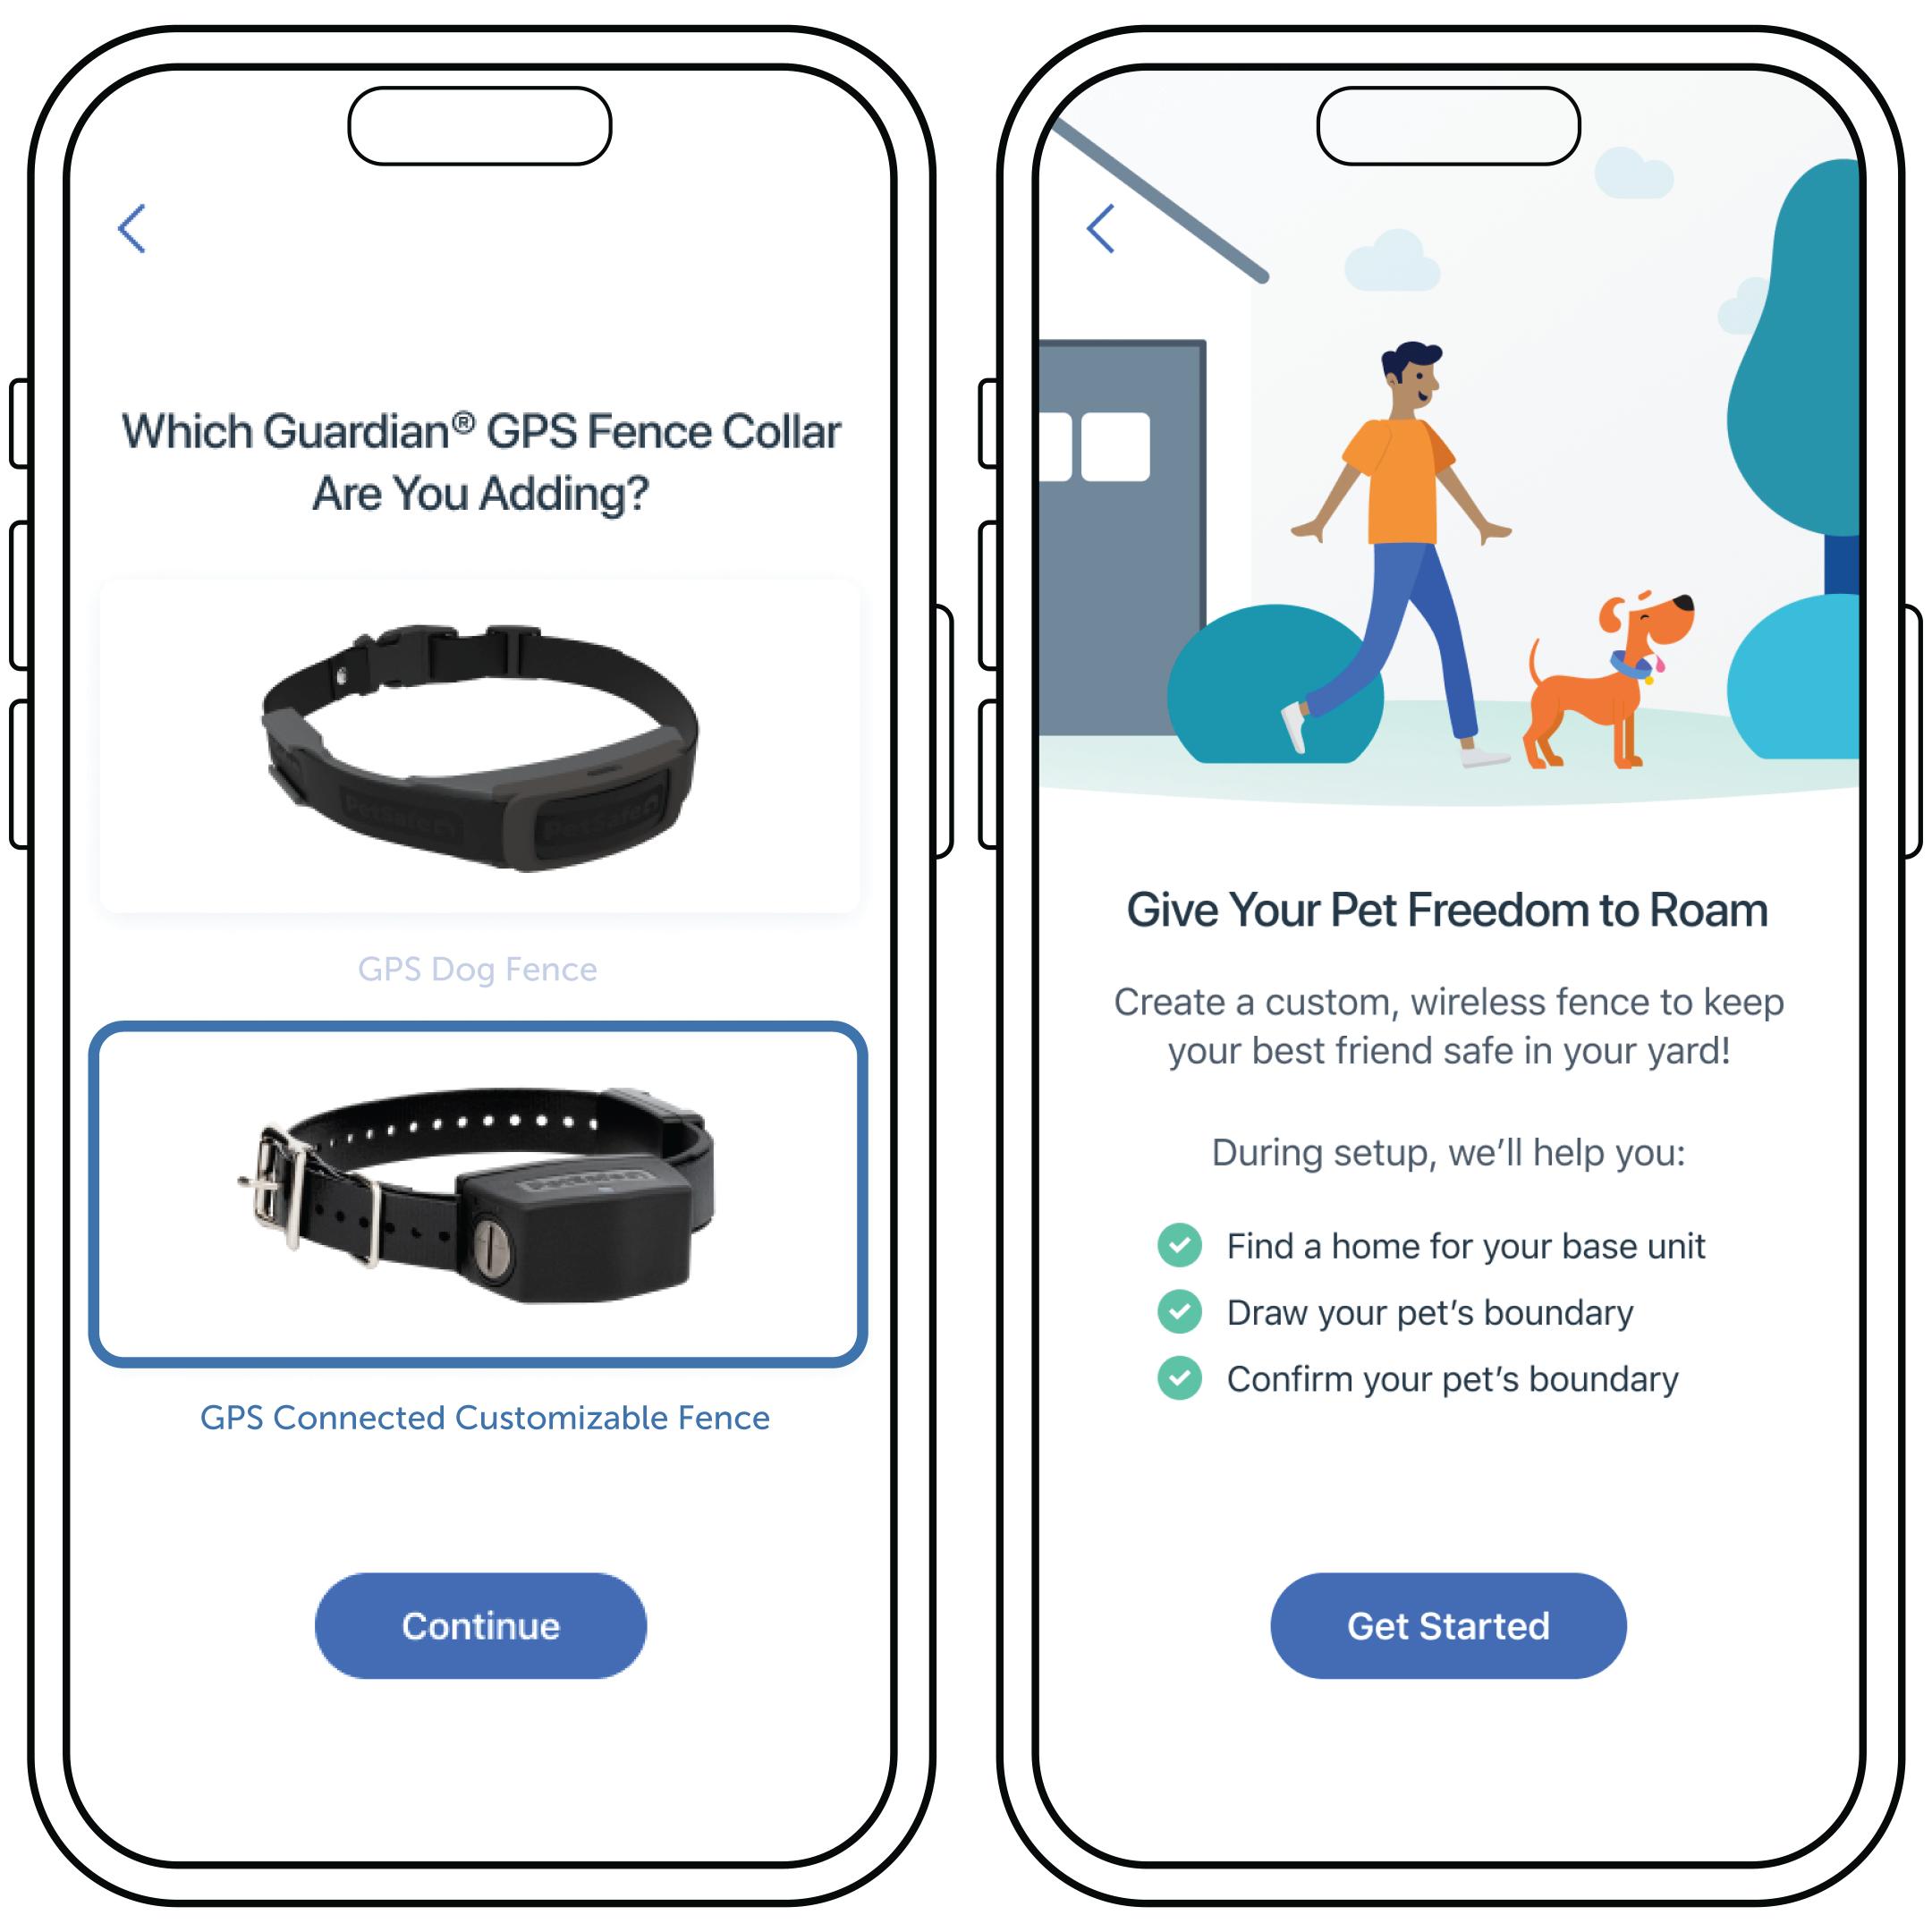
Choose GPS Connected Customizable Fence and tap Continue. Then tap Get Started to begin creating your fence.

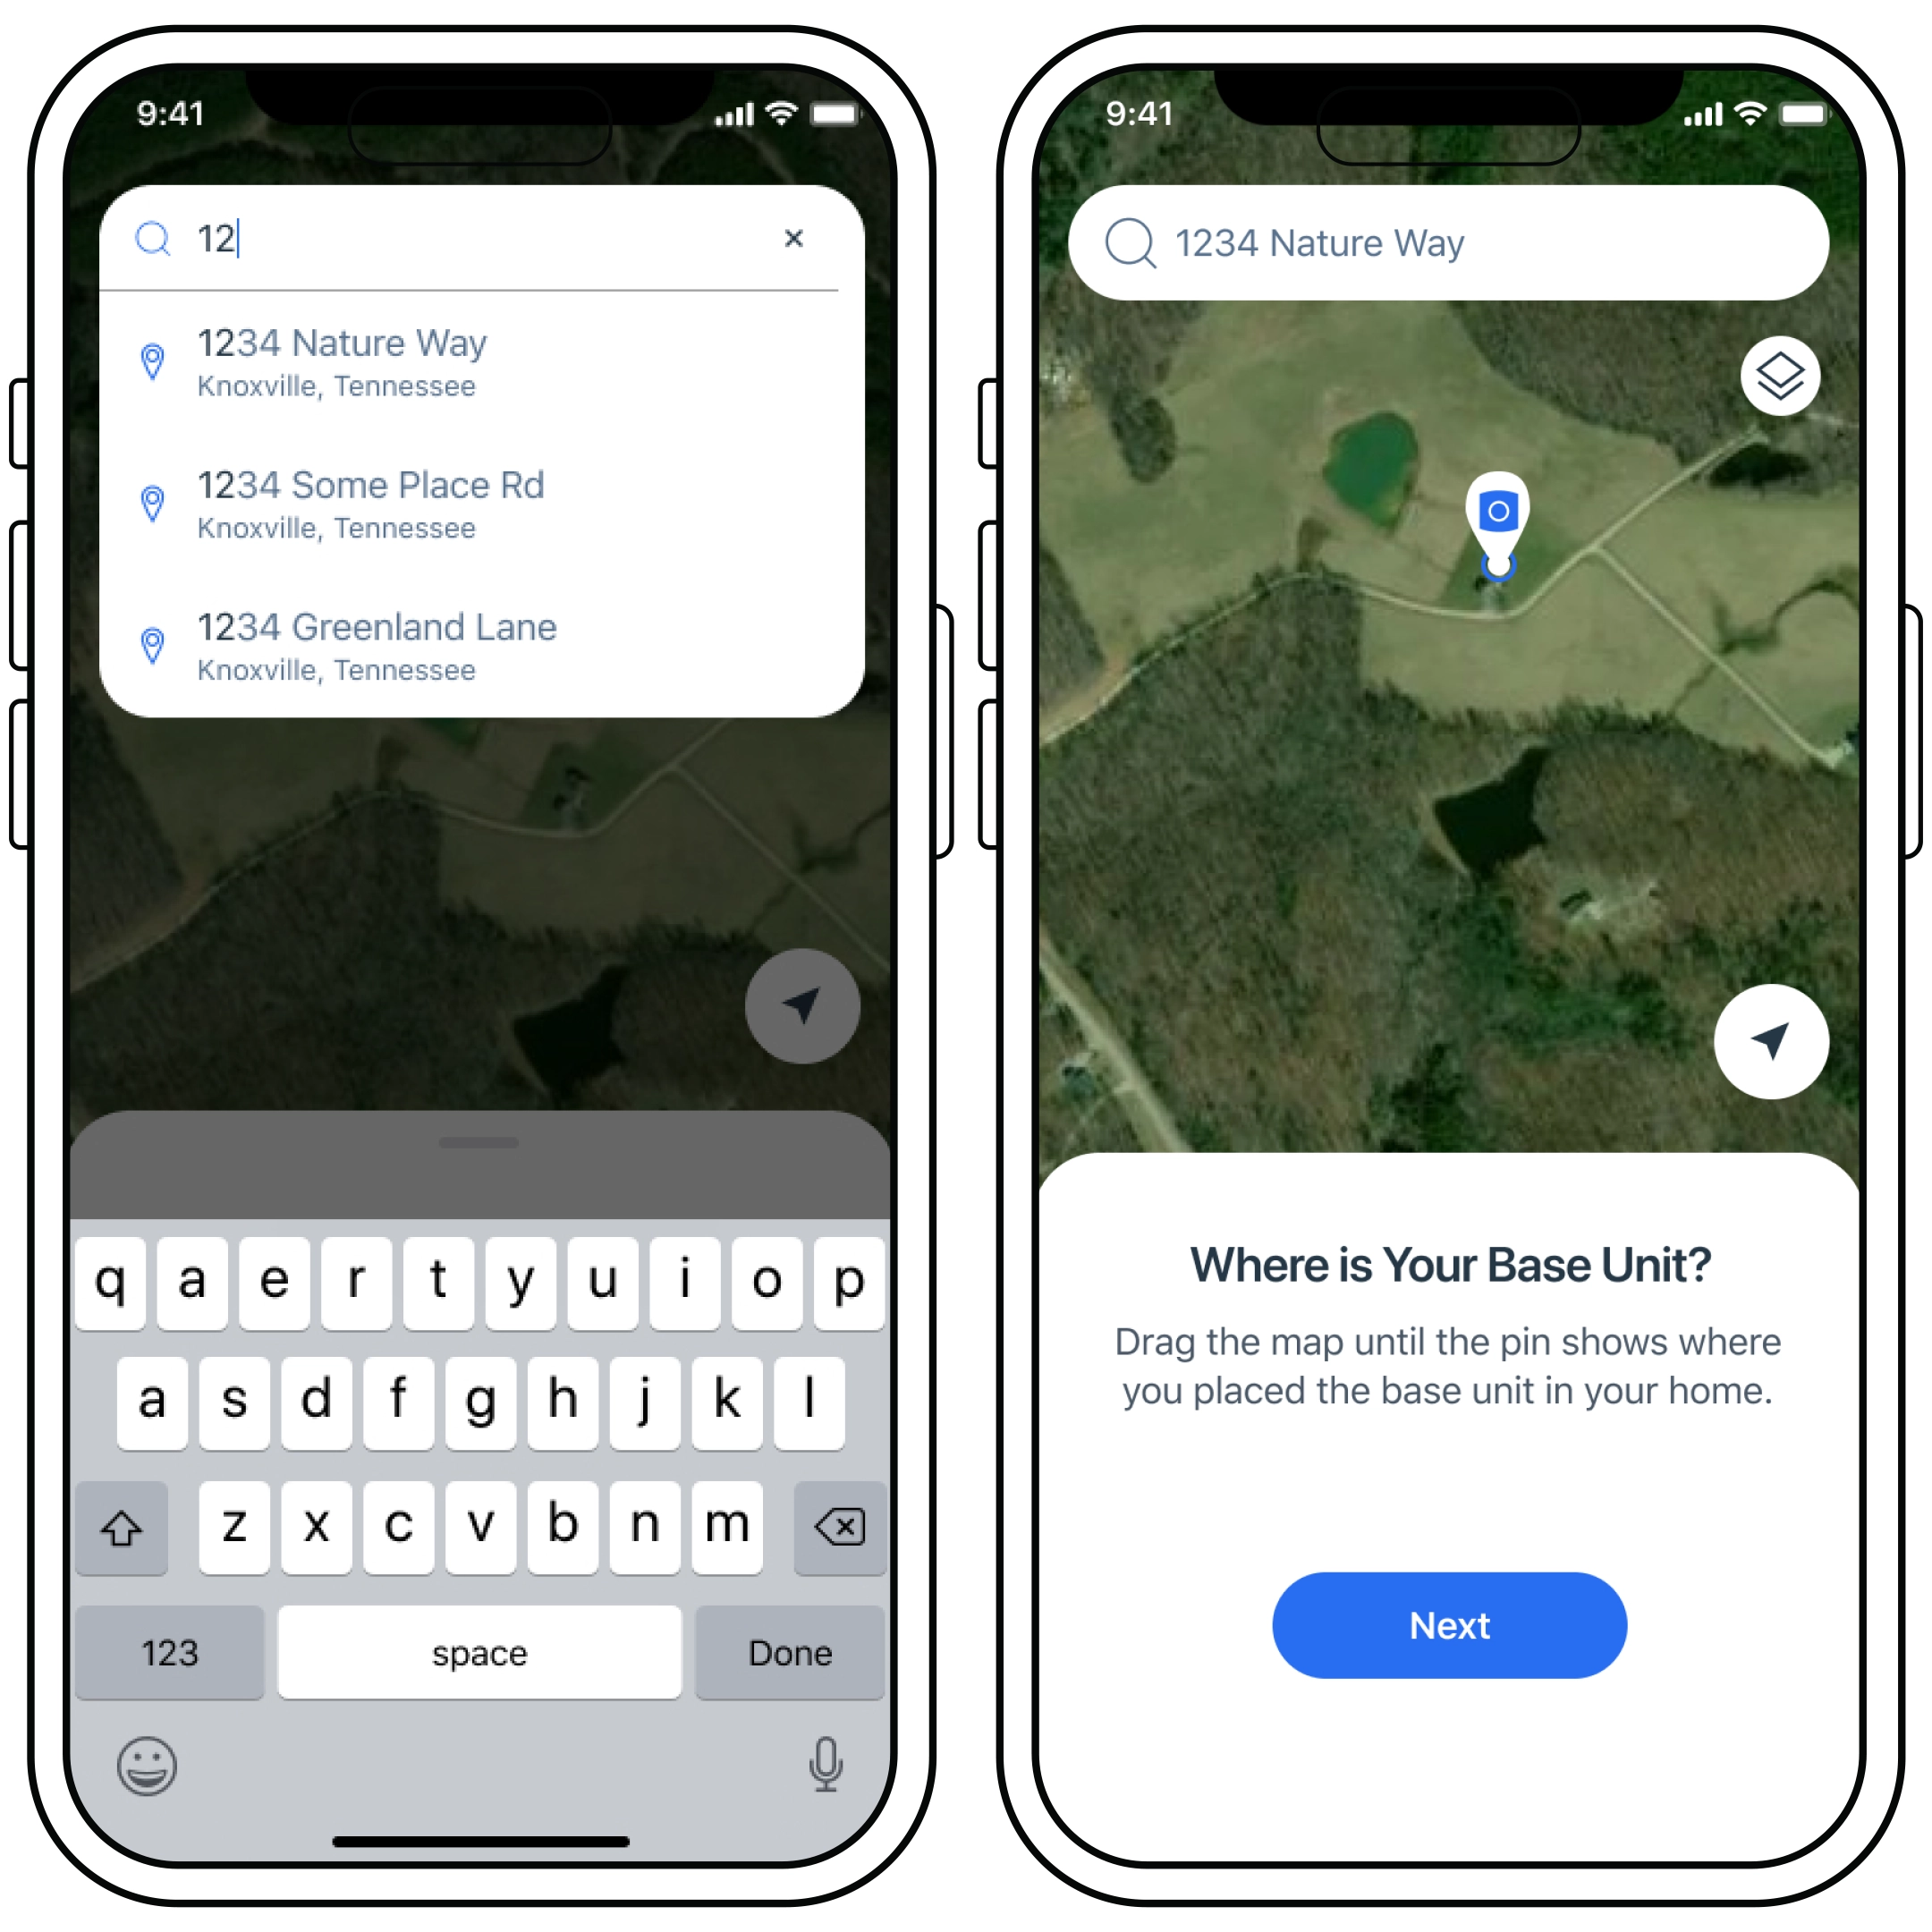
Make sure to enable location services or you cannot add a fence. Then add your address.

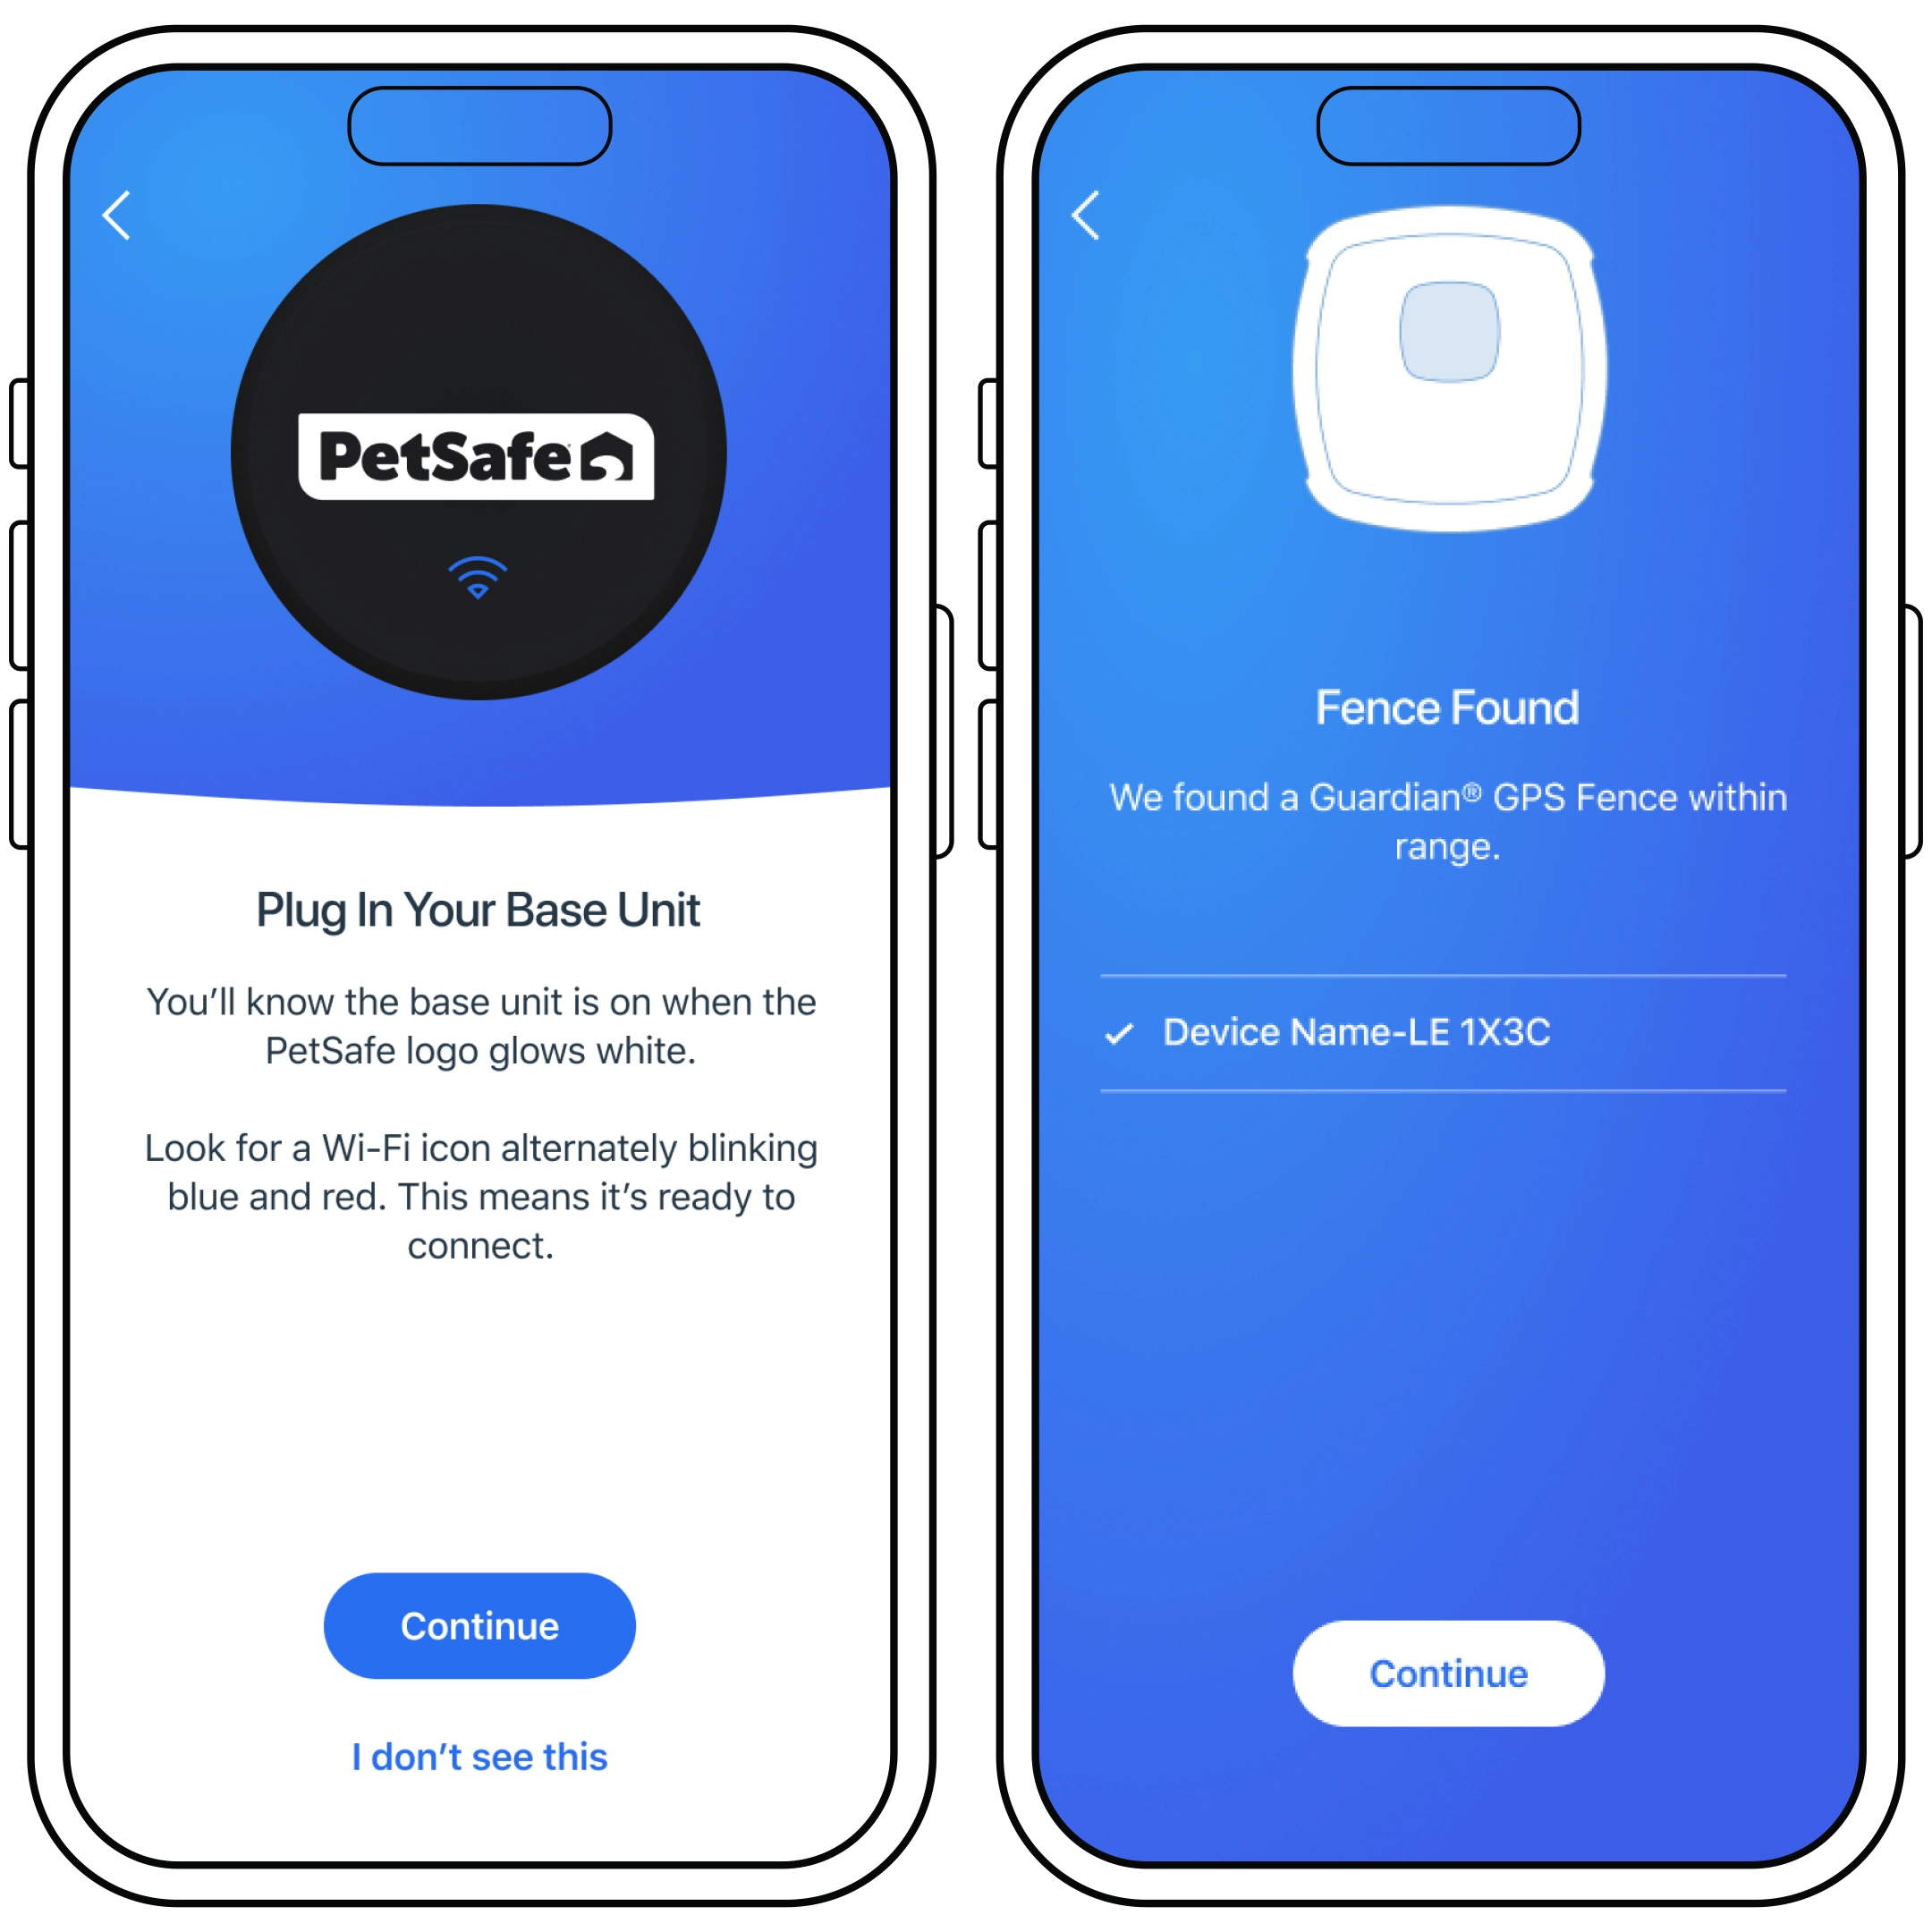
Plug in your base unit then allow the app to search for the base unit.

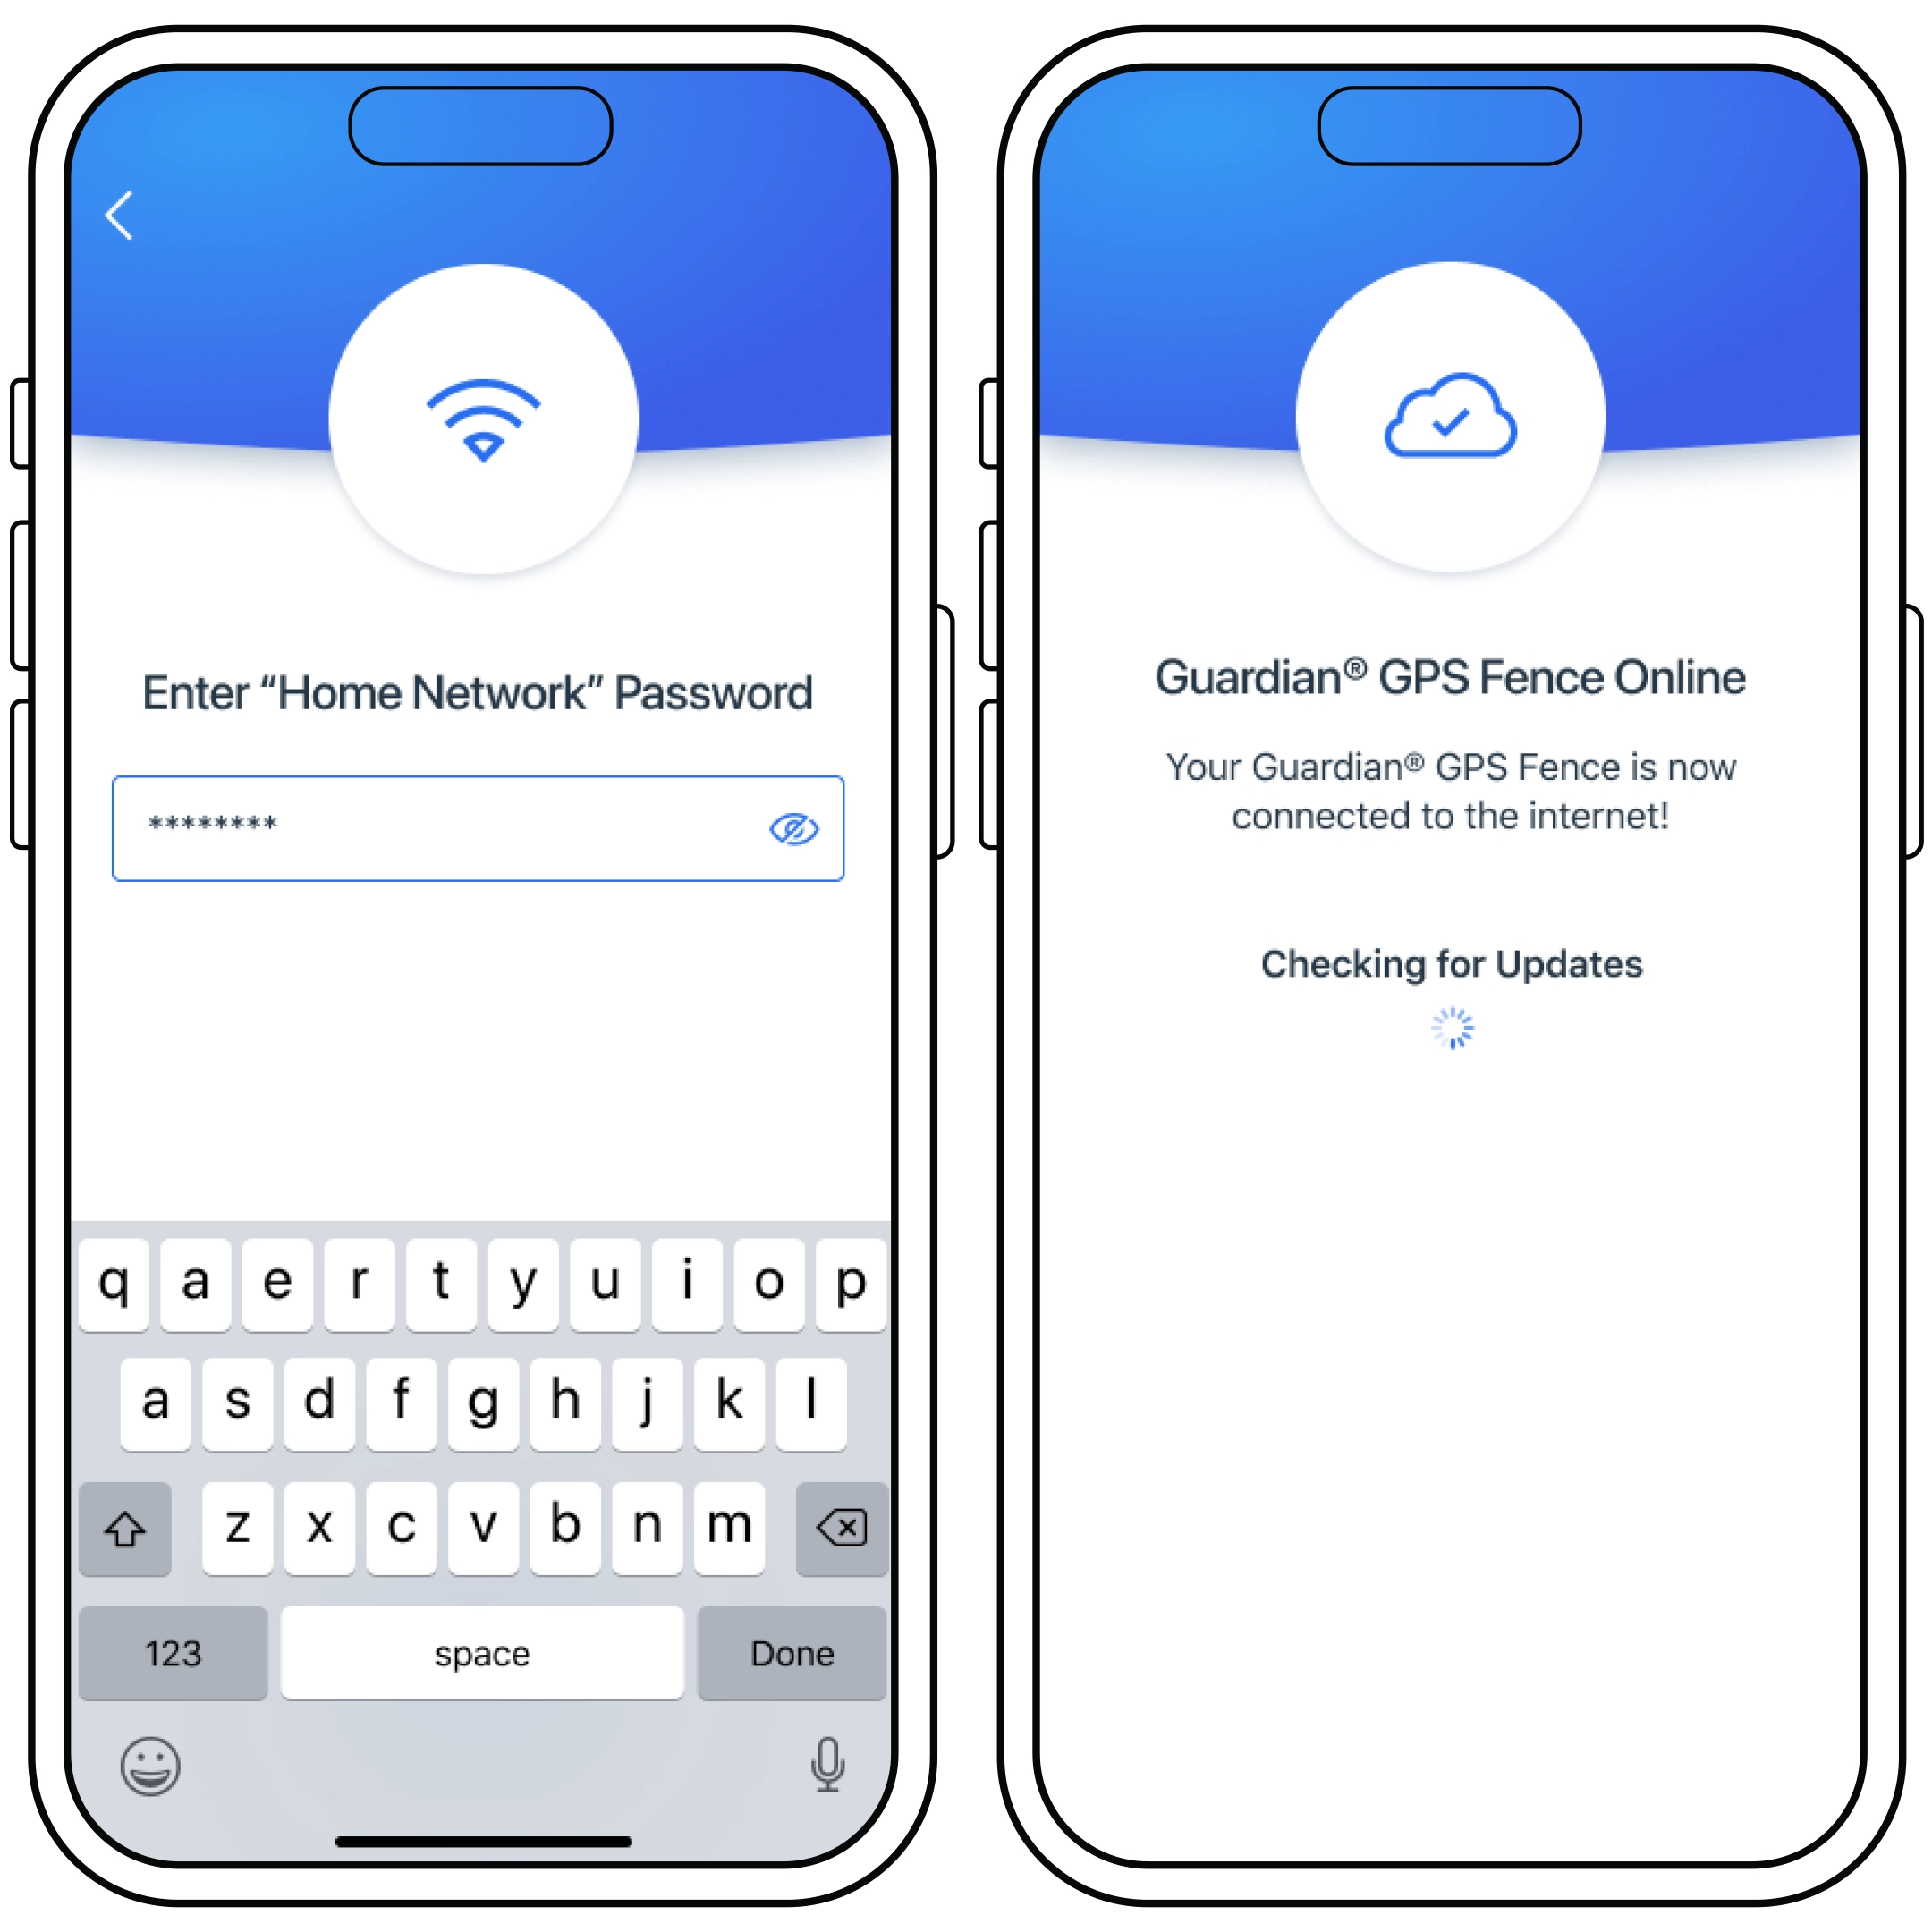
Select your Wi-Fi network and enter your password. At this point, your base unit will check for necessary updates.

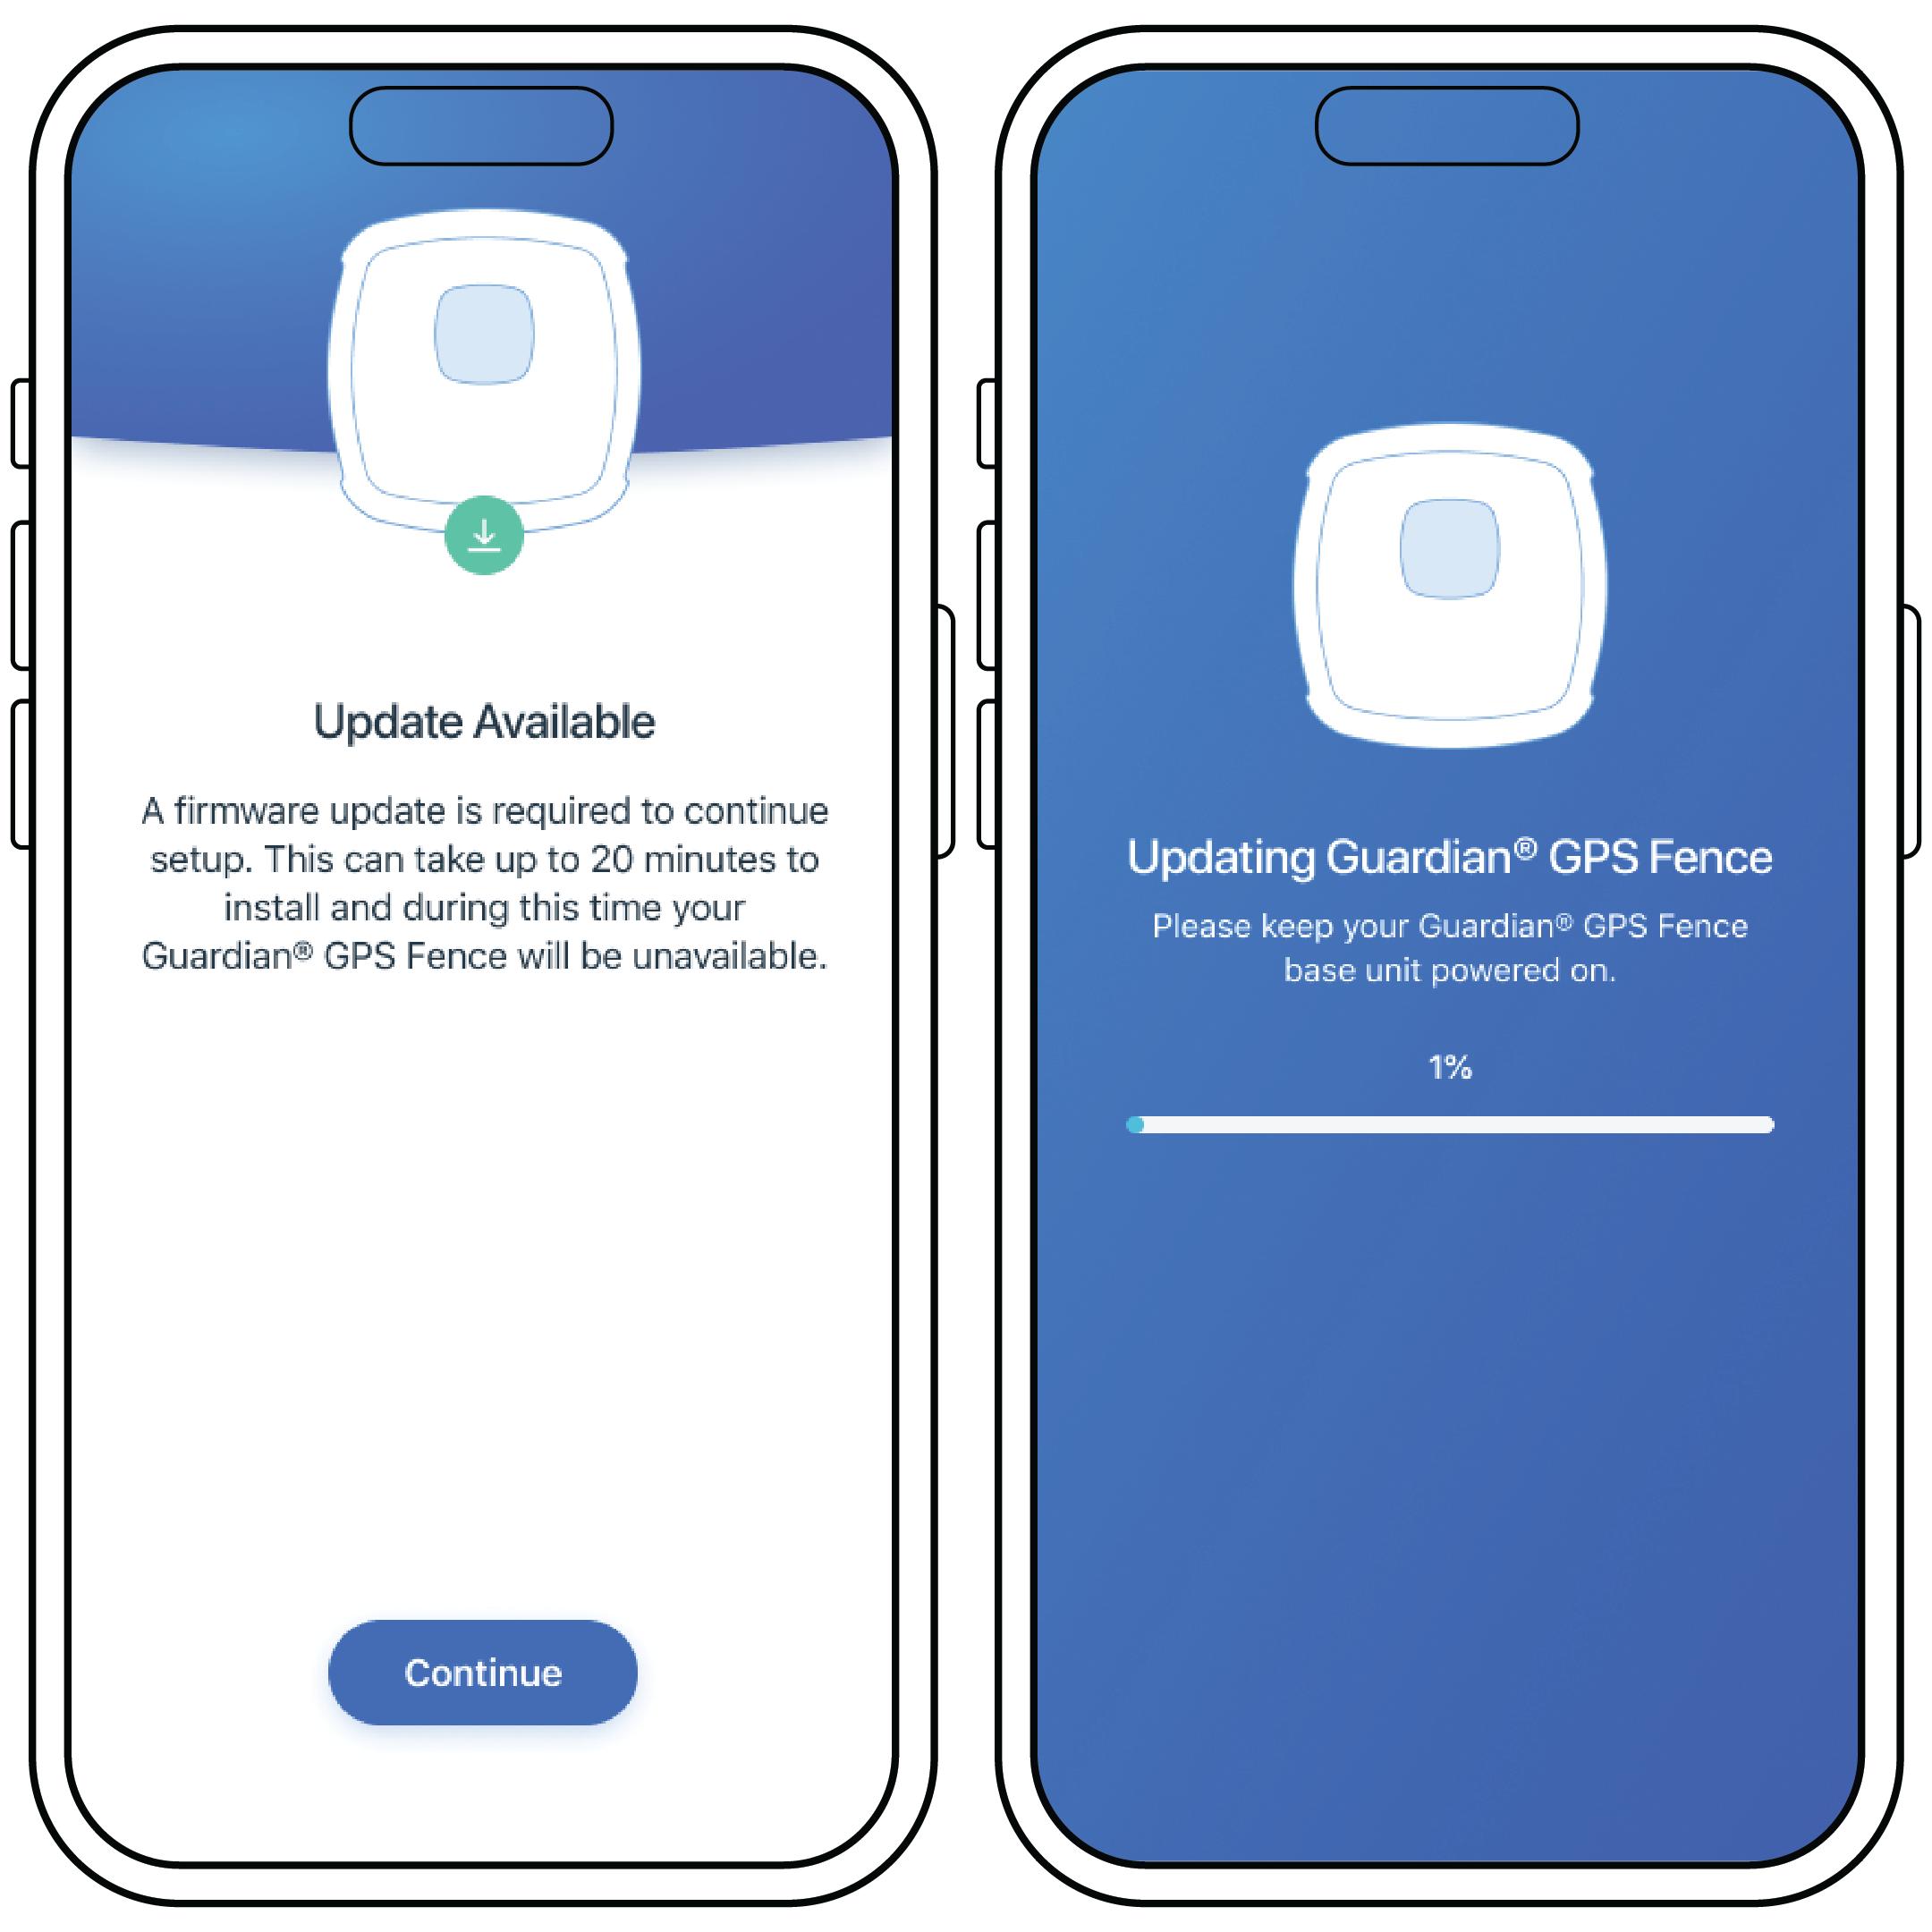
If an update is available, press Continue. During the update, do not close the app or power off your base unit.
Next, you will create your fence. For more information, visit How to Create a Fence on My PetSafe® Guardian® GPS Connected Customizable Fence System.
If your GPS base loses power or Wi-Fi after setup, don't worry! Your containment system will still work using the last settings saved and will still correct your pet if they attempt to leave the boundary.
However, to update your boundary or change any settings, you'll need to reconnect the base to Wi-Fi or power. For more information, visit What Happens if My PetSafe® Guardian® GPS Connected Customizable Fence Has No Wi-Fi or Power?