How To Replace the Insulated and Vinyl Flaps on My PetSafe® Extreme Weather Pet Door™
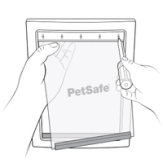
Identify the Size of Your Pet Door
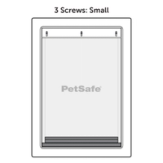
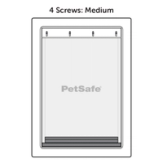
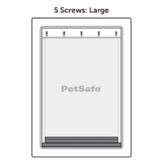
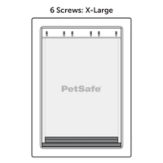
Ensure you purchase the correct size vinyl and insulated flap by identifying the size of your pet door. Your pet door size can be determined by counting the number of screws at the top of the flap.
Replacing Exterior Flap
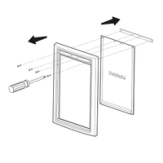
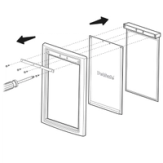
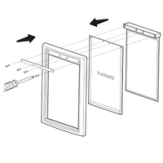
Using a Philips screwdriver, remove the screws across the top of the interior frame of the pet door. The flap and the mounting bar will be released. Remove the flap and mounting bar.
Place the flap on the flat side of the mounting bar so that the flap sits flush with the notch on the mounting bar. Place behind the frame so that the flap is sandwiched between the frame and mounting bar.
Hold the mounting bar and flap in place. Insert the screws from the interior side of the frame through the flap and into the mounting bar. For easier installation, start with the screws on each end so the flap and bar are held in place. Then insert the middle screws.
Do not tighten the screws completely as the flap will need to be adjusted.
Adjust the flap so the magnet bottom of the flap seals with the bottom of the frame and there are no gaps on either side of the flap. Then tighten all the mounting screws in place.
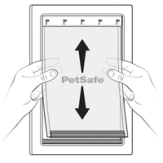
Replacing Interior and Insulated Flaps
Using a Philips screwdriver, remove the screws across the top of the interior frame of the pet door. The support bar, viny flap, and insulated flap unit will be released from the frame.
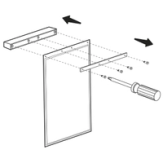
To replace the insulated flap, remove the screws, backing plate, and insulated flap from the back of the flap clamp. Insert the replacement insulated flap between the flap clamp and backing plate and secure it with screws.
Be careful not to overtighten the screws as this can damage the flap clamp or backing plate.
To replace the vinyl flap, insert the new flap between the pet door frame and the flap clamp on the insulated flap unit. Replace the support bar on the front of the interior frame. Secure the insulated panel unit and new vinyl flap to the pet door frame with screws.
Ensure that the flaps are aligned on the frame so that there are no gaps on the sides of the flaps, and they can easily swing back and forth while still allowing the magnet bottom of the flap to seal with the bottom of the frame. Adjust as needed.
For more information on adjusting the flaps, visit How to Adjust the Flap on My PetSafe® Pet Door.
Contact Customer Care
If you need further assistance, please contact our customer care team.