How to Mount the PetSafe® Stay & Play® Wireless Fence Base Unit
When mounting the PetSafe® Stay & Play base unit to a wall, in addition to the base unit, mounting bracket, and included hardware, you will also need a pencil, a drill, a 1/16-inch drill bit, screwdriver, and a stud finder. To use the wall anchors, a ¼ inch drill bit would be required.
Visit How to Select a Suitable Location for the PetSafe® Stay &Play® Fence to verify that the base unit is in an appropriate location.
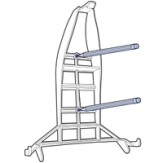
Place the mounting bracket on the wall of the selected location.
Mark the screw hole locations with a pencil.
Use the stud finder to confirm whether the location is on a stud or not.
- If the screw location is on a stud, the wall anchors are not needed.
- If the screw location is not on a stud, you will need to use the wall anchors provided.
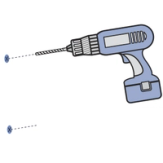
Use the appropriate drill bit to drill a pilot hole at the marked location.
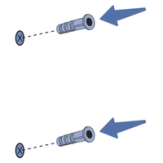
If your screw holes are not on a stud, insert the wall anchors into the pilot holes.

Line up the bracket screw holes with the pilot holes and screw the bracket to the wall.
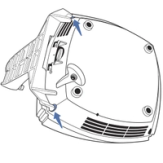
Place the bottom of the base unit onto the bracket first. There are holes for the bracket to slide into.

Snap the top of the base unit into place.
Contact Customer Care
If you need further assistance, please contact our customer care team.