How To Install the PetSafe® Microchip Cat Door in Wood, PVC, or uPVC Doors
Important Information
This article provides steps for installing the Microchip Cat Door in Wood, PVC, or uPVC doors only. Before beginning, please check if your door has a metal core. If a metal core or metal plate is found, you will need an Installation Adapter.
For detailed instructions on installing in different materials, visit our other articles:
- How To Install the PetSafe® Microchip Cat Door in Metal or Metal Core Doors
- How To Install the PetSafe® Microchip Cat Door in a Glass Door or Window
- How To Install the PetSafe® Microchip Cat Door in a Wall
When you first open the box, do not throw away any included cardboard/paper pieces, these are used during install.
What’s Included:
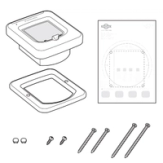
- Interior Frame
- Exterior Frame
- Quick Start Guide
- Cutting Template
- Screw Plugs
- Screws
Tool You Will Need:
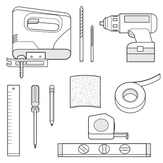
- Jigsaw
- Drill
- 12 mm Drill Bit
- 6 mm Drill Bit
- Tape Measure
- Phillips Screwdriver
- Sandpaper
- Masking Tape
- Pencil
- Ruler
- Level
Measure Your Cat
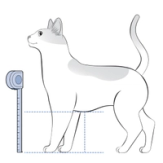
Measure your cat from the floor to their belly. Then mark that measurement on the door with a pencil.
Use a level to draw a horizontal line through the height marking to extend it.
Decide where on your door to install the pet door.
- The pet door does not have to be installed in the center of your door. You may choose to adjust it to the left or right.
- If you are installing it in a paneled door, align it within a panel for ease of installation.
Use a level to draw a vertical line for the pet door to be centered on. If you are placing the pet door centered on your door, measure to find the center and draw a vertical line for the center of your door.
Prepare the Door
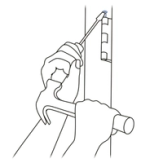
Remove the pins from the hinges using the flat-head screwdriver and hammer to remove the door from the doorframe.
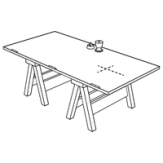
Place the door, exterior side up, on a raised level surface suitable for drilling and cutting, such as a pair of sawhorses. Clamp or weigh down the door to prevent it from moving.
Cut the Door Opening
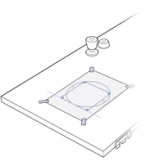
Place the template on the exterior side of your door with the belly height line on the template aligned with the belly height line you marked on your door. Tape the corners to hold it in place.
Ensure the area underneath where you have placed the template is clear before drilling and cutting.
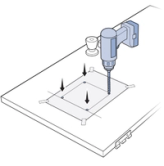
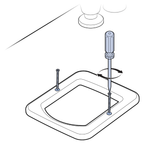
Drill the four corner holes with a 12 mm drill bit. Hold the drill steady at a 90-degree angle and use a framing square to keep it straight.
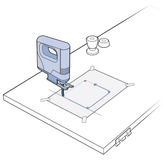
Place the jigsaw blade into a corner hole, making sure the blade goes entirely through the door, and cut along the dotted line on the template. Continue until an opening is made. You may need to finely trim the area or sand the rough edges to ensure a good fit.
Install the Frame
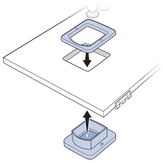
Check the fit of the frames in the opening. Place the interior frame (with flap) from the underside of the door. Then place the exterior frame into the cutout from the exterior side of the door. If the frame does not easily fit inside the opening, you may need to make adjustment cuts to the opening before proceeding with installation.
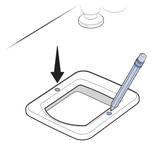
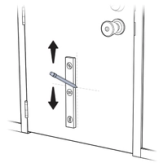
Hold the frames in place and mark the screw holes of the exterior frame on the exterior side of the door.
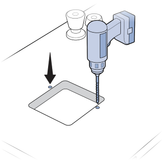
Remove both frames and drill exterior screw holes with a 6mm drill bit.
Align both frames back into the door. Use a screwdriver and appropriate length screws to secure the two frames together through the screw holes. Place blanking plugs when finished.
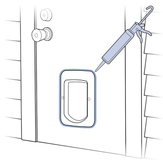
Replace your door on its hinges. Use weatherproof caulk around the exterior frame for weather resistance.
Contact Customer Care
If you need further assistance, please contact our customer care team.