How To Install the PetSafe® Microchip Cat Door in a Wall
Important Information
- You will need to purchase the installation adapter to install in a wall. The installation adapter can be purchased through our website here.
- The Microchip Cat Door can be installed in doors and walls up to 2.75 inches. Depending on the thickness of your wall, you may also need to purchase Tunnel Extensions. Multiple tunnel extensions can be used, each adding 2 inches. Extension Tunnels can be purchased from our website here.
When you first open the box, do not throw away any included cardboard/paper pieces, these are used during install.
Before You Begin
Program your cat’s microchip to the door and test the door in your desired location before cutting or installing. For detailed instructions, visit our article How To Setup the PetSafe® Microchip Cat Door and Prepare for Installation.
What’s Included:
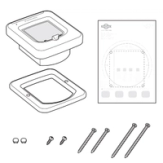
- Interior Frame
- Exterior Frame
- Quick Start Guide
- Cutting Template
- Screw Plugs
- Screws
Tool You Will Need:
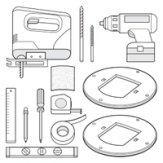
- Installation Adaptor (sold separately)
- Jigsaw
- Drill
- 12 mm Drill Bit
- 6 mm Drill Bit
- Tape Measure
- Phillips Screwdriver
- Sandpaper
- Masking Tape
- Pencil
- Ruler
- Level
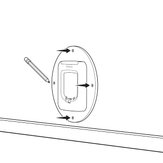
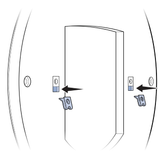
Determine Cat Door Placement
Decide where you would like to install the pet door. Use a stud finder to locate the studs in the wall and mark their location with a pencil.
Check for electrical/plumbing fixtures that could be in the wall where you wish to place the pet door.
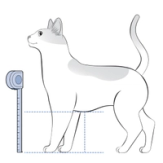
Measure your cat from the floor to their belly. Then mark that measurement on the door with a pencil.
Use a level to draw a horizontal line through the height marking to extend it.

Locate the center point between the two stud markings. Use a level to draw a center vertical line through the shoulder height line.
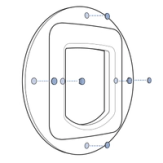
Place the Template
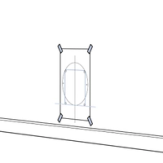
- Place the template on your wall, with the belly height line on the template aligned with the belly height line you marked on your wall.
- Use a level to confirm it is straight.
- Tape the corners to hold it in place.
Depending on the presence of metal in your wall, there are two options on the cutting template. Please use the appropriate line for your wall construction.
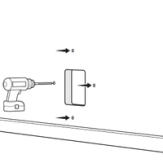
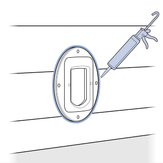
Cut the Opening
Follow all safety instructions when using power tools. Be sure to always wear safety glasses.
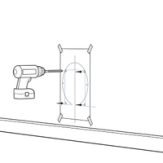
Drill holes according to the template using a 12 mm drill bit. Hold the drill steady at a 90-degree angle and use a framing square to keep it straight.
Place the jigsaw blade into a corner hole and cut along the appropriate template line. Continue cutting along the template until an opening is created. Remove any insulation that is in the cutout.
From the exterior of the home, finish cutting the hole through the wall using the four corner holes drilled through the wall as a guide. Clean the area of any dust, dirt, or debris.
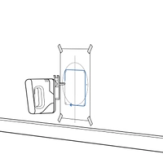
Install the Adaptor, Frame, and Tunnel Extension
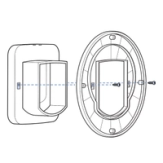
Slide one adaptor plate over the tunnel on the interior frame (with flap) and attach it to the back of the frame using the two included pan headed screws.
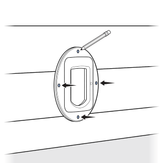
From the interior of the home, position the interior assembly (interior frame and adaptor plate) in the cutout and mark the four screw holes from the installation adaptor on the wall. Then remove the assembly.
Using the proper hardware for your wall construction, drill the appropriate size holes for your hardware and attach the interior frame with installation adaptor to the wall.
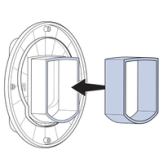
You may need to lengthen the tunnel depending on your wall thickness. To do so, add tunnel extensions until the desired length is reached. The tunnel extensions’ edges seat into each other and can be secured in place with glue.
Important: Do not cut the tunnel that is part of the interior frame. Key components are contained within the tunnel and any alteration to the tunnel will affect functionality.
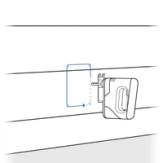
Attach the two included metal clips into the rectangular recesses on the remaining adaptor plate with the flat side of the clip flush with the outer face of the plate.
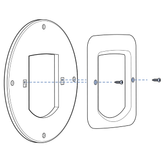
Set the exterior frame on top of the remaining adaptor plate and attach using the two included 16mm ( ⅝”) flat head screws.
From the exterior of the home, position the exterior assembly (interior frame and adaptor plate) onto the tunnel and mark the four screw holes from the installation adaptor on the wall. Then remove the assembly.
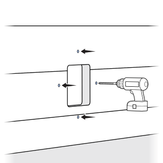
Using the proper hardware for your wall construction, drill the appropriate size holes for your hardware, and attach the exterior frame assembly to the wall.
Insert the 8 blanking plugs into the exterior and interior installation adaptor plates and 2 blanking plugs into the exterior frame.
Use weatherproof caulk around the exterior frame with for weather resistance.
Contact Customer Care
If you need further assistance, please contact our customer care team.