How To Clean and Maintain My PetSafe® SmartDoor™ Connected Pet Door
Important Information
Perform regular cleaning and maintenance to keep your PetSafe® SmartDoor™ Connected Pet Door clean and operating properly.
Unlock the pet door using the key/microchip, the app, or the Lock/Unlock button in the battery compartment.
If the Lock/Unlock button is pressed while the door is in Smart Mode, it will turn Smart Mode off and switch the door to Standard Mode.
For more information, visit What Do the Buttons and Indicator Lights Mean on My PetSafe® SmartDoor™ Connected Pet Door?
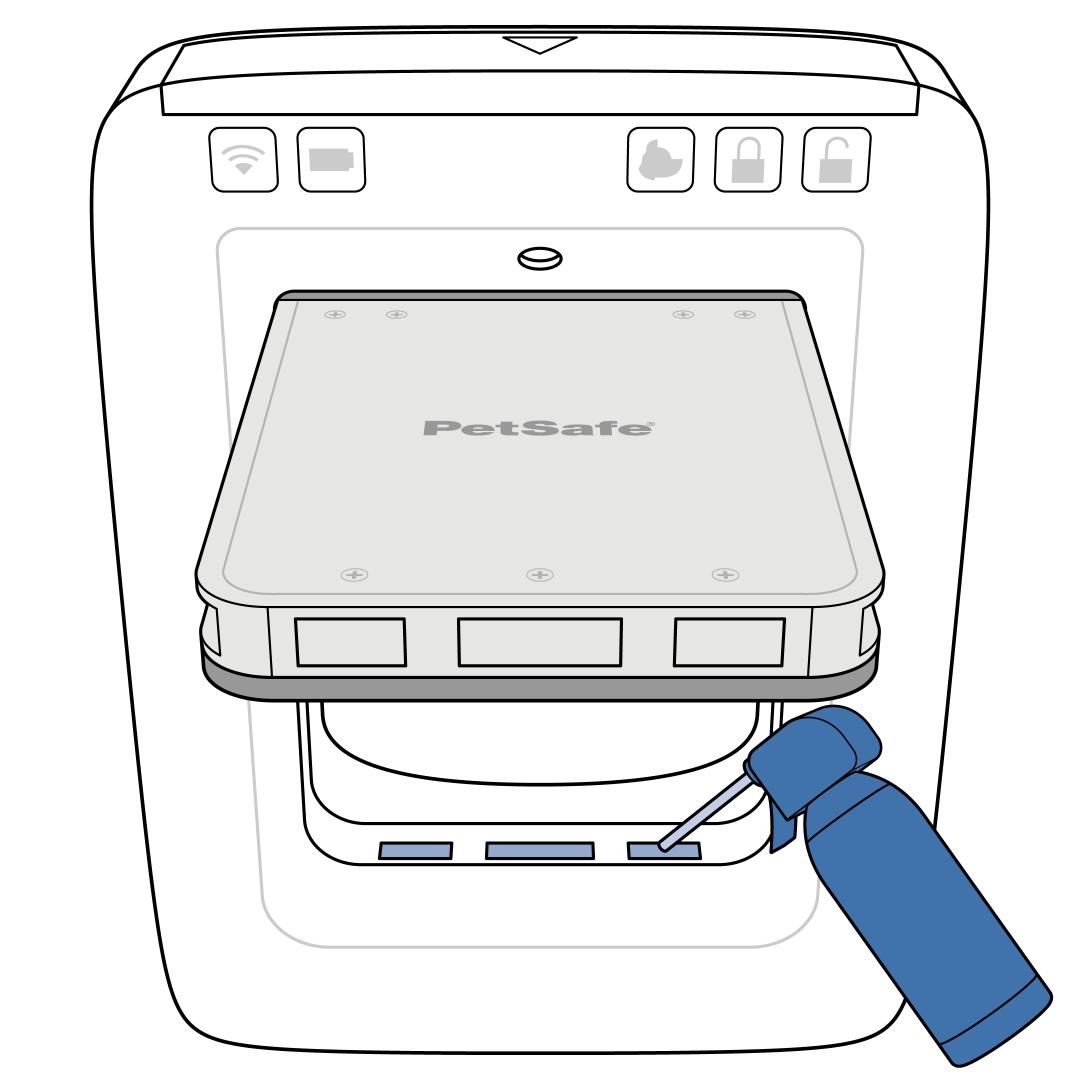
Visually inspect the latches at the bottom of the pet door frame, under the flap.
Clear any dirt or debris from the latches, using a can of compressed air, a soft-bristled brush or an alcohol wipe.
Use a damp (not wet) cloth to wipe down the interior and exterior frames of the pet door.
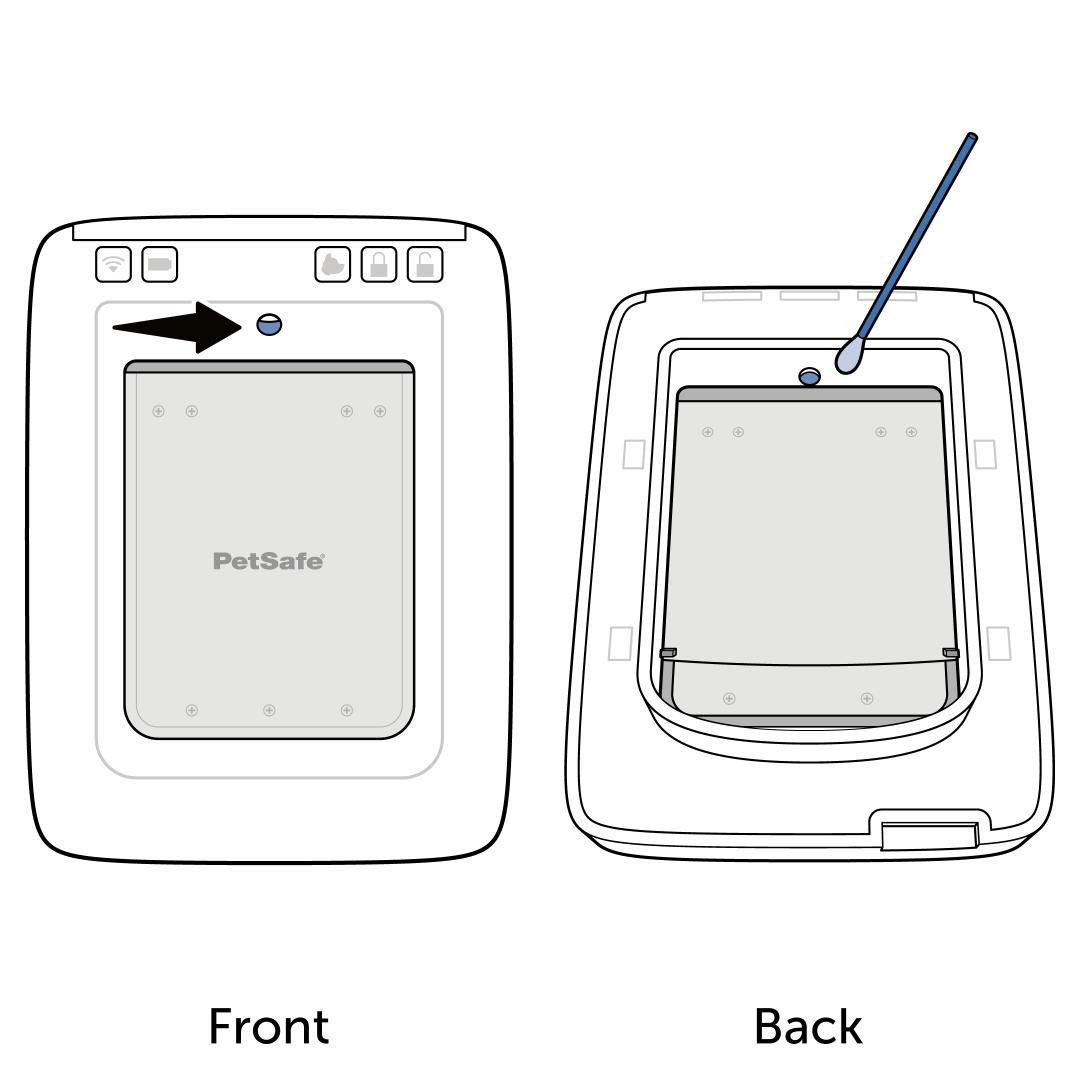
Clean the motion sensors, centered above the flap on both the front and back of the door, using a damp cotton swab.
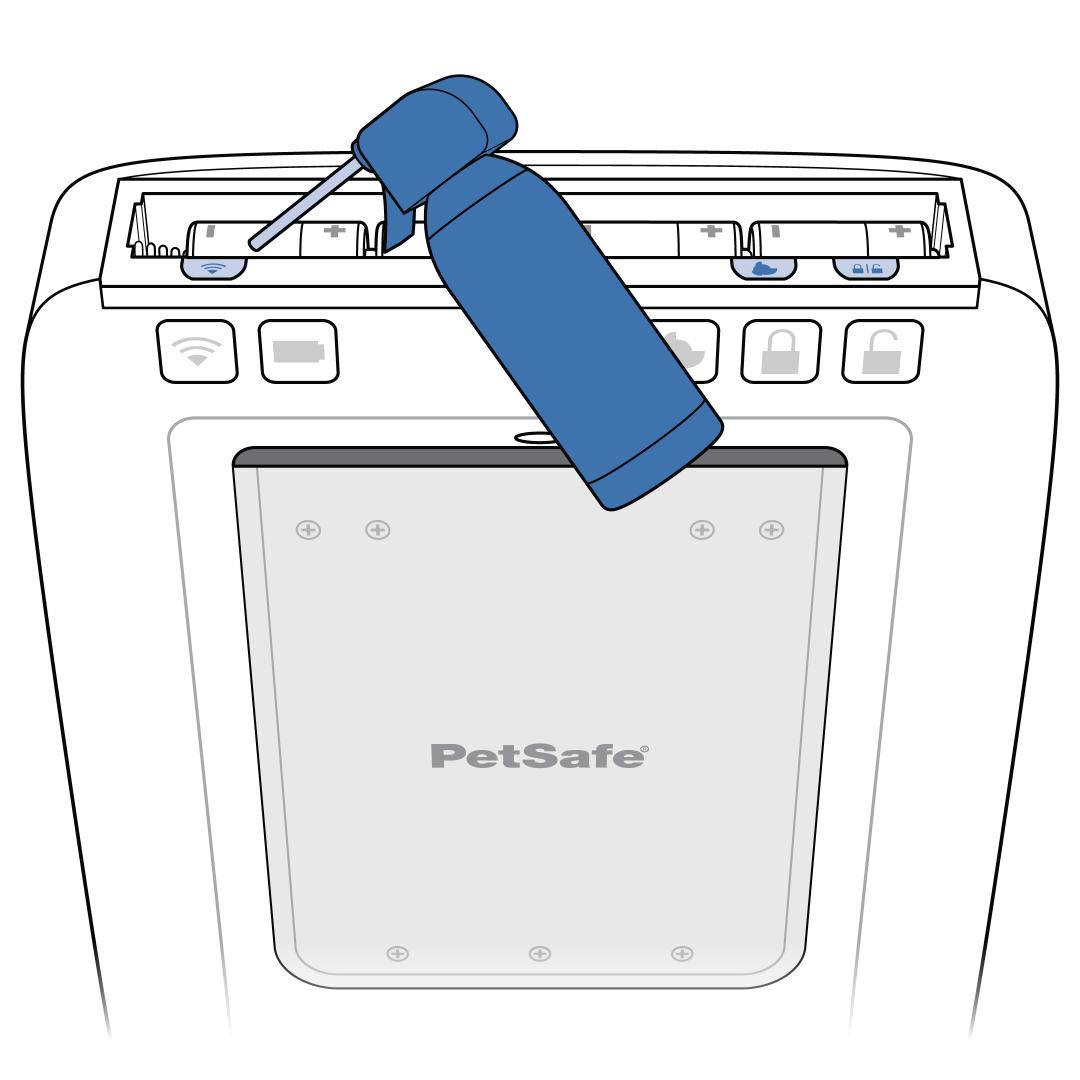
Open the battery compartment and inspect the three buttons inside. The buttons should give a tactile “click” when pressed.
Clear any dirt or debris from the buttons using a can of compressed air, a soft-bristled brush or an alcohol wipe.
Important: Do not use liquid or spray cleaners to clean the buttons, as these could introduce moisture into the battery compartment.
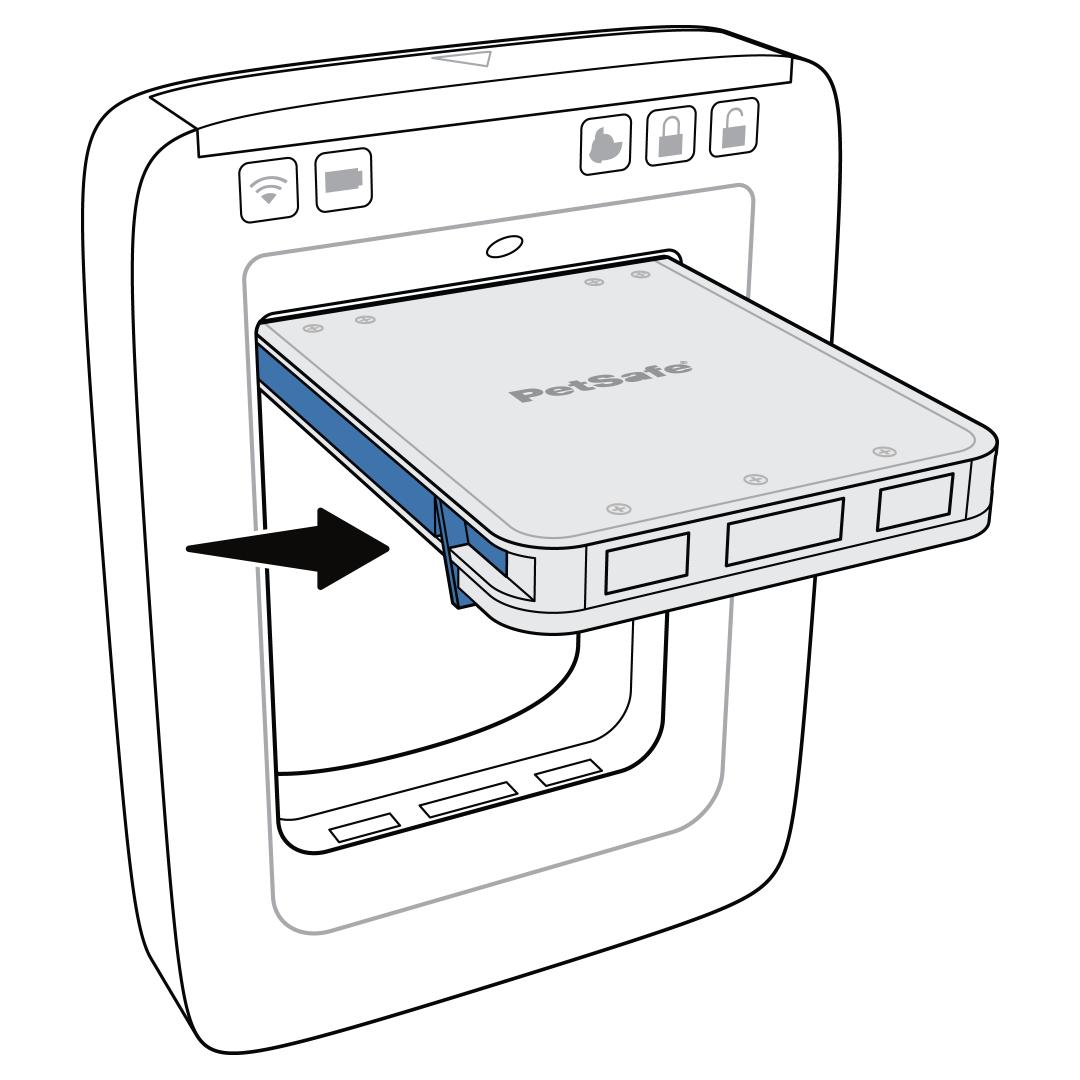
Visually inspect the weather stripping and rain diverters (nylon fins) at the sides of the flap. If these are loose or damaged, they can prevent the flap from closing.
- If the weather stripping and/or rain diverters are intact and in place, clear any dirt or debris from the weather stripping and rain diverters, using a can of compressed air, a soft-bristled brush or a damp cloth.
- If the weather stripping and/or rain diverters are damaged, you will need to order and install a replacement flap. Replacement flap kits can be purchased through our website here.

If the weather stripping and/or rain diverters are intact but have slipped out of position, use a small Phillips screwdriver to loosen the screws at the side of the flap, then move the weather stripping and/or rain diverters back into position and retighten the screws.