Teach & Treat - How to Insert or Change Batteries in the Remote

You Will Need:

  • A Philips head screwdriver
  • Two new CR-2032 batteries
teach-&-treat-how-to-insert-or-change-remote-batteries-step1-locate-hole-with-screw-illustrationteach-&-treat-how-to-insert-or-change-remote-batteries-step1-locate-hole-with-screw-illustration

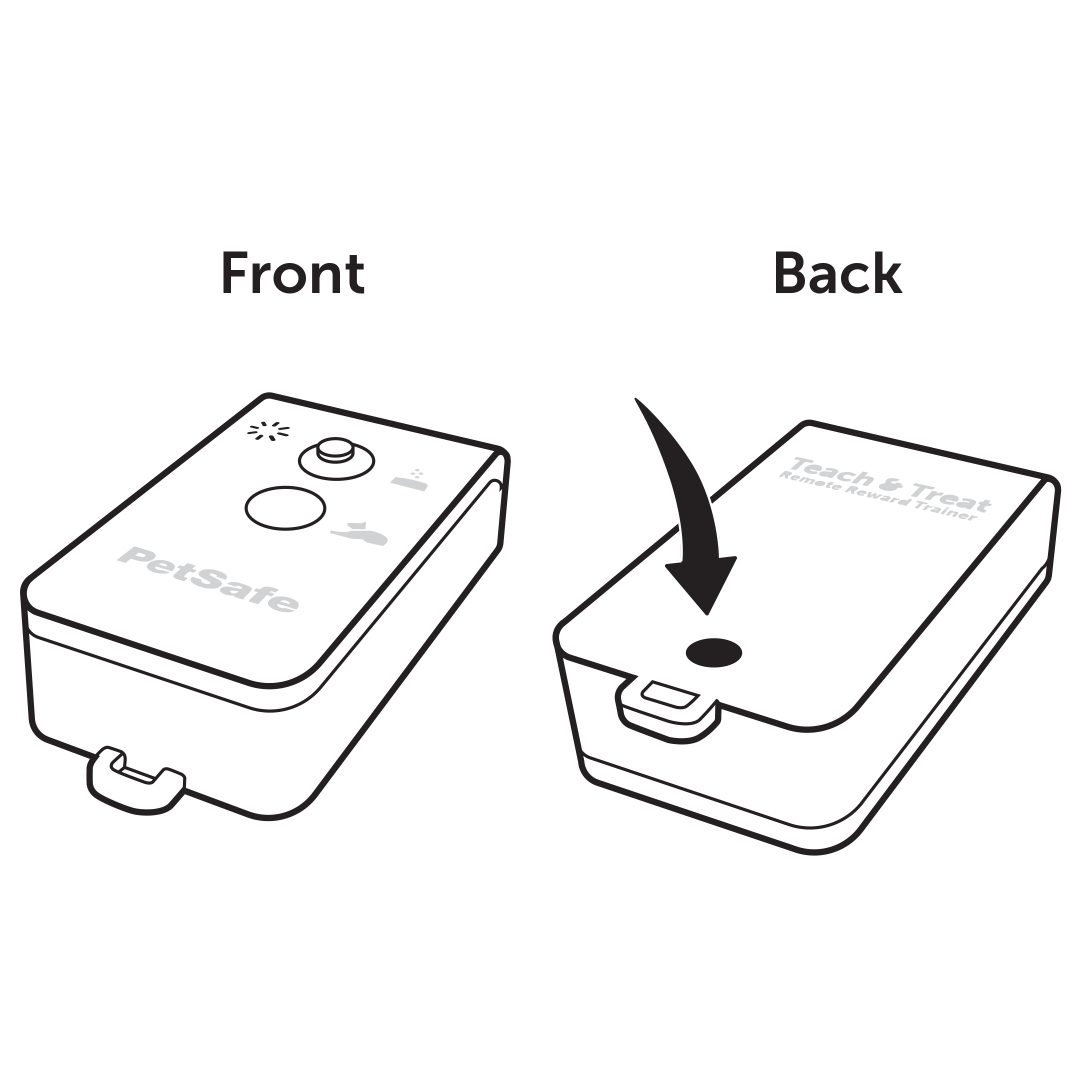
Flip the remote to the back and locate the hole with the screw.

teach-&-treat-how-to-insert-or-change-remote-batteries-step2-loosen-screw-illustrationteach-&-treat-how-to-insert-or-change-remote-batteries-step2-loosen-screw-illustration

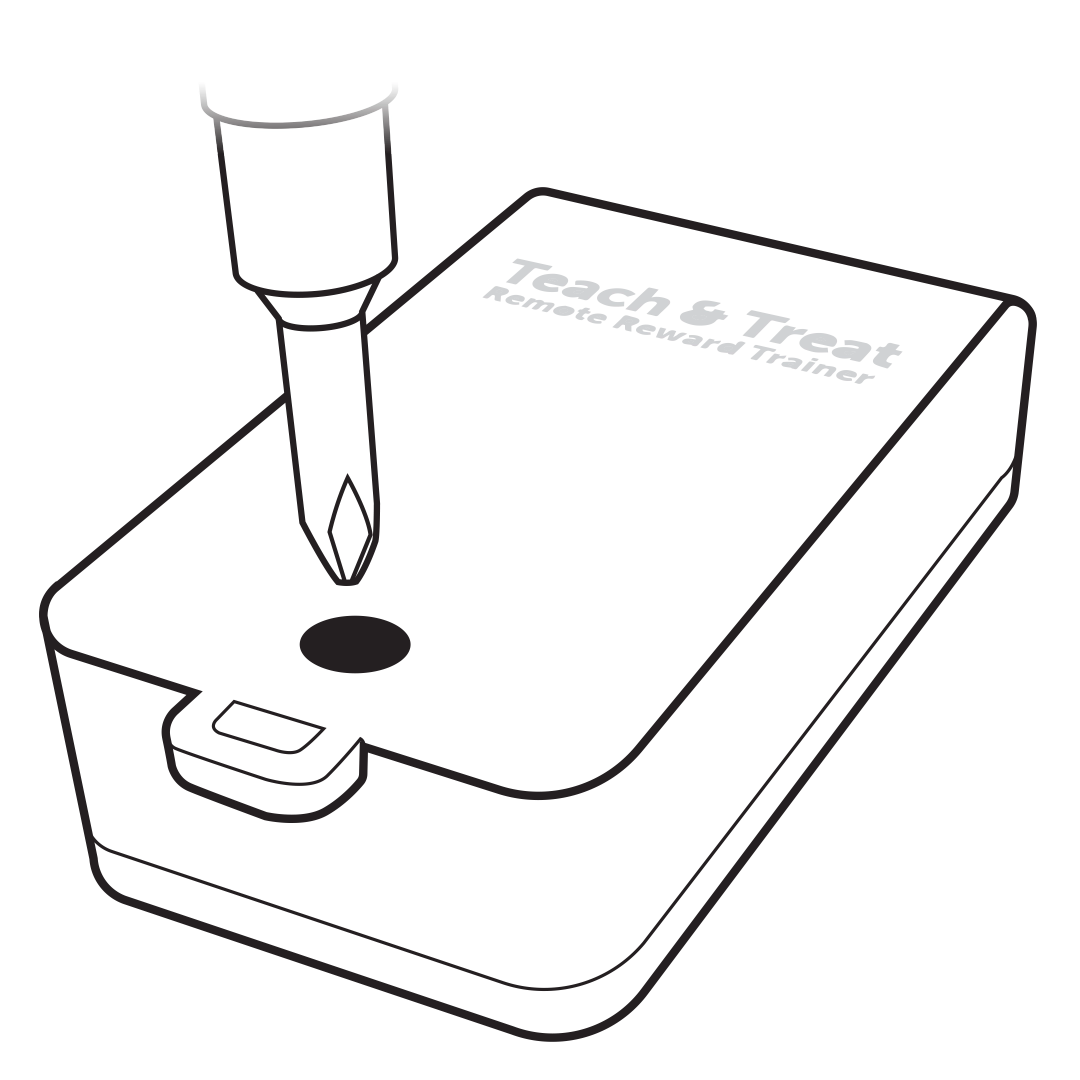
Using a Philips screwdriver, loosen the screw. Carefully remove the back cover; the screw may slide out.

teach-&-treat-how-to-insert-or-change-remote-batteries-step3-push-out-old-batteries-illustrationteach-&-treat-how-to-insert-or-change-remote-batteries-step3-push-out-old-batteries-illustration

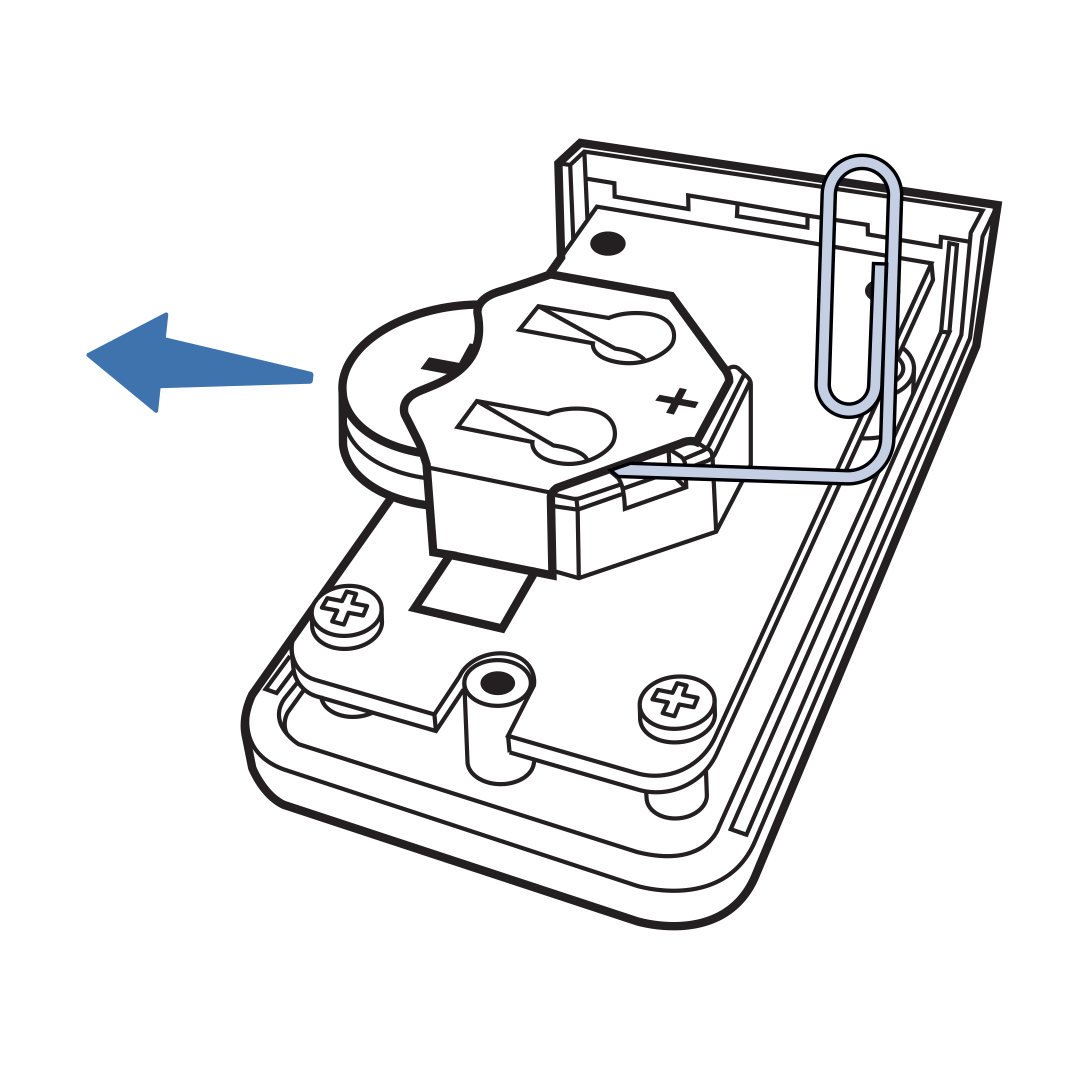
Gently insert the end of a paperclip or pencil into the gap between the metal tab and the plastic battery surround. Carefully push the batteries so they stick out the other side, enough to grab with your fingers.

teach-&-treat-how-to-insert-or-change-remote-batteries-step4-push-out-old-batteries-illustrationteach-&-treat-how-to-insert-or-change-remote-batteries-step4-push-out-old-batteries-illustration

Remove both batteries with your fingers from the open side of the battery housing.

teach-&-treat-how-to-insert-or-change-remote-batteries-step5-replace-old-batteries-illustrationteach-&-treat-how-to-insert-or-change-remote-batteries-step5-replace-old-batteries-illustration

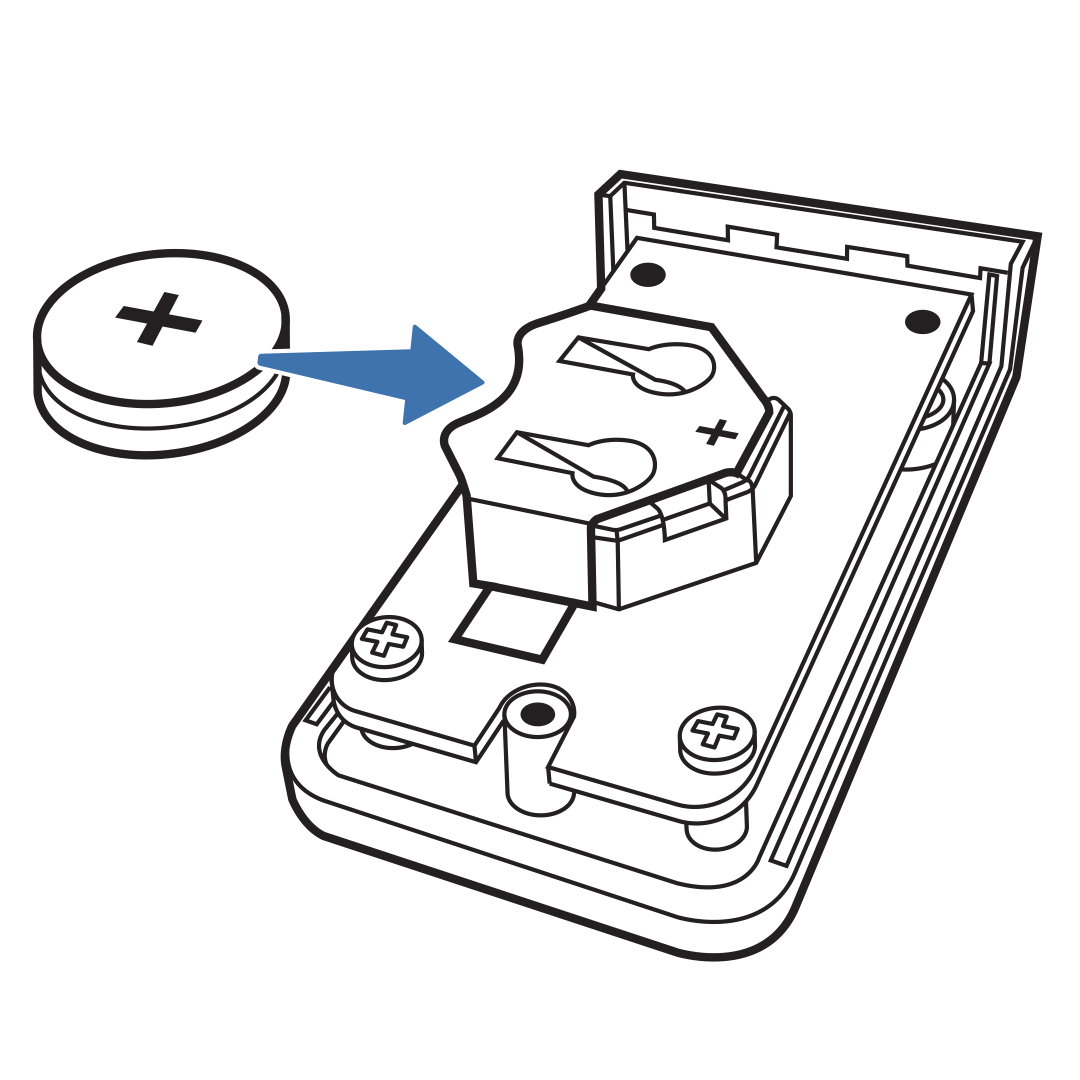
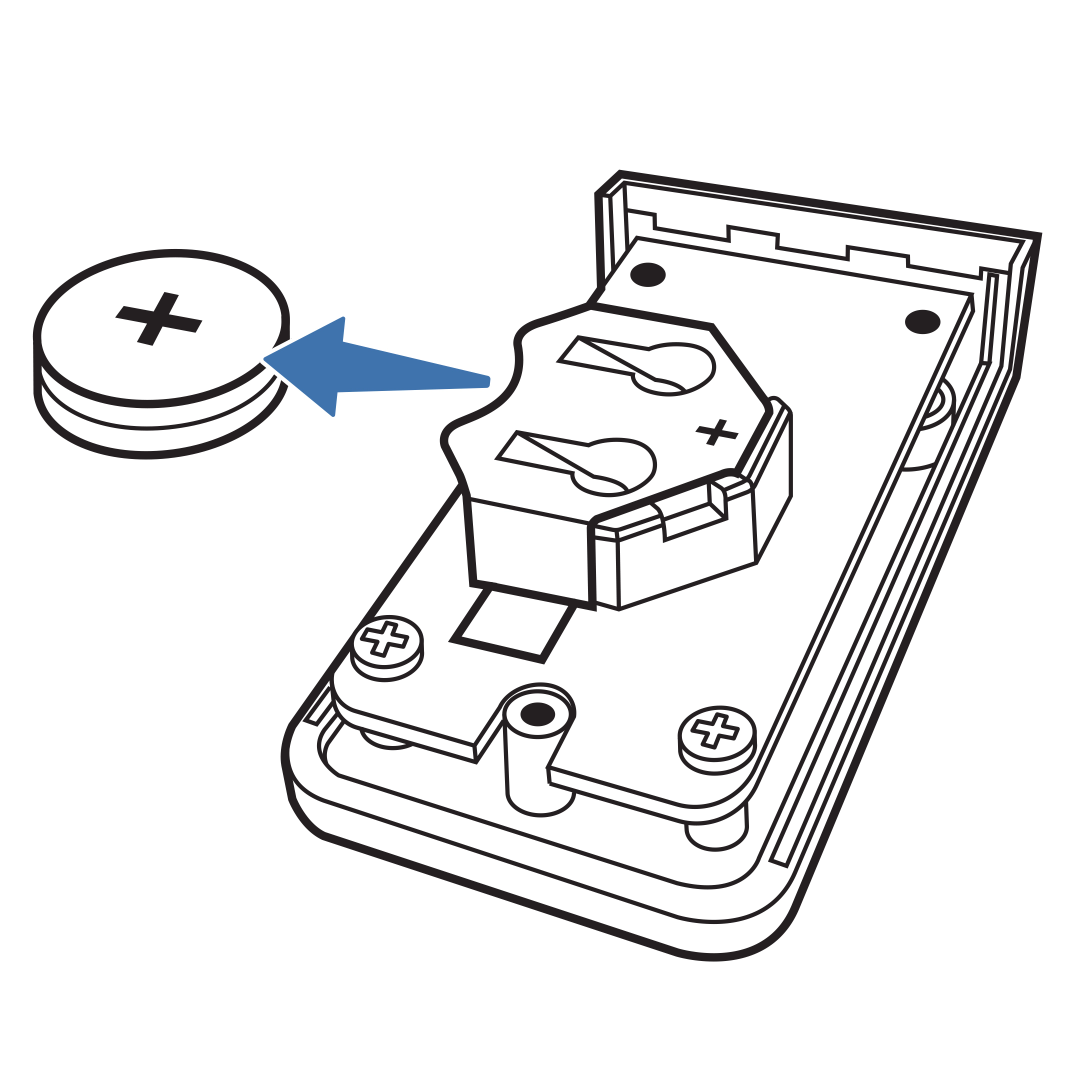
Replace the old batteries with two new CR-2032 batteries by stacking the batteries with the positive (+) side facing up and sliding under the metal tab from the open side.

teach-&-treat-how-to-insert-or-change-remote-batteries-step6-replace-back-cover-remote-illustrationteach-&-treat-how-to-insert-or-change-remote-batteries-step6-replace-back-cover-remote-illustration

Replace the back cover by first inserting the tab into the notch and then closing the back cover down over the front half of the remote. Replace and hand-tighten the screw in the back cover. You can test the remote for power by pressing either button; a green light will glow in the top left corner.

Note: Be cautious not to overtighten the screw.


Contact Customer Care

If you need further assistance, please contact our customer care team.

We’d love your feedback on the page you just read!

Related Articles