Teach & Treat - How To Insert or Change Batteries in the Dispenser
How to Set Up Your PetSafe® Teach & Treat Remote Reward Trainer
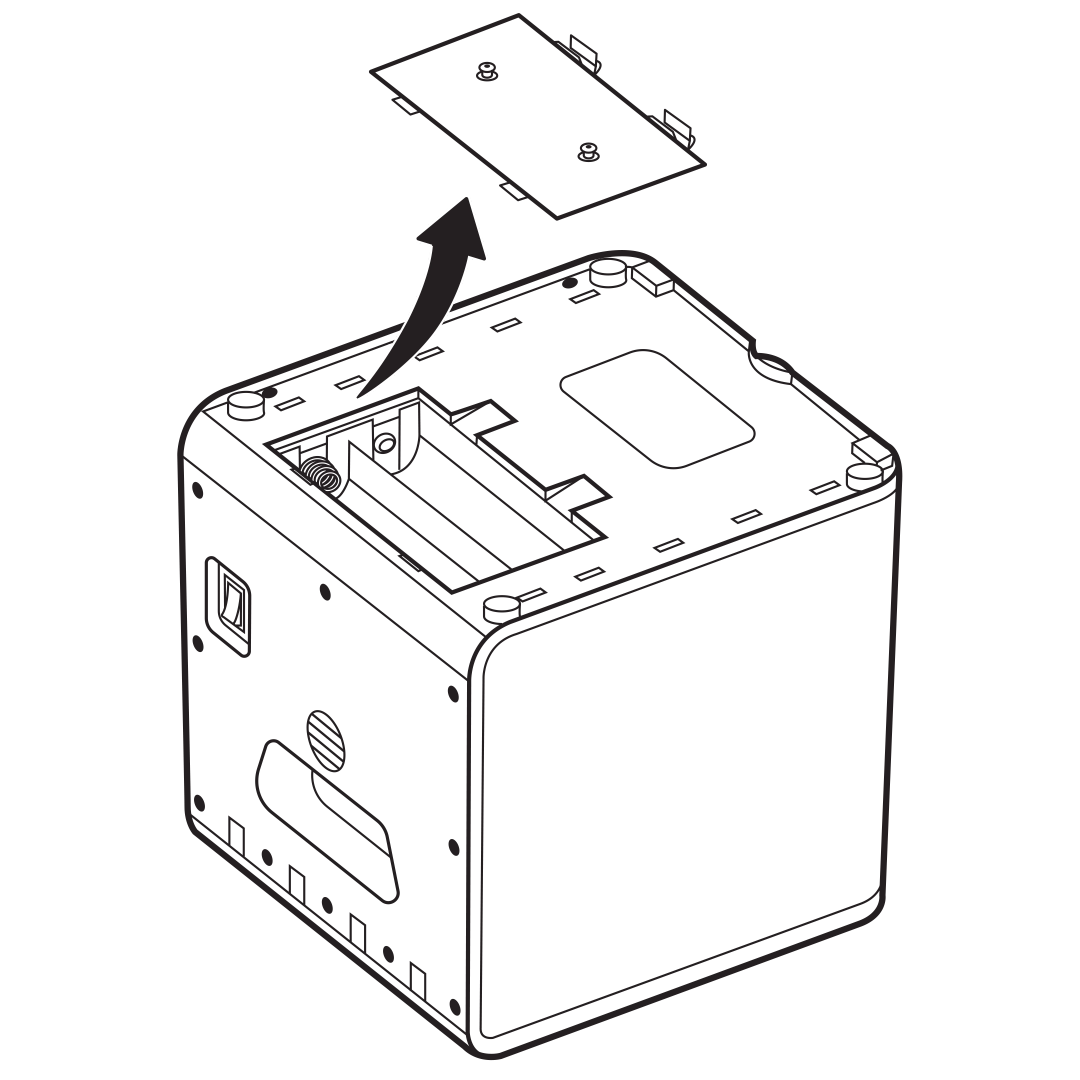
Start by locating the battery compartment on the bottom of the Teach & Treat Dispenser. Using a Philips screwdriver, loosen the two screws. Remove the battery compartment door by pressing the two pressure tabs in at the same time and lifting.
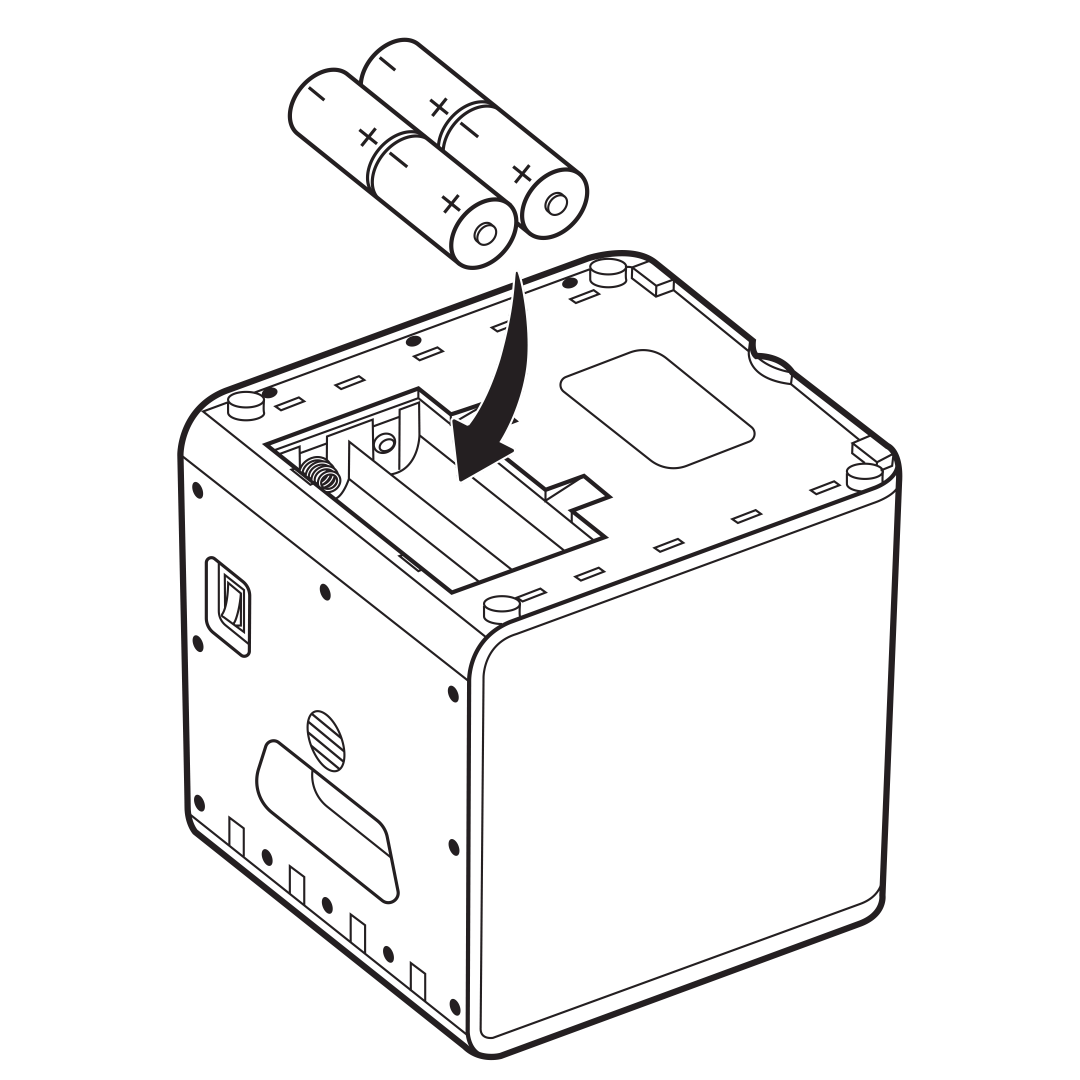
Remove any old batteries. Insert four new D-cell batteries into the compartment, making sure they are the correct direction.
It is important that you use alkaline D-cell batteries.
Replace the battery compartment door by inserting one side into the notches, then pressing closed until the pressure tabs click into place. Replace and hand-tighten the screws in the battery compartment cover.
Note: Be cautious to not overtighten the screws.
Contact Customer Care
If you need further assistance, please contact our customer care team.