Simply Clean® Automatic Litter Box Set Up
Table of Contents
Simply Clean® Automatic Litter Box Setup
Welcome
Welcome to your new PetSafe® Simply Clean® Automatic Litter Box!
What to Expect
Installing the litter box will take approximately one hour.
Must use clumping, scoopable or clay litter.
Acclimation time will vary depending on the cat.
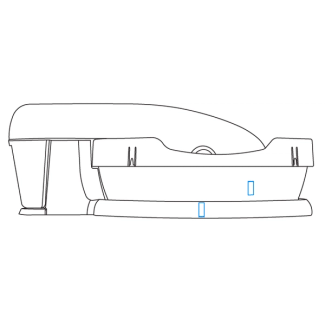
In the Box

Conveyor Cover
Thumb Screws
Litter Guard
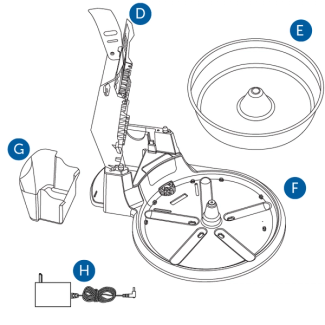
Conveyor
Litter Bowl
Base
Removable Waste Bin
Power Adapter
Assemble Your Litter Box
To begin, place the litter box on a firm, flat surface. Follow the directions below to ensure the litter box receives power and functions properly.

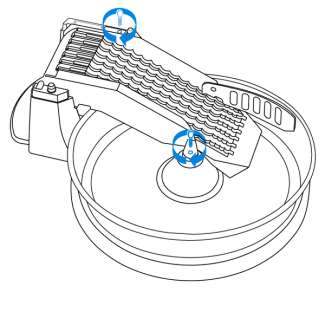
Remove thumb screws from center of the litter bowl and top of the conveyor.
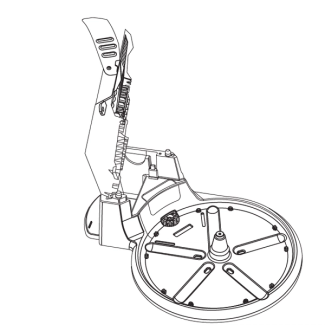
Lift the conveyor to the upright position
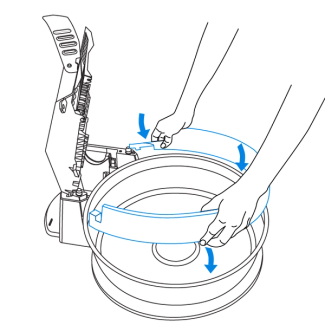
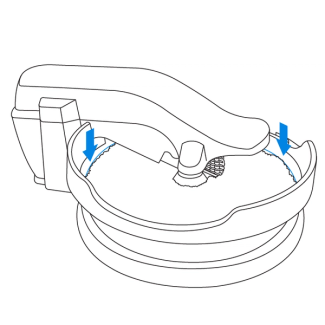
Attach the litter guard to the litter bowl by placing the tab and vertical clips on the litter guard under the bowl lip.
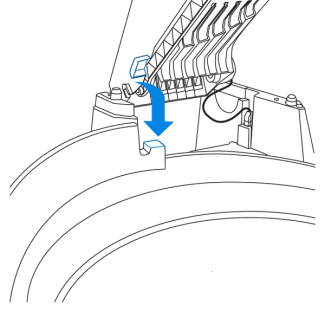
Align the square post on the litter guard with the square hole on the conveyor.
Align the screw holes on the conveyor with the holes on the bowl. Reinstall the screws.
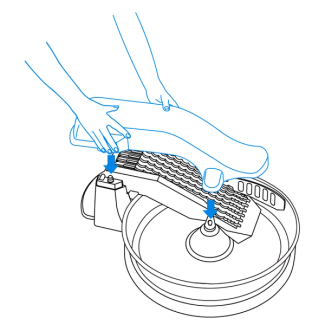
Attach the conveyor cover by aligning the inside holes with the posts and thumb screws and push into place.
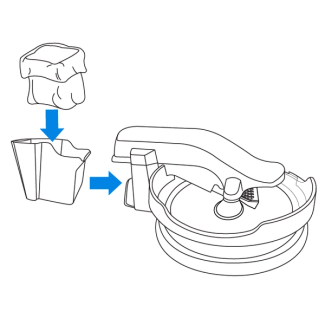
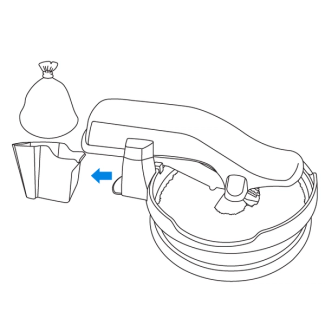
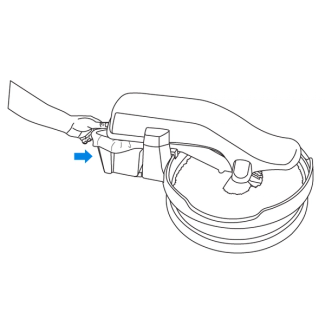
Line the waste bin with a plastic bag and insert into the back of the litter box.
Note: To minimize odors, add a small layer of clean litter and baking soda to the waste bin.
Fill the litter bowl only with clumping, scoopable or clay litter to the fill line.

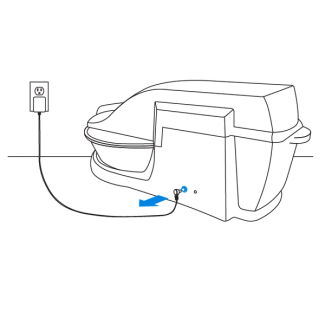
Connect the power adapter to the back of the litter box and plug into a standard electrical outlet. The green light will turn on and the litter box is ready for use.
Note: Ensure that the conveyor and waste bin are properly placed to give the litter box power.
Test Your Litter Box

Line up a piece of tape on the bowl with another piece of tape on the base unit.
Check the location of the tape on the bowl after a few minutes. The pieces of tape should be a few inches apart.
If the Tape has Not Moved
Check that the green light on the back is lit to confirm power.
Make sure the conveyor cover is securely in place and the waste bin is properly installed. If they are not, the system will not have power.
Inspect the bowl motor connection on the bottom of the unit to confirm that it is completely attached.
Maintenance
Waste Removal
For one cat, it is recommended to empty the waste bin every other day. For multiple cats, the waste bin may need to be emptied daily.
Remove the bag in the waste bin and discard of the waste.
Insert a new bag and replace the waste bin. Make sure it is fully inserted into the unit.
Cleaning
We recommend cleaning the Simply Clean® Automatic Litter Box every two weeks for a single cat household or more often with multiple cats.
Unplug the power adapter from the litter box.
Remove the waste bin from the back of the unit and dispose of its contents.
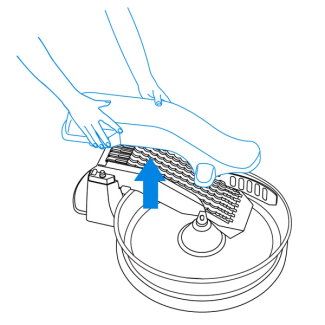
Remove the conveyor cover by lifting up on the sides.
Remove the thumb screws from the center of the litter bowl and the top of the conveyor. Lift the conveyor to the upright position.

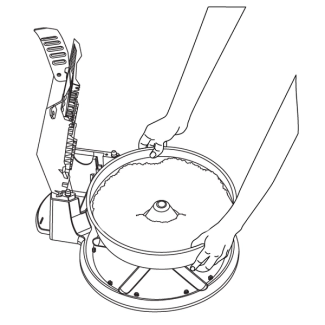
Lift the litter bowl up and dispose of the used litter. Remove any loose litter on the base of the litter box to prevent grinding sounds.
Remove the litter guard by gently pulling up on the tabs at the bottom of the clips and the tab at the end of the guard. Clean the litter guard and edge of bowl if there is any buildup.
Contact Customer Care
If you need further assistance, please contact our customer care team.