Set Up Your Pawz Away® Threshold Pet Barrier
Table of Contents
Welcome
Welcome to your new PetSafe® Pawz Away® Threshold Pet Barrier!
Keep in Mind
The pet barrier can be used for both cats and dogs.
The Safety shut off feature automatically turns the collar off if your pet stays in the barrier range for 15 seconds.
An unlimited amount of collars and pet barriers may be used together.
The pet barrier is compatible with a YardMax® Collar, but the Pawz Away collar is not compatible with the YardMax In-Ground Fence™.
Refrain from having your pet wear the collar longer than 12 hours to avoid skin irritation.
Contents of Package
Collar

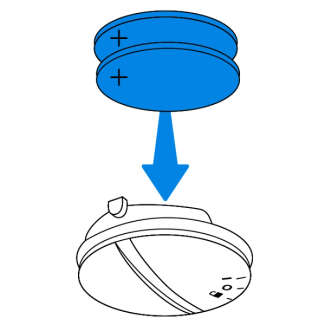
Two CR 2032 Batteries

Test Light Tool
Mounting Strips
Drywall Anchors

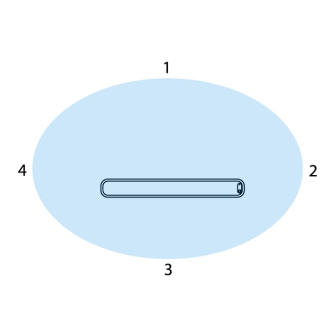
Base Unit

Mounting Template
Additional Tools
These tools are not included.

Scissors

Four AAA Batteries
Lighter
Power Drill

3/16 Drill Bit
Screwdriver
How It Works
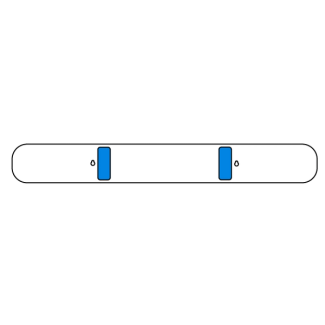
The base unit has four range levels and emits a radio signal along three different sides. The collar receives the signal and sends a correction to your pet to keep them out of an area in your home.
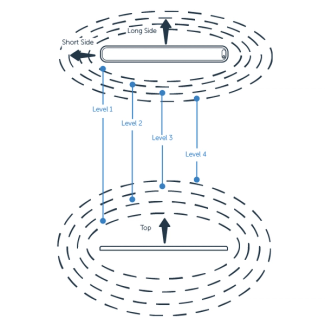
Important: The range is strongest directly over top of the base unit.
Prepare Your Base Unit
Power On
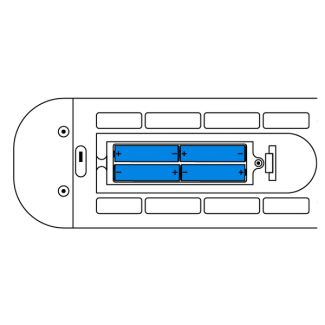
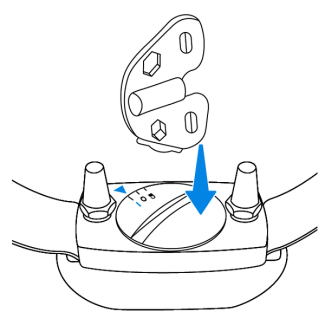
Remove the battery door on the back of the base unit and insert four AAA batteries.

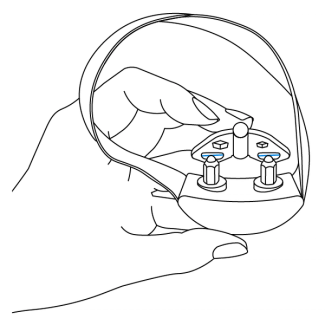
Hold the power button until a green light is seen to turn the base unit on.
The base unit can switch between two modes:
- Standard mode: Collar reaches maximum stimulation in three seconds.
- Training mode: Collar reaches maximum stimulation in two seconds.
Base unit battery life lasts up to nine months on Standard mode and up to four months on Training mode.
Set the Range
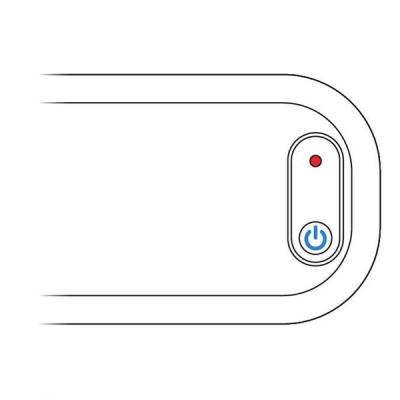
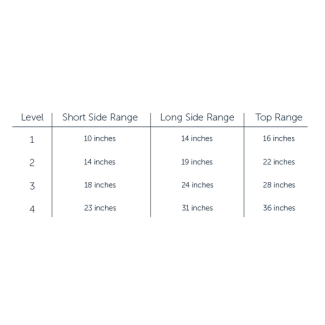
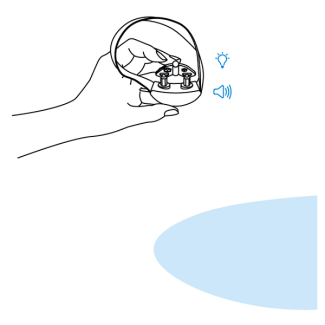
Press the power button and count the number of red flashes to know the current level. Quickly press the button again to change the level.
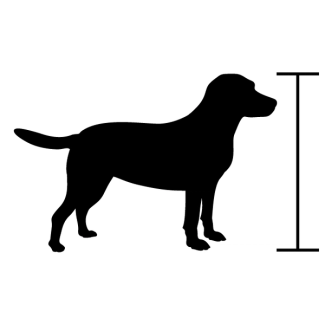
Measure the height of your tallest pet and match the measurement with the Top Range to pick an initial range level.
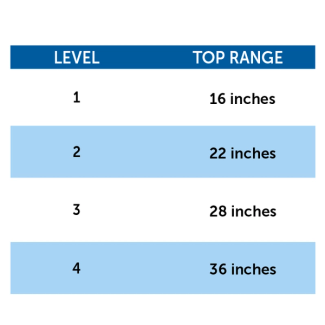
Important: The initial range level may change after testing the system.
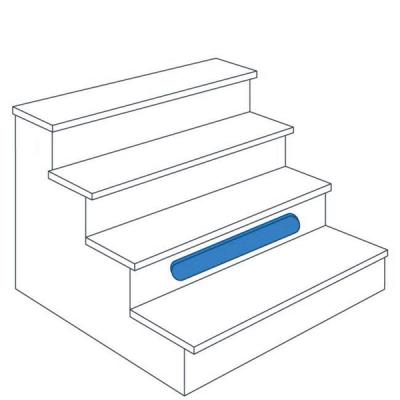
Placement
The base unit may be placed flat on the ground or mounted with the mounting strips or screws. Ensure you place the base unit indoors, five feet away from metal and eight feet away from other pet barriers. Do not use the base unit for deterrence from exterior doors.
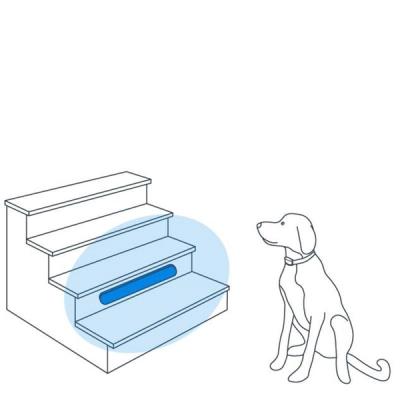
Mounted on stairs
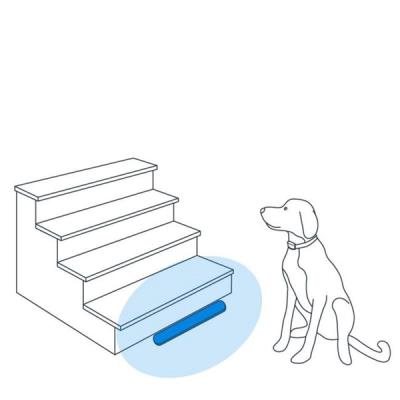
Placed below stairs
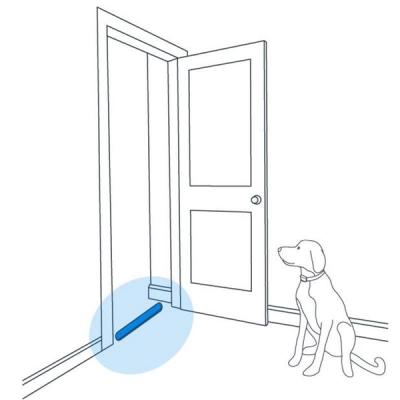
Placed in doorway
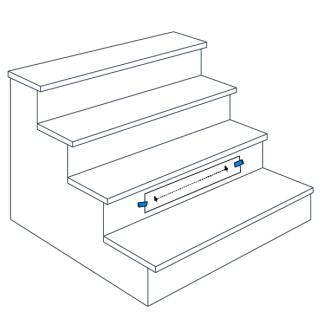
Test the Boundary
Insert Collar Batteries
Turn the battery cap to the lock position using the test light tool, then remove the cap.
Insert two CR 2032 batteries into the battery cap, with the positive side going into the cap.
Place the battery cap into the collar, then use the test light tool to turn it to the | position.
Collar battery life lasts up to three months, depending on use.
Important: The collar emits a low level stimulation when first entering the boundary range, then gradually emits a stronger stimulation depending on the mode of the base unit.
Test the Boundary
Hold the collar probes against the wire on the test light tool and walk toward the pet barrier until the light on the tool flashes.
Important: Hold the collar to match the height of your tallest pet.

Hold the collar probes against the wire on the test light tool.
Position the collar under the tool and at the height of your pet.
Walk toward the barrier until the collar beeps and the test light tool flashes.
Check multiple angles around the area to ensure full coverage.
Test multiple angles to ensure the pet barrier properly restricts your pet from entering the intended area.
Important: If the collar does not activate where expected, adjust the range on the base unit and ensure it is five feet away from metal.
Mount Your Base Unit (Optional)
Option 1: Mount with Adhesive
Peel and place the mounting strips on the back of the base unit.
Hold the base unit firmly in place for 10 seconds to secure it to the surface.
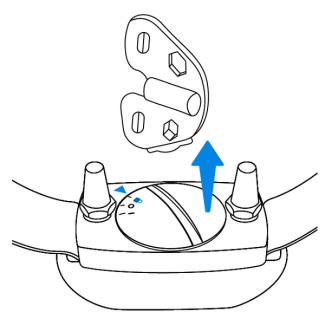
Option 2: Mount with Screws
Tape the mounting template on the surface where the base will be mounted.
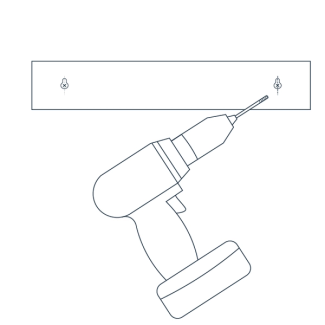
Drill through both marks on the template using a 3/16 drill bit.
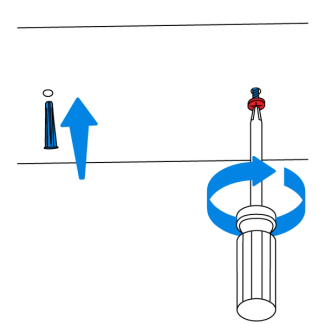
Insert the drywall anchors into the holes, then tighten the drywall screws with a screwdriver. Leave a small part of the screw exposed to hang the base unit on.
Hang the base unit on the screws to secure it in place.Insert the drywall anchors into the holes, then tighten the drywall screws with a screwdriver. Leave a small part of the screw exposed to hang the base unit on.
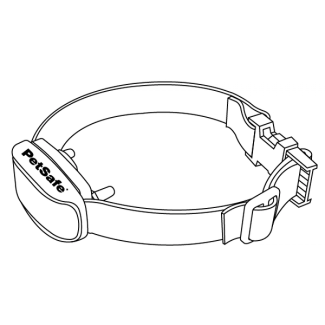
Fit the Collar
For proper use, the collar must be adjusted to fit your pet properly. To ensure the collar is fit correctly, turn the collar off and follow these steps:
Adjust Collar
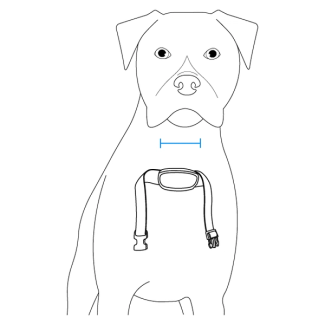
With your dog standing, center the probes on the neck.
Check that only one finger fits between the probe and your dog’s neck.
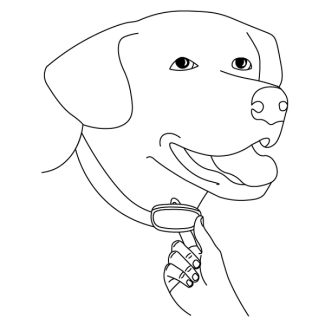
Adjust Strap
Adjust the strap until the collar is snug. Both probes must be touching skin for correction to be felt.
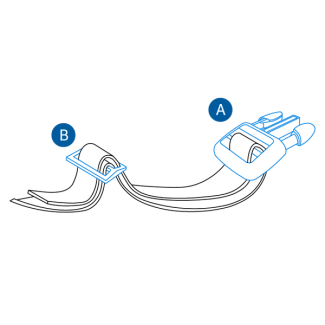
Fasten Buckle
Slide Buckle
To loosen
Move the strap through the Slide Buckle, then pull through the Fasten Buckle.

To tighten
Move the strap up through the Fasten Buckle, then pull through the Slide Buckle
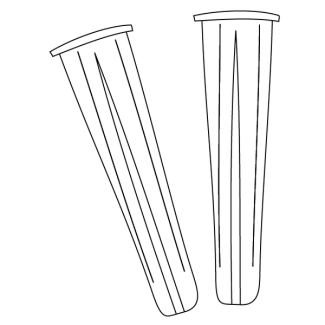
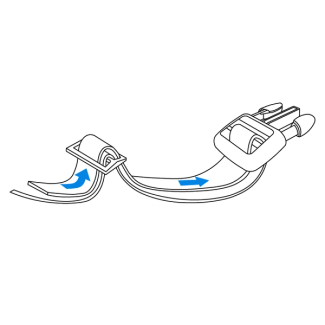
Trim Strap (Optional)
If the strap is too long for your pet, follow the instructions below to trim the excess. The above materials will be needed to begin.

Mark the strap at least 2 inches past the slide buckle.
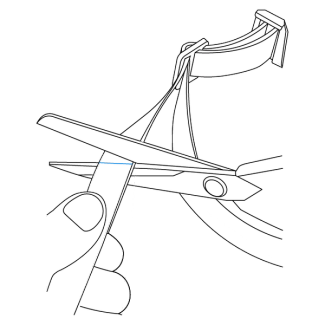
Remove the collar from your dog and trim the strap.
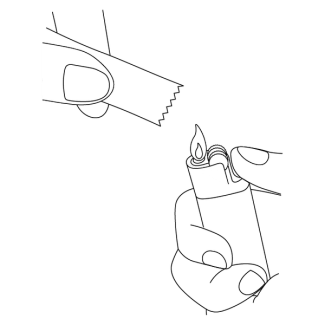
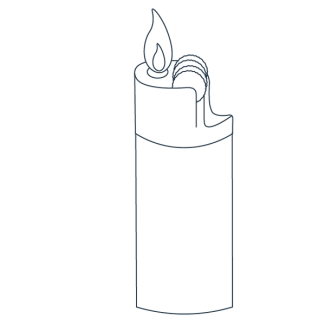
Apply a flame to seal the cut edge.
Acclimation
Acclimating your pet to use a pet barrier will take a few hours of work. Once your pet understands that they are not allowed in the restricted area, they will generally avoid the barrier.
Contact Customer Care
If you need further assistance, please contact our customer care team.