My PetSafe® Pawz Away® 2.0 Outdoor Wireless Pet Barrier Collar Is Not Correcting or My Dog Is Not Responding
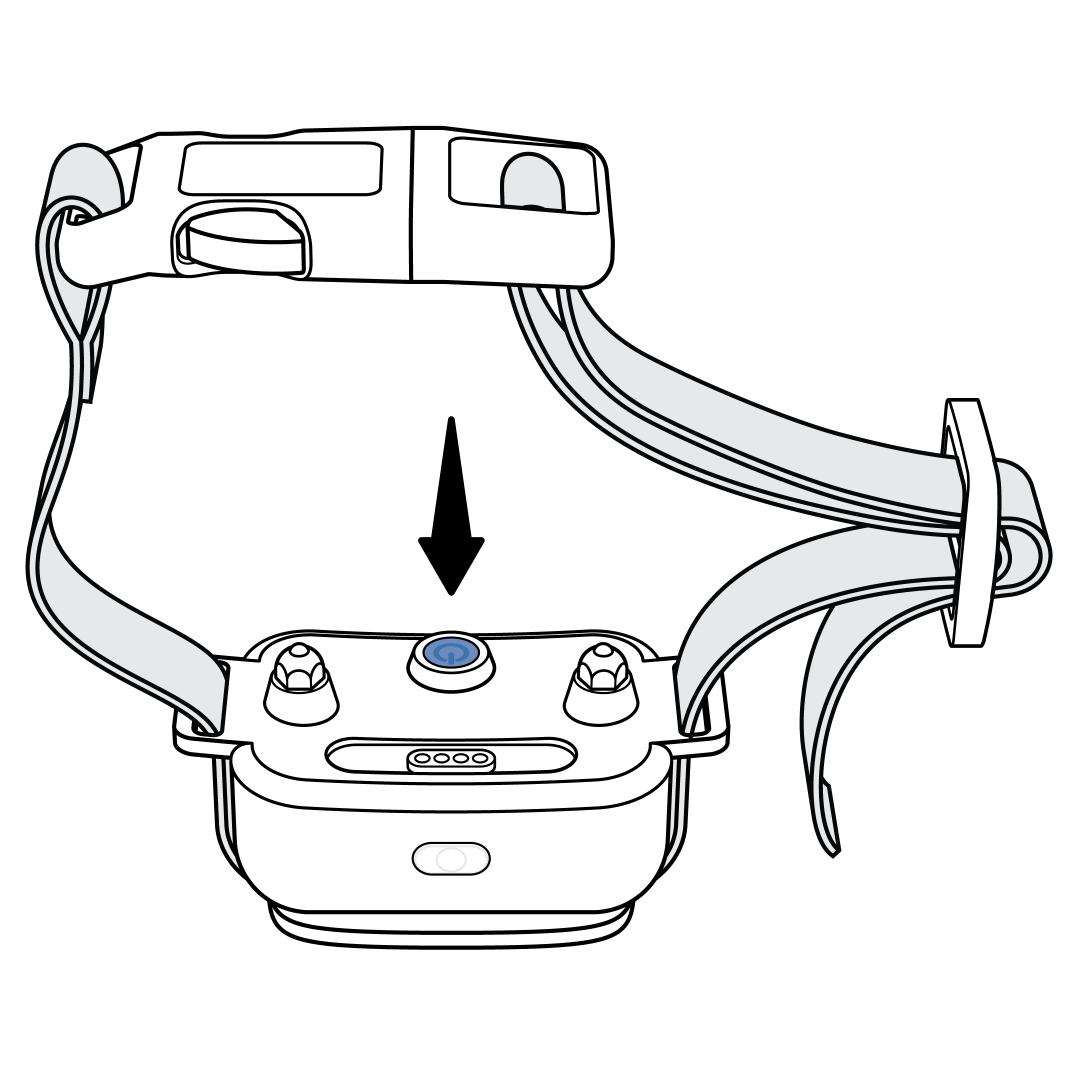
Ensure the collar is charged and powered on. To power it on, press the power button for 1 second until the light is green, then release. The collar will tone and the light will remain solid green for 5 seconds. Then the light will indicate the battery status by blinking either a green or red light once every 5 seconds.
If the light is red or there is no light, charge the collar completely. For more information, visit How To Charge My PetSafe® Pawz Away® 2.0 Collar.
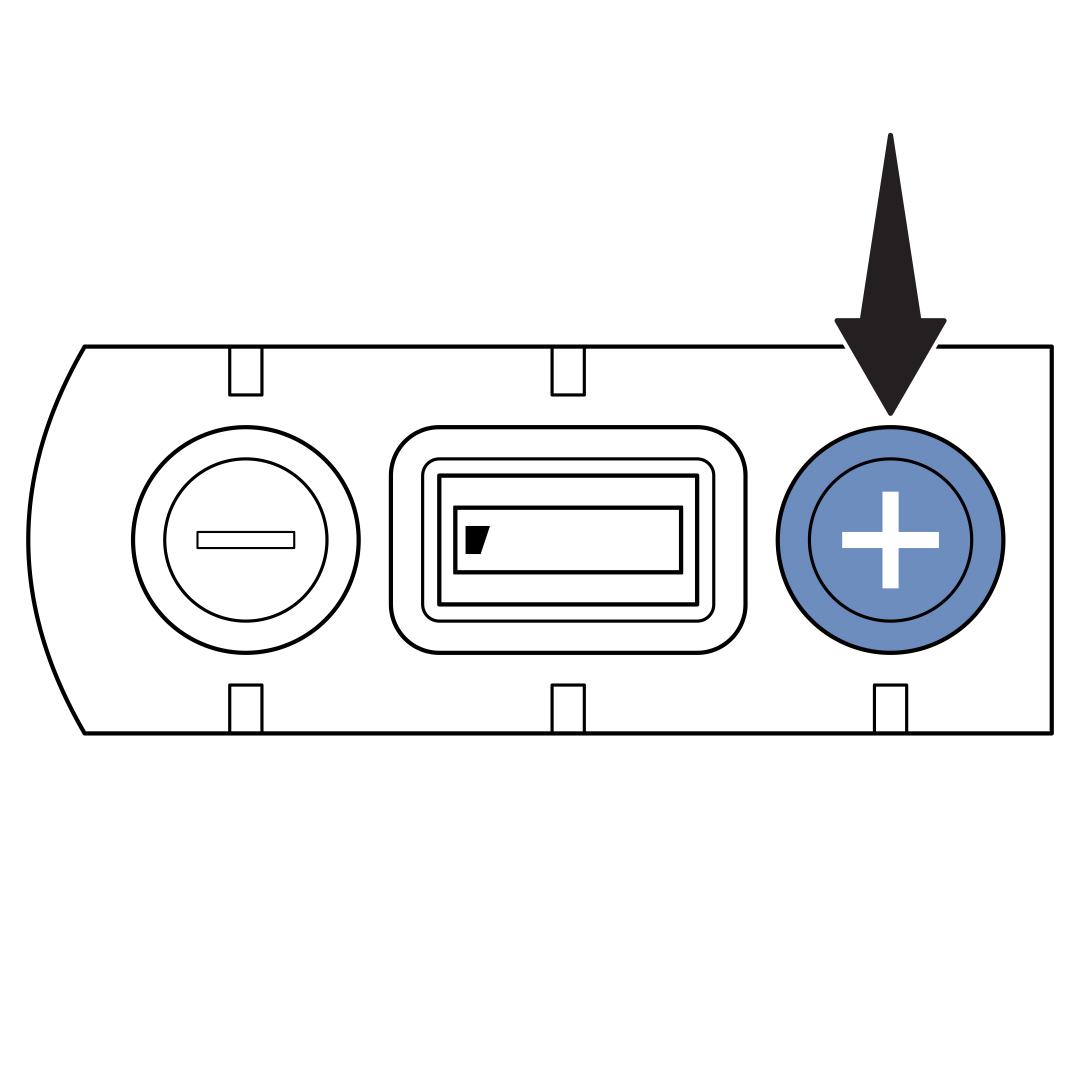
Lift the lid on your outdoor base rock base and ensure the it is powered on. The screen is blank when the outdoor base rock is powered off. Press the up (+) button one time. The screen on the outdoor base rock will display the range bars.
If there is no power, replace the batteries in the outdoor base rock with 4 alkaline D-cell batteries, ensuring they are placed in the correct direction indicated by the plus and minus indicators on each slot. The slots with the springs should touch the negative side of the battery.
Do not use lithium or rechargeable batteries. For more information, visit How To Replace the Batteries in My PetSafe® Pawz Away® 2.0 Outdoor Wireless Pet Barrier.
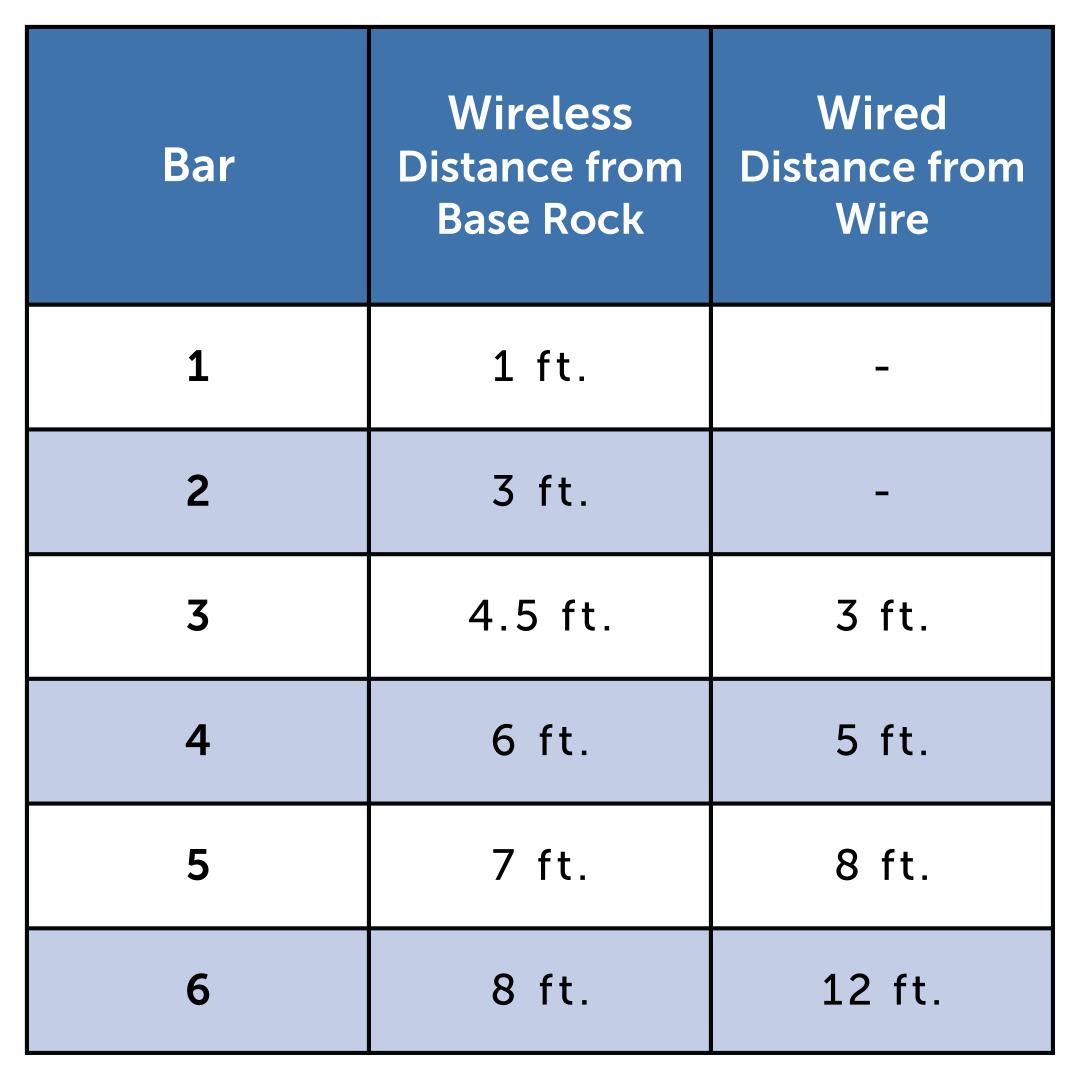
Confirm the range is set appropriately for your desired coverage area. The number of bars on the display represents the distance of the signal. If you are using wire to create the boundary, you need to set the range to a minimum of 3 bars. Adjust the signal range as needed by pressing the up(+) and down (-) buttons.
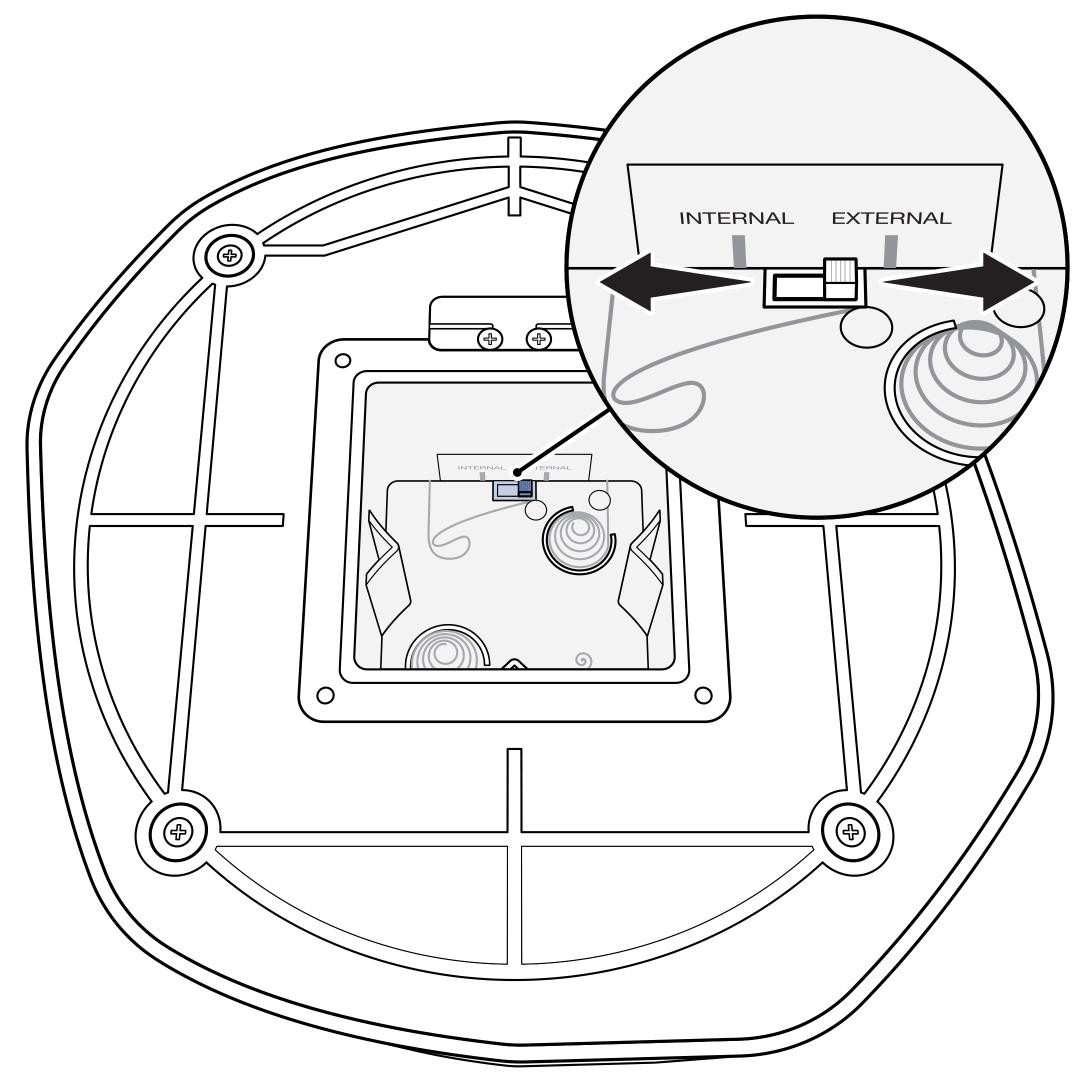
Check the mode switch inside the battery compartment to ensure the proper mode is selected.
- For wired, the mode switch must be set to “External”.
- For wireless, the mode switch must be set to “Internal”.
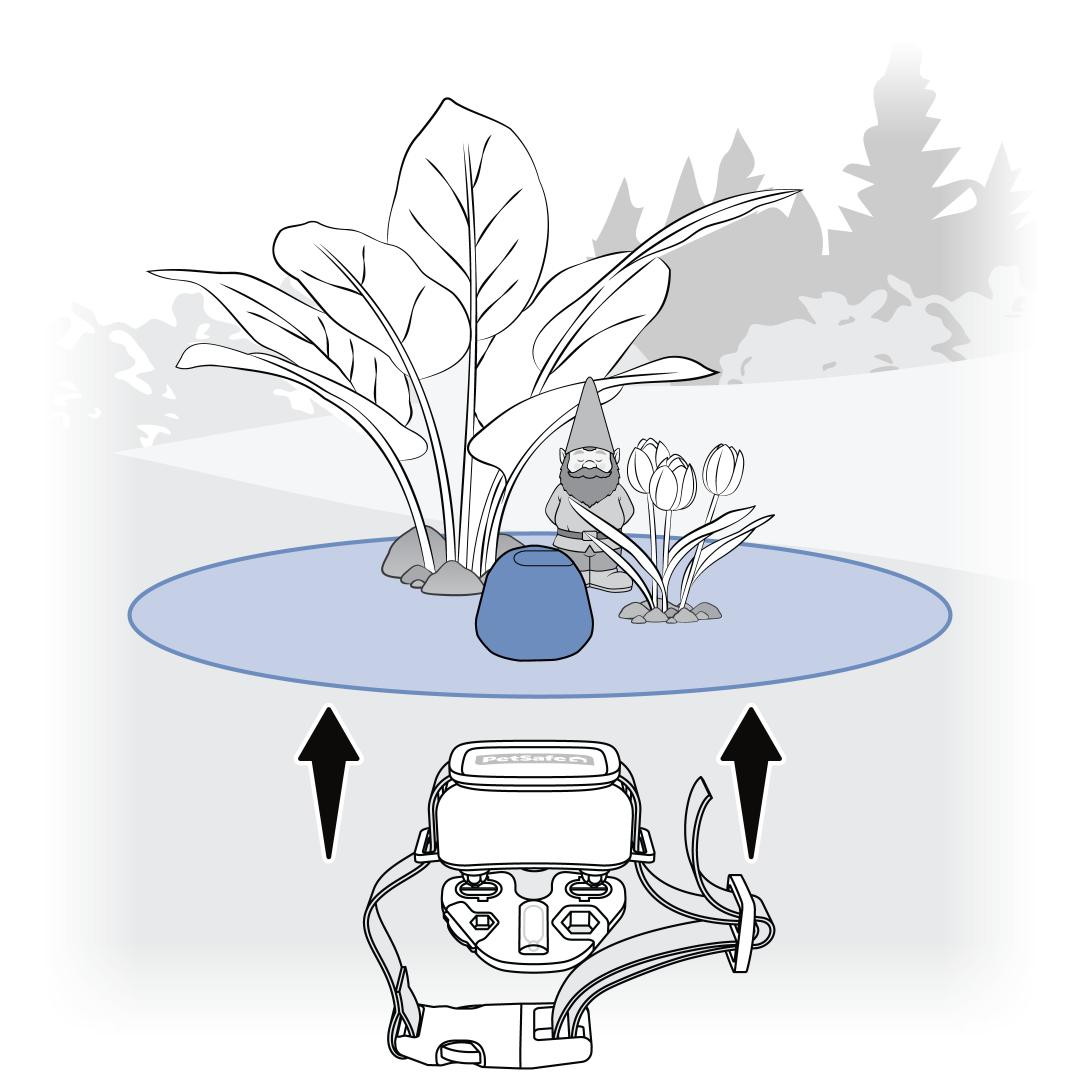
Test the collar by placing the Contact Points on the wires of the Test Light Tool and approaching the outdoor base rock. Be sure to hold it at the height of your dog's neck.
As the collar approaches the off-limits zone, the collar will sound a warning tone. Once the collar enters the zone, it will tone, vibrate and deliver static correction, indicated by an amber flash at the center of the Test Light Tool.
The collar uses Variable Pulse™ technology which starts on the lowest static correction level and pulses in progressively increasing levels of correction strength to the maximum level as the collar stays in the area, up to 15 seconds. The Test Light Tool will increase in brightness as the correction level increases. If the collar times out after 15 seconds of continuous correction, you will need to leave the signal area to allow it to reset before testing again.
When testing outside in bright conditions, we recommend cupping your hand over the Test Light Tool as it may be difficult to see the light activate.
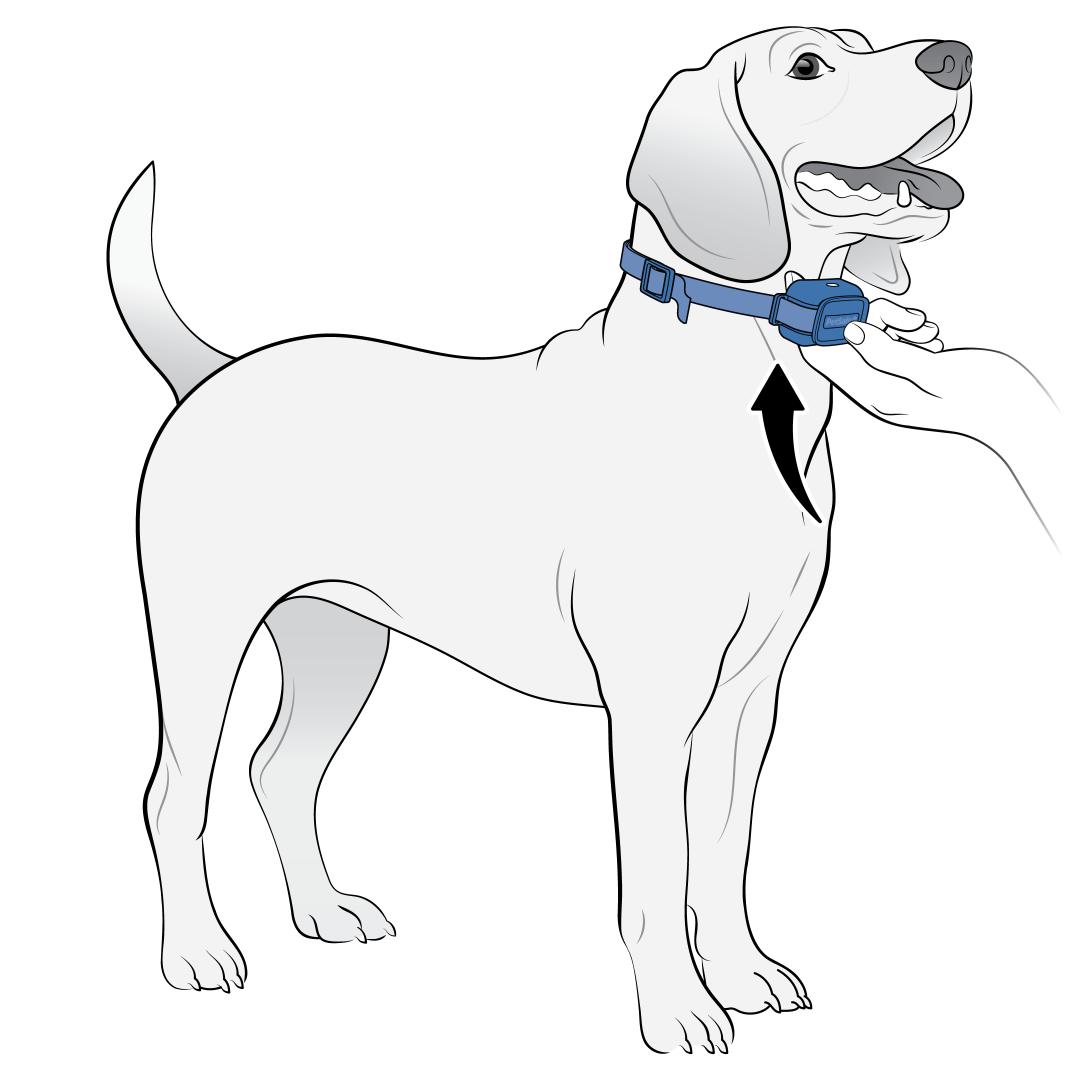
If the collar activates and correction is delivered, ensure the collar is properly fit to your dog. If the collar is not fit correctly, your dog will not feel the correction.
The collar should be tight enough so that you can fit only one finger between a Contact Point and your dog’s neck. For more information on fit, visit How To Fit the PetSafe® Pawz Away® 2.0 Collar on My Dog.
Revisit the training with your dog once proper fit is confirmed. For more information on training, visit How To Train My Dog to the PetSafe® Pawz Away® 2.0 Outdoor Wireless Pet Barrier.
Wired Only: Inspect the wire and insulation for damage. Damage can cause dead zones in the signal or cause signal bleed which would result in the collar only activating right on top of the wire.
If the wire is buried, check the area for recent disturbances that could cause damage such as digging, aerating, rodent burrowing or any other noticeable disturbance.
If the wire appears to be damaged, repair or replace the wire. Use the proper waterproof, silicone gel-filled splices. If only a short amount of wire was originally used or your boundary wire already has several splices, it is best to remove the old wire entirely and replace with new wire instead of repairing it.
If needed, you can purchase a Wire Splice Kit through our website.