Install YardMax® Cordless In-Ground Fence™
Table of Contents
Welcome
Welcome to your new YardMax® Cordless In-Ground Fence™.
A Few Things to Keep In Mind
Installing the wired fence system takes 1 to 2 days.
A minimum of 14 days of training is recommended.
Environmental factors in the yard, such as metal sheds or utility wires, may effect the fence signal.
We recommend calling to have utility lines marked prior to installation to avoid damage to existing lines.
Visit https://call811.com for contact information on marking utility lines at your home.
How the System Works
Parts of the System
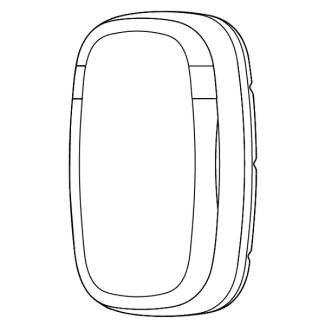
The transmitter is the base unit of the system. It sends a radio signal through the wires attached to the terminals on the bottom.
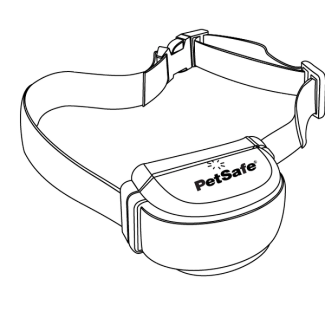
The collar communicates with the radio signal coming from the wire and keeps your pet safely inside the boundary.
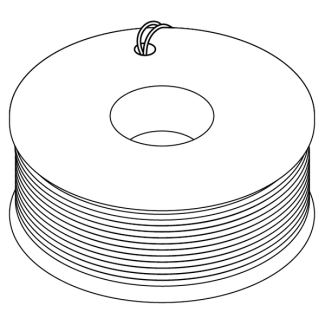
A 500 foot spool of wire comes with the system. The wire determines the boundary for the fence.
Step 1: Plan Your Layout
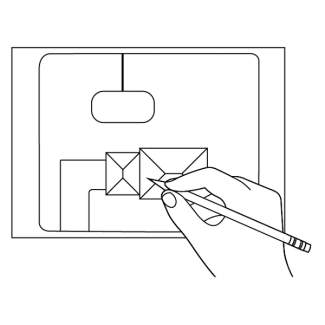
Plan out the fence by drawing it or using the fence planning tool to help make the install process easier.
Up to 1,000 feet of wire may be used.
A Few Things to Keep In Mind
The boundary wire needs to be a complete loop. One end of the wire begins in the base unit terminal. Once the fence is laid out in the yard, the other end of the wire plugs into the second terminal on the base unit.
Have your utilities marked. When placing the fence wire, it’s important to have your utility lines marked to avoid damage and signal interference.
Draw rounded corners. In order to maintain a consistent signal avoid creating 90 degree corners. The fence planning tool does not have rounded corners when the fence is drawn; this is very important when laying the wire.
If your neighbor has an In-Ground Fence™ as well, make sure there is 5-10 feet between both fences.
YardMax® Mode vs. Traditional Mode
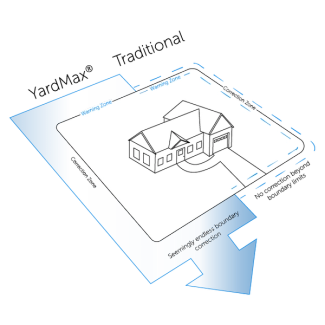
YardMax® Mode
- Warning zone begins at boundary wire
- 30% more yard space for your pet
- Creates the impression of an endless boundary
- Compatible with Pawz Away® products
- 15 second time out feature
Traditional Mode
- Warning zone begins before the boundary wire
- Off-limits contained areas within your yard, such as garden or pool
- The width is set with the boundary width control dial
- Compatible with Pawz Away® products
- 15 second time out feature
Single Loop Layouts

Single loop layouts are best to contain your dog in both the front and back yard.

Twisted wire cancels out the radio signal and allows your pet to cross without receiving a static stimulation. To cancel the signal in the wire, two pieces of the wire must be twisted together 10-12 times per foot.
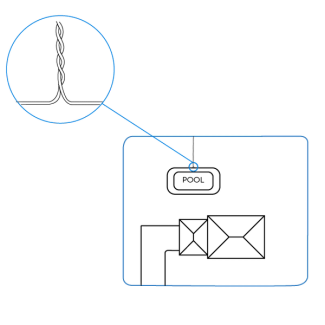
When containing a specific area, such as a pool or garden within the yard, twist wire between the main fence wire and the contained area within the yard.

When containing the front and back yards separately, create a loop on either side of the home, using the home as a barrier. Ensure that there is at least five feet between the parallel wires.
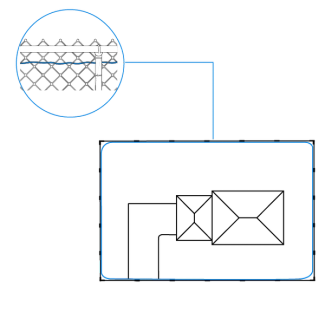
Running the wire around an existing fence creates an additional barrier that helps keep your dog safely in the yard.
Double Loop Layouts
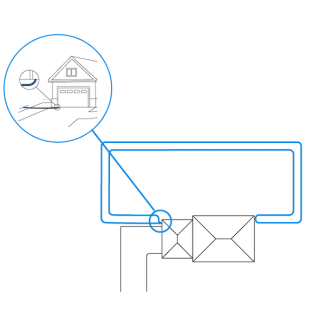
Double loop layouts are best to contain your dog in the front or backyard only. This layout is also works well when combining the in-ground fence with an existing fence.
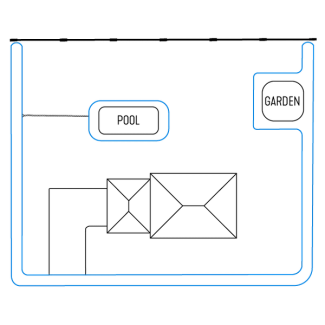
If there is an area near the boundary that your dog should be kept away from, include this area within the boundary wire.

If the yard already has a fence and only one side needs a boundary, a double loop layout is needed.
Utility Wires
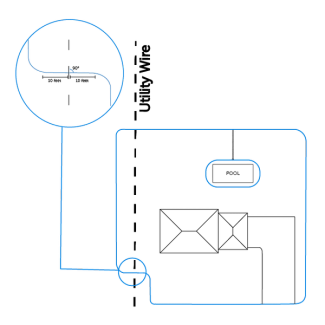
Utility wires can interfere with the signal. If crossing utility wires is necessary, the wire must cross at a 90 degree angle to avoid interference.
Step 2: Prepare the System
Materials
Please have the following contents ready for set up:
Collar
Base Unit
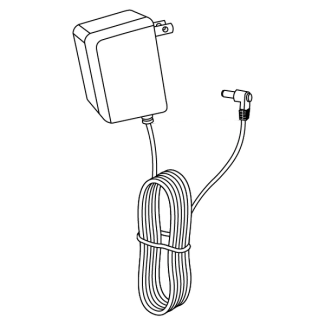
Collar Charger
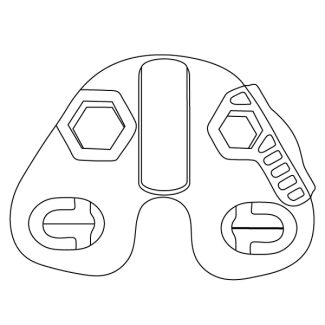
Test Light Tool
Wire
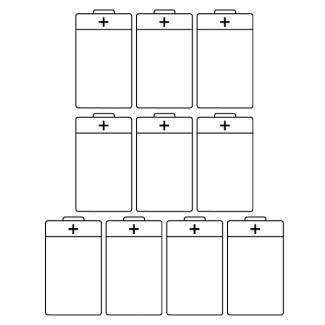
10 D Batteries
(Not Included)
Tools
These additional tools may also help with the setup process:

Power Drill

Wire Stripping Pliers
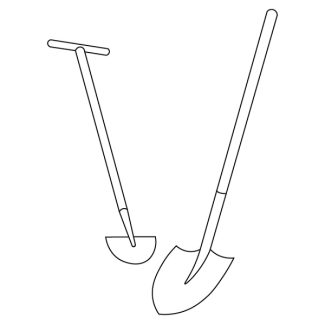
Shovel or Lawn Edger
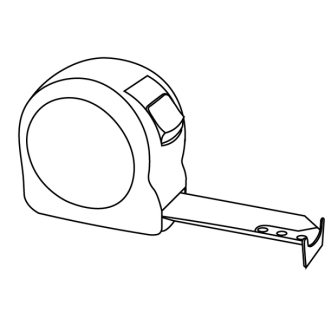
Tape Measure
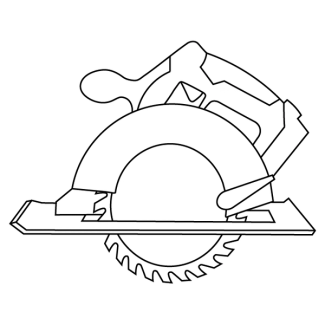
Circular Saw

Phillips Screwdriver
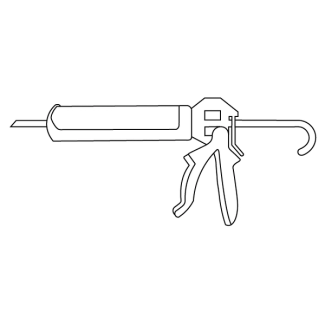
Silicone Caulk
Collar
To begin setting up your system, the collar needs a full charge, this typically lasts up to three months depending on the frequency of use.
Important: When the battery is low, the collar flashes red every five seconds.
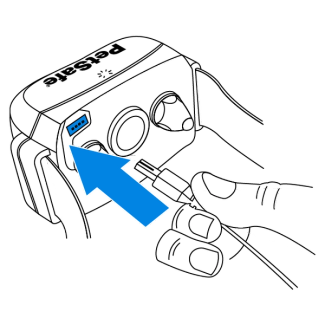
Plug in the collar for 2-3 hours to receive a full charge before using the system. The light on the collar turns green when it reaches a full charge.

The collar automatically turns on when it is taken off the charger. To turn the collar on otherwise, press the mode button for one second.
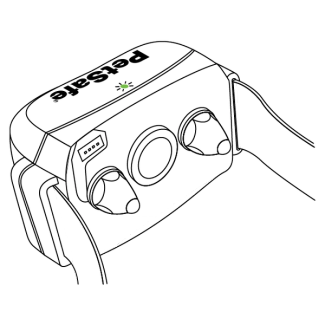
A green light will flash to represent that the collar is on, followed by a light indicating the battery status.
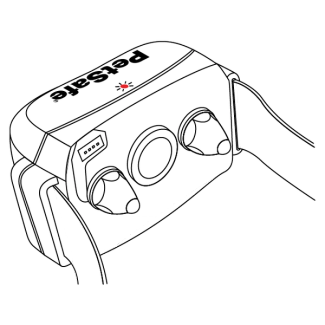
A series of red flashes will follow indicating the collar level setting.
Collar battery life lasts up to 3 months, depending on use.
Collar Level
Follow these steps to learn how to set the collar level.
Press and hold the mode button until a red light is seen.
A series of red flashes will follow indicating the current setting of the collar level.
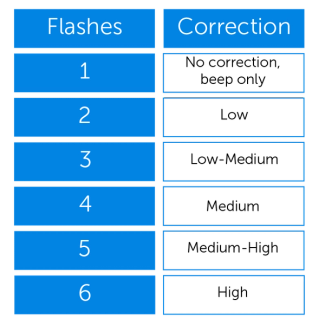
To change the level, quickly press and hold the mode button again until a red light is seen. Count the number of flashes to confirm the level has increased.
Set the collar to level 6 to create the brightest light on the test light tool during testing.
If the collar does not light up when pressing the mode button, contact our Customer Care Team.
Step 3: Prepare Your Base Unit
Install Batteries
The base unit requires 10 D batteries (not included) to power on.
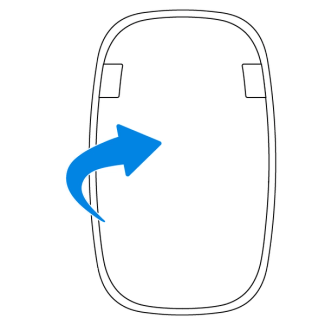
Remove the magnetic face plate from the base unit.
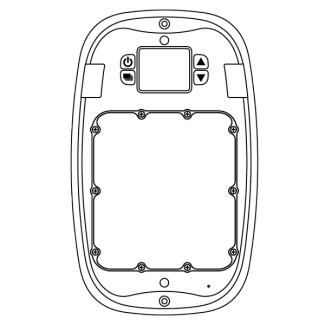
Use a Phillips screwdriver to remove the screws on the battery door.
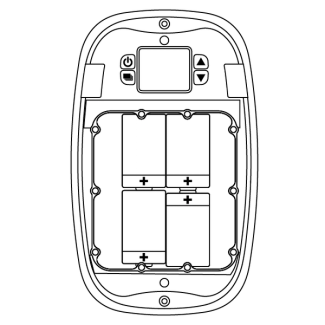
Insert four D batteries into the bottom row of the base unit.
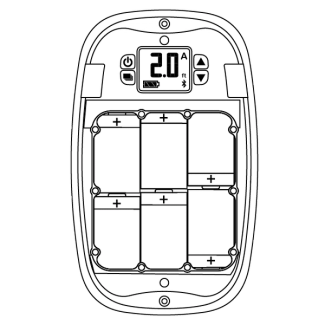
Insert the remaining six D batteries into the top row of the base unit, then reattach the battery door.
Important: Place the batteries into the base unit in the same order as the diagrams above.
Base unit battery life lasts 9-12 months, depending on use.
Program the Base Unit
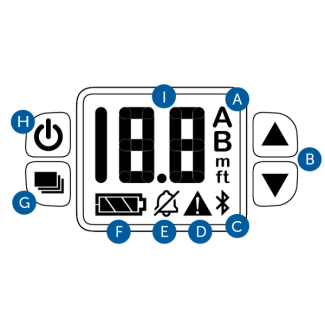
A: YardMax® Mode:
boundary width is endless
B: Traditional Mode:
boundary width is adjustable
Up and Down Button
Adjusts range or mode, depending on current selection
Bluetooth
Flashes when powered on, allows the base unit to receive updates
System Issue
Indicates that there is an issue with the system causing the alarm to sound. Troubleshooting is required.
Alarm Silenced
Indicates that the base unit alarm has been silenced
Battery Status
Displays the current battery life
Select Button
Navigates through range and mode selection
Power Button
Powers the base unit on and off
Boundary Range
YardMax® Mode:
Adjusts boundary height
Traditional Mode:
Adjusts boundary width
Choose a boundary mode to program the base unit:
YardMax® Mode
In YardMax® mode, the boundary width is endless and the range is based on the height of your pet. The warning zone begins directly after the boundary wire.
Traditional Mode
In Traditional mode, the boundary width is determined by the range selection, and determines where the warning zone begins.
YardMax® Mode
Ensure the base unit is powered on before programming. To power on the base unit, hold the power button for five seconds. An alarm will sound because no wire is attached, press any button other than the power button to silence the alarm.
Important: When programming, the current setting will flash until a selection is made.

Measure the height of your pet, then add 1 foot.

Press the select button two times to navigate to the mode, then press the up button to select mode A.
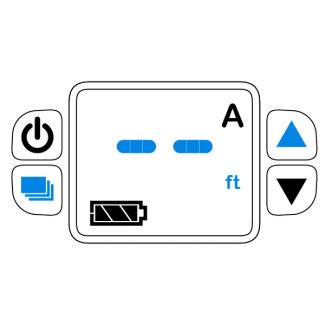
Press the select button two times to navigate to boundary range, then press the up button to enter your pet’s height plus 1 foot.
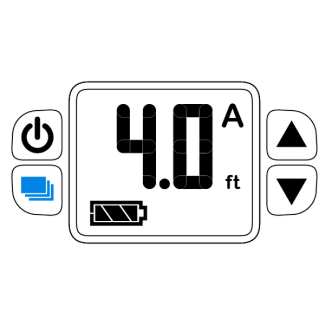
Press the select button two times to finish programming, then power the base unit off.
Traditional Mode
Ensure the base unit is powered on before programming. To power on the base unit, hold the power button for five seconds. An alarm will sound because no wire is attached, press any button other than the power button to silence the alarm.
Important: You may choose a boundary width between 2 feet and 15 feet.


Important: When programming, the current setting will flash until a selection is made.
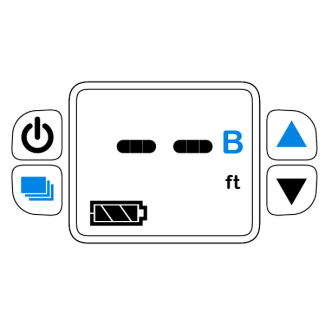
Press the select button two times to navigate to the mode, then press the up button to select mode B.
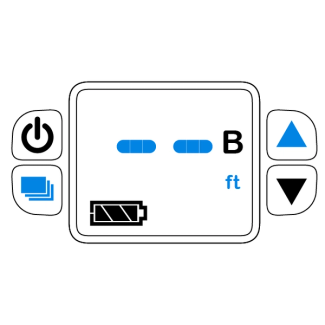
Press the select button two times to navigate to boundary range, then press the up button to enter the desired boundary width.
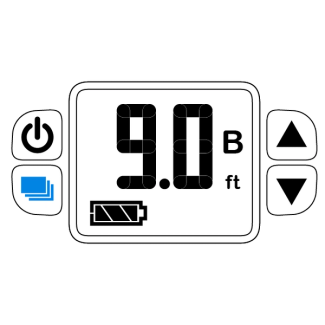
Press the select button two times to finish programming, then power the base unit off.
Step 4: Prepare Your Boundary
Base Unit Location
The base unit can be placed outdoors or indoors, allowing you to pick a convenient location. Keep in mind, the base unit should not be placed in standing water or areas likely to have standing water in heavy rains.

Outdoors
Place in a shaded area anywhere outside that is at least three feet away from metal.
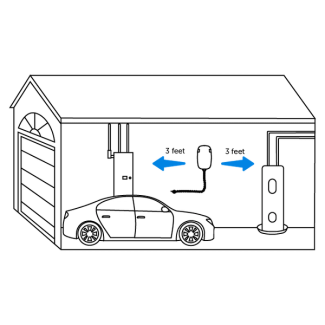
Indoors
Place indoors in an area that is at least three feet away from metal.

If you cannot place the base unit near a window or door, drill an access hole for the wire.
Layout the Wire
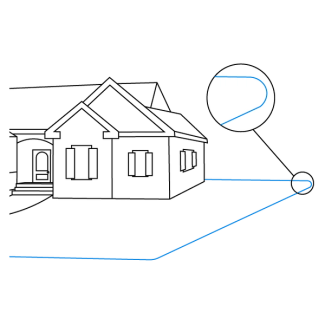
Place the wire on top of the ground to test the layout before burying. Have the pre-planned layout from step 1 available to follow when laying out the wire.
Twisted Wire

Twist the wire that connects the boundary to the base unit. The wire can be twisted by hand or by using a drill, ensure it has 10-12 twists per foot.
Important: Traditional mode is the only mode that allows twisted wire to contain a specific area, such as a pool or a garden.
Splice the Wire
If your layout requires additional wire, the wire will have to be spliced together to complete the boundary.
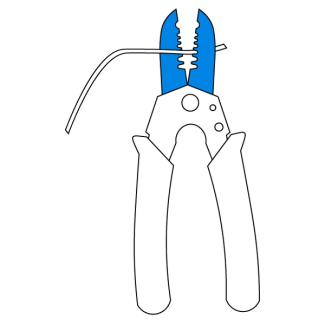
Strip 3/8 inch of insulation from the end of each wire.
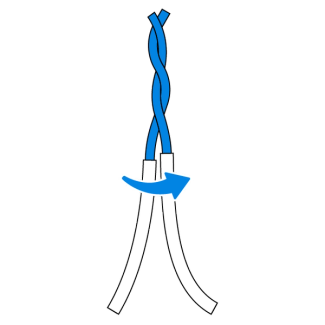
Twist the exposed wire together.
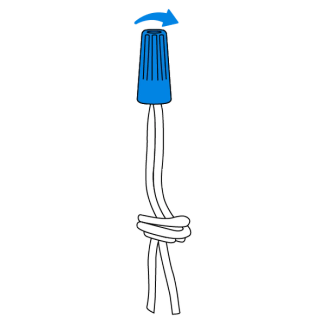
Twist a wire cap over the wires. Tie a loose knot in the wire to help secure the wires.
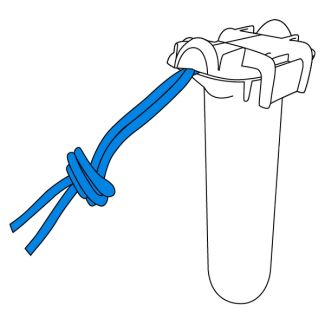
Insert the wires into a splice capsule, then close the capsule.
Important: Do not use heat shrink or crimp the wire to splice.
Attach Wire to the Base Unit
Strip 3/8 inch of insulation from the end of each wire.
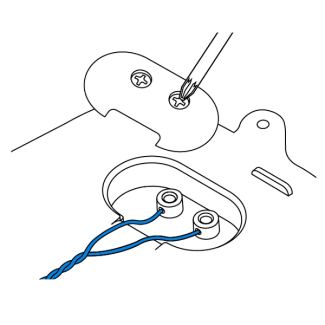
Unscrew the wire cover on the back of the base unit, then insert the boundary wire to the terminals.
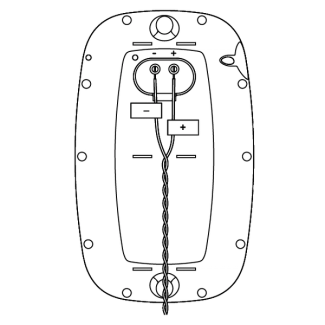
Wrap the + sticker around one wire, then the - sticker around the other.
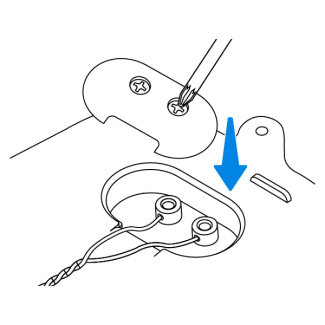
Attach the wire cover back onto the base unit. Tighten until resistance is felt.
Ensure the base unit is powered on before testing the boundary. To power on the base unit, hold the power button for 5 seconds.
Test the Boundary
For testing purposes only, set the collar to level 6. This helps create the brightest light on the test light tool to ensure visibility when testing the fence.
Important: Set the collar back to Level 1 when training begins.
Follow these instructions to ensure the system is working properly.

Hold the collar probes against the wire on the test light tool.

Position the collar under the tool and hold at the height of your pet.

Walk toward the wire until the collar beeps and the tool flashes.

Test over twisted wire to ensure no activation from the collar.
YardMax® Mode Only:
If the collar is activating inside the boundary, flip the position of the wires marked + and - in the base unit.
Check the twisted wire to make sure the signal is inactive.

Fluctuation in the boundary is to be expected. Trial and success is recommended to find the boundary range that works best for your yard.
If in Traditional mode, test on a low and high range to ensure no signal interference. Make sure to test any adjustments made to the boundary.

LOW

HIGH
Step 5: Install Your Wire
Bury the Wire
After testing the system, follow the instructions below to bury the wire.
Important: Disconnect the wire from the base unit before burying.
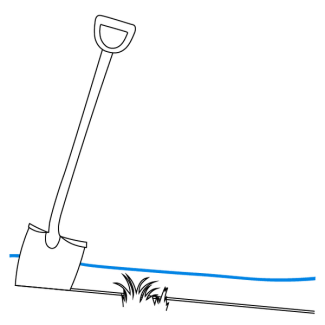
Dig a narrow trench 1-3 inches deep. The trench only needs to be as wide as the wire.
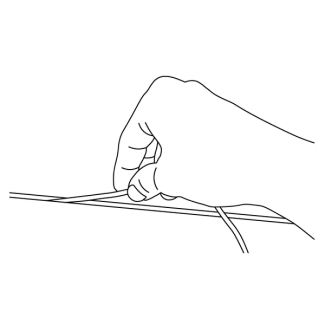
Place the wire loosely into the trench to allow the wire to expand with temperature changes.
Note: A paint stick can be used to press the wire into a narrow trench.
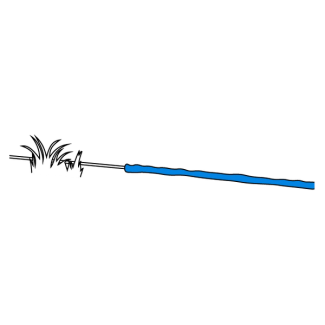
Cover the trench using excess dirt.
Important: If the ground is rough or rocky, consider installing wire in a protective tube, such as a garden hose or PVC pipe.
Attach to a Fence
The boundary wire can only be attached to a wooden or chain link fence. When laying a double loop, ensure the wires are at least 5 feet apart.
Wooden Fence
Use fence staples to attach the boundary wire to the fence. Avoid driving the staple in all the way and damaging the insulation on the wire.

Single loop
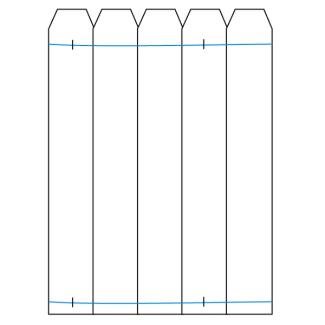
Double loop
Chain Link Fence
Weave the boundary wire through the fence to secure it in place. Zip ties can also be used, but make sure to leave extra space to avoid damaging the insulation on the wire.
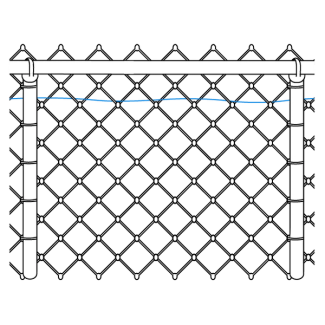
Single loop
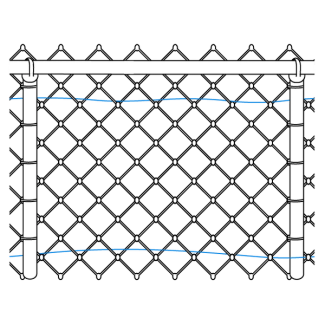
Double loop
Gates
Bury the boundary wire in the ground to cross gate openings.
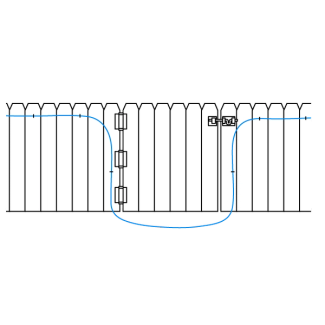
Single loop
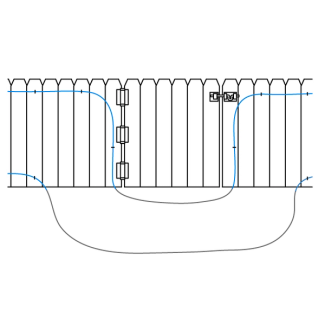
Double loop
Crossing a Hard Surface
If the wire needs to cross a hard surface, such as a driveway or sidewalk, follow the instructions below.
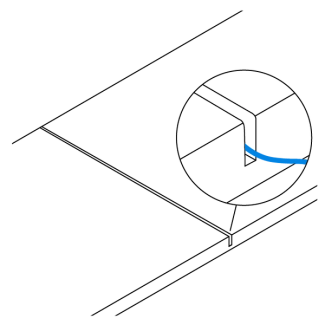
If there is an existing expansion joint, use a blunt tool, such as a wooden paint stick, to clean debris out, then run the wire through it.
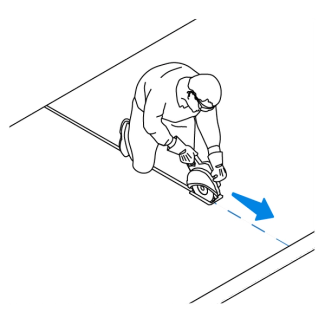
If there is no expansion joint, use a circular saw to cut a path, then run the wire through it.
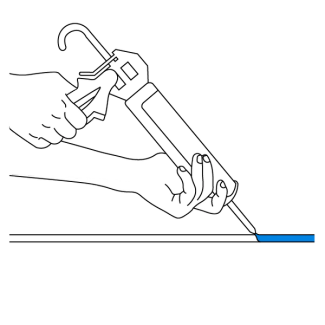
Cover the path in the driveway with a waterproof compound, such as silicone caulk, to protect the wire from damage.
Alternative to Burying
If you run the wire somewhere it can not be buried, such as gravel driveway or garden, make sure to place it in a low traffic area.
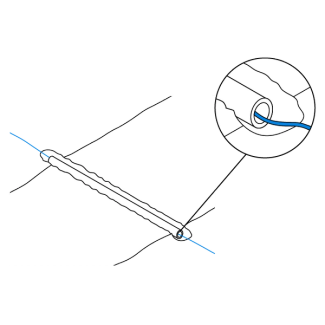
Run the wire through PVC or rubber hosing to keep it protected. Do not place in metal as it will interfere with the signal.
Place the Boundary Flags

Walk toward the boundary until the collar beeps and the tool flashes.

Place a flag where the collar starts to beep. Then step back.
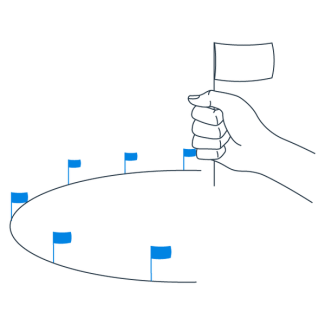
Continue to walk out to the boundary, placing flags 5-10 ft apart.
Step 6: Fit the Collar
The collar must be fit properly to work. To make sure the fit is correct, turn the collar off and follow these steps:
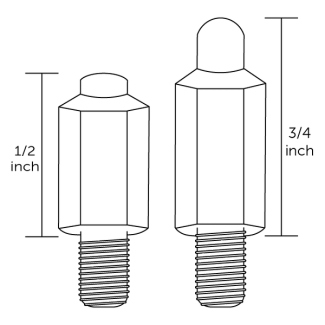
Swap the short contact points for the long if your pet has long or thick fur.

Tighten the contact points using the wrench until resistance is felt.
How to change the probes on the collar
Important: Periodically check the tightness of the contact points to keep the collar secure.
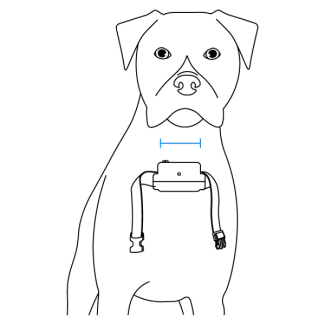
With your pet standing, center the contact points on the neck.

Adjust the strap until the collar is snug.
Important: Both contact points must be touching skin for static stimulation to be felt.
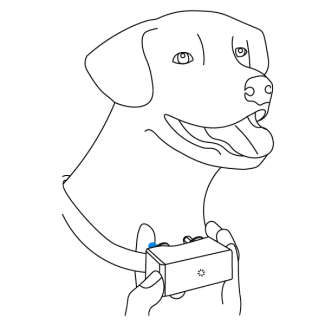
Put the collar on your pet and ensure only one finger fits between the contact points and your pet’s neck.
Important: Refrain from using the collar longer than 12 hours to avoid irritation.
Trim the Collar

If the strap is too long for your pet, follow the instructions below to trim the excess. The above materials will be needed to begin.
Important: Leave extra room on the strap if your pet is young or grows a thick winter coat.
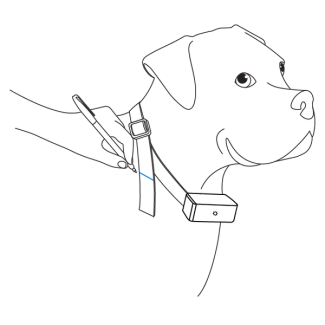
Mark the strap at least 2 inches past the slide buckle.
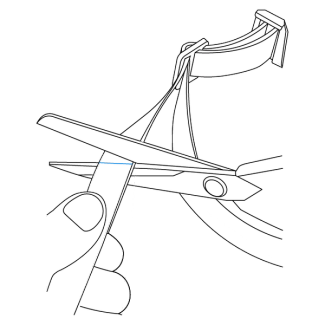
Remove the collar from your pet and trim the strap.
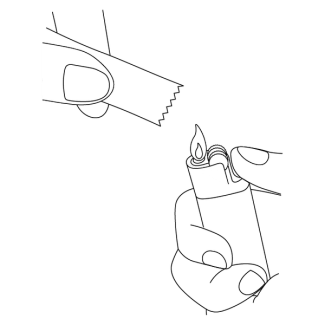
Apply a flame to seal the cut edge.
Next Up: Train Your Pet
Training is essential so your dog becomes familiar with the pet area. Training will cover collar settings, boundary awareness, distractions and eventually, off leash in the pet area.
A Few Things to Keep In Mind
Sessions will last 10-15 minutes each, 3 times a day.
A minimum of 14 days of training is recommended.
Spend at least 5 minutes of play time at the end of each training session.
The first battery may drain faster due to repeated activation during training.
Contact Customer Care
If you need further assistance, please contact our customer care team.