How to Use Your Indoor Radio Fence
Table of Contents
Welcome
Welcome to your new Indoor Radio Fence!
Keep in Mind
The pet barrier can be used for both cats and dogs.
The safety shut off feature automatically turns the collar off if your pet stays in the barrier range for 30 seconds.
An unlimited amount of collars and pet barriers may be used together.
The pet barrier is compatible with all PetSafe® in-ground fence collars except YardMax® and UltraSmart®.
Refrain from having your pet wear the collar longer than 12 hours to avoid skin irritation.
Understanding Your Barrier
Note: A collar is not included. The barrier needs a compatible collar to work properly.
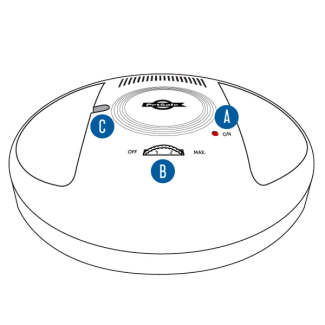
Power Light
A red light that illuminates when the unit has power.
Dial
Used to adjust the range from a 2 foot radius to a 10 foot radius
Power Jack
Connects the power adapter to the barrier.
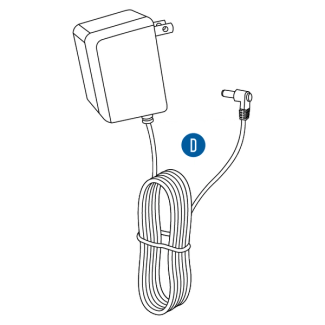
Power Adapter
Supplies power to the barrier when plugged in.
How It Works
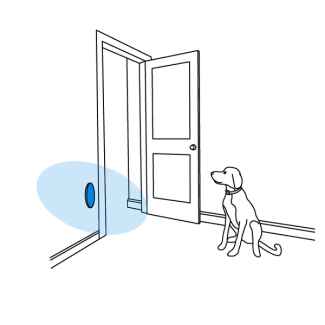
The barrier emits an adjustable, circular radio signal. The collar receives the signal and sends a correction to your pet to keep them out of an area in your home.

Radius
The distance from the middle of the barrier to the edge of the radio signal.
Diameter
The distance from the edge of the radio signal on one side of the barrier to the edge of the radio signal on the other side.
Preparation
Check Collar Compatibility
Follow along below to ensure collar compatibility.
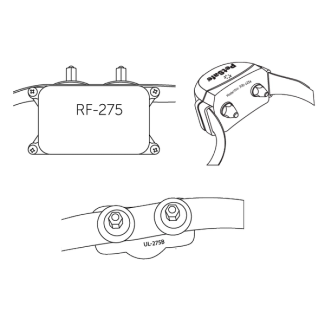
Locate the model number on the collar. The model number may be located on the bottom of the collar, near the probes or underneath the strap.
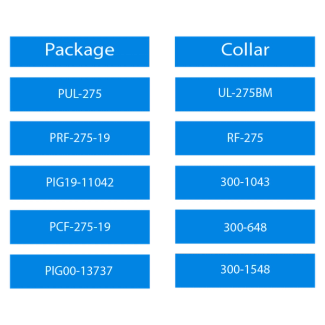
The model number on the collar should match one of the model numbers on the chart.
Important: If the model number on the collar does not match one listed above, the collar may not be compatible with the barrier.
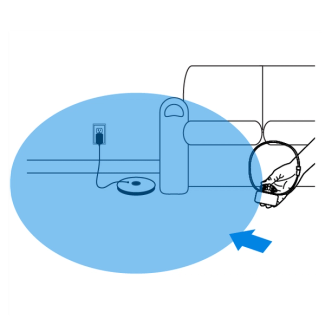
Placement
Ensure the barrier is placed indoors, near a standard electrical outlet and away from metal objects and other radio frequency devices.
Important: When placing the base unit on the ground, ensure it is not stepped on or tripped over.
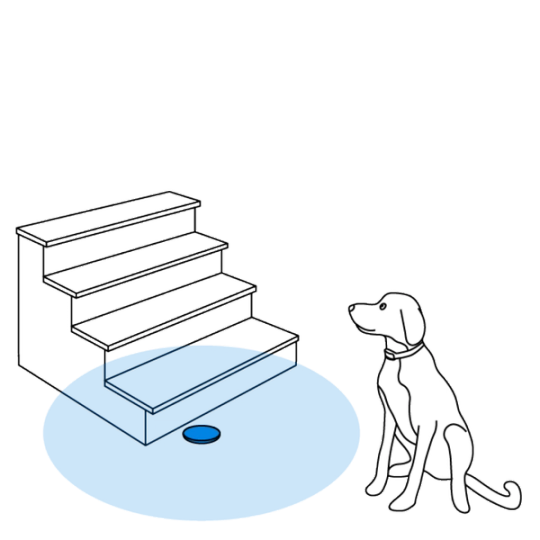
Place below stairs
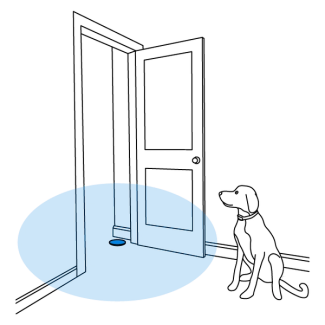
Place in doorway
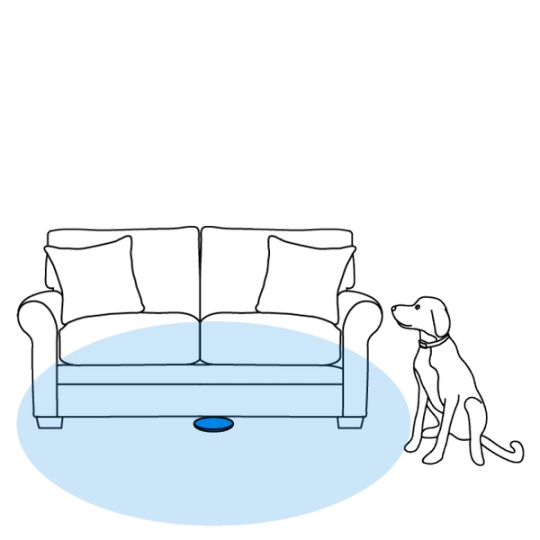
Place under furniture
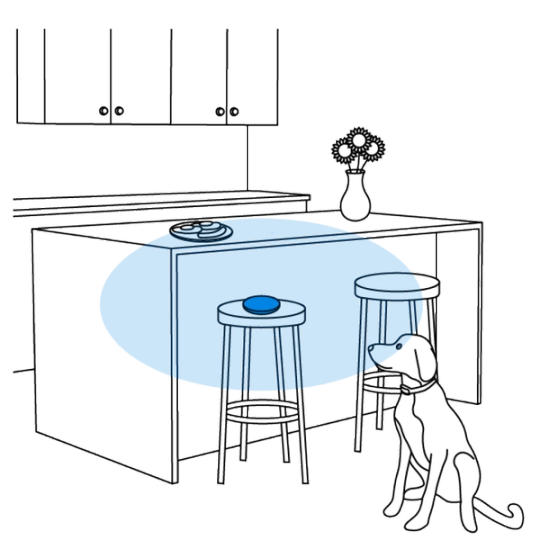
Place in kitchen
The barrier can also be mounted. When mounted, the signal becomes strongest directly in front of and behind the barrier.
Set Up
Important: Remove all collars from pets prior to set up to prevent an undesired correction.
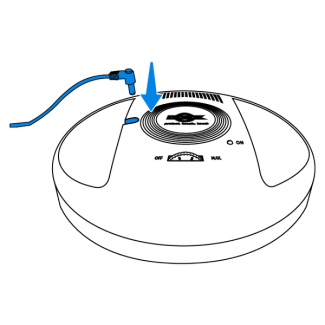
Connect the power adapter to the power jack.
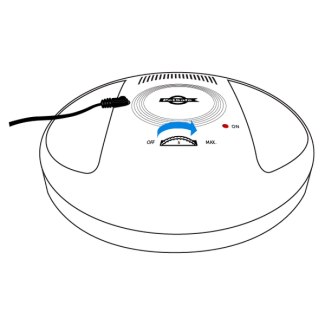
Turn the dial clockwise until the number five is showing on the dial. The red light will turn on, indicating power.

Turn the collar on and place the test light tool wires on the probes. Hold the collar and tool at the neck height of your pet.
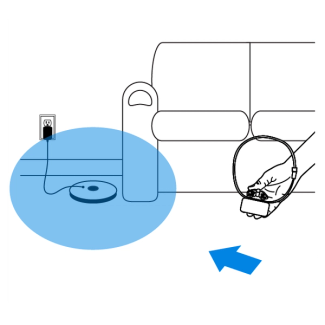
Starting 10 feet from the barrier, walk toward the boundary until the collar beeps and the tool flashes.
Turn the dial to adjust the range and test again until the desired coverage is achieved.
- Clockwise: larger radius
- Counter-clockwise: smaller radius
Note: Check multiple angles around the area to ensure full coverage.
Important: If the collar does not activate where expected, adjust the range on the base unit and ensure it is five feet away from metal.
Fit Your Collar
Adjust the Strap
For proper use, the collar must be adjusted to fit your pet properly. To ensure the collar is fit correctly, turn the collar off and follow these steps:
Adjust the strap until the collar is snug. Both probes must be touching skin for correction to be felt.
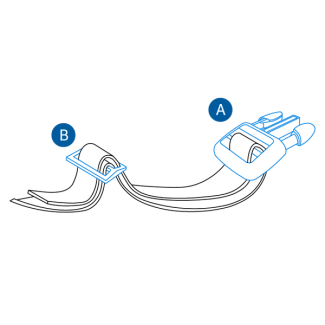
Fasten buckle
Slide buckle

To loosen
Move the strap through the Slide Buckle, then pull through the Fasten Buckle

To tighten
Move the strap up through the Fasten Buckle, then pull through the Slide Buckle.
Fit the Collar

With your pet standing, center the probes on the neck.
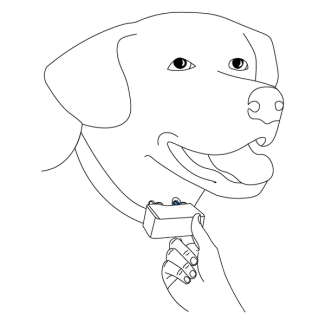
Check that only one finger fits between the probe and your pet’s neck.
Important: Refrain from using the collar longer than 12 hours to avoid irritation.
If the strap is too long for your pet, follow the instructions below to trim the excess. The above materials will be needed to begin.
Important: Leave extra room on the strap if your pet is young or grows a thick winter coat.
Trim Strap (Optional)

Mark the strap at least 2 inches past the slide buckle.
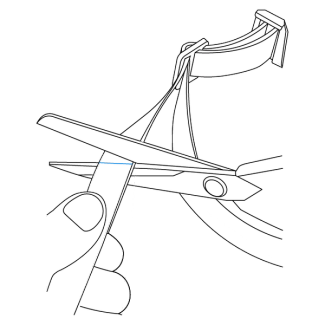
Remove the collar from your dog and trim the strap.
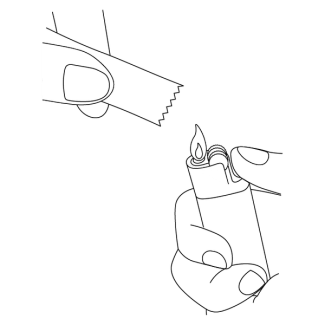
Apply a flame to seal the cut edge.
Contact Customer Care
If you need further assistance, please contact our customer care team.