How to Use Your Indoor Bark Control
Table of Contents
Pick the Indoor Bark Control Unit You Own
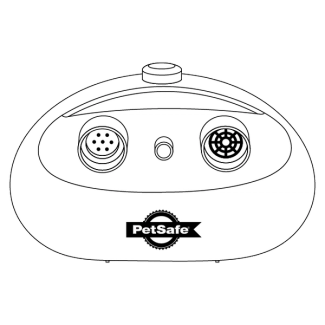
Model: PBC-1000
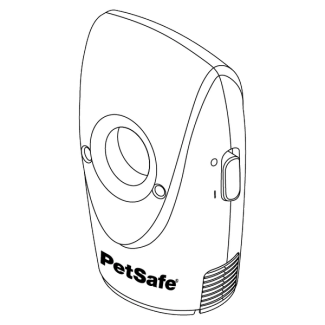
Model: PBC00-14661 | PBC00-15266
Understanding Model PBC-1000
Up to 25 feet of range.
Requires one 9V battery (not included).
Ultrasonic sound discourages excess barking.
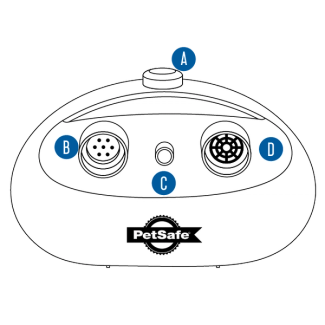
Manual Button
Emits a high-pitched tone through the speaker when pressed.
Microphone
Detects barking to to determine when a high-pitched tone needs to be emitted.
Indicator Light
Indicates the current function of the unit.
Speaker
Emits a high-pitched tone to correct barking.
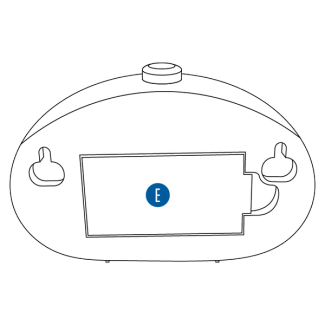
Battery Door
Covers the 9V battery required to power the unit.
Light Chart

How to Set Up Model PBC-1000
Insert Batteries
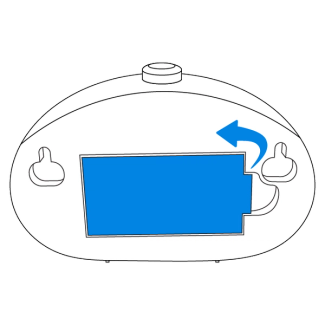
Remove the battery door on the back of the unit.
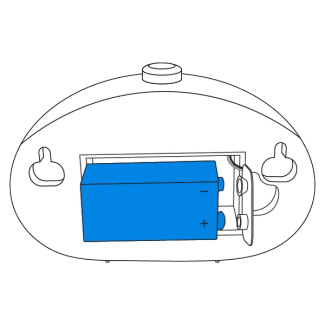
Insert a 9V battery, then close the battery door.
Battery life lasts up to six months depending on use.
Important: To power off the unit, take the battery out.
Test the Unit
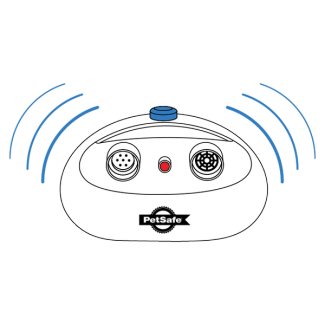
To test the unit, make a loud noise towards the microphone or press the button on top of the unit and watch for the red light.
Important: The tone is set to a pitch intended for dogs to hear.
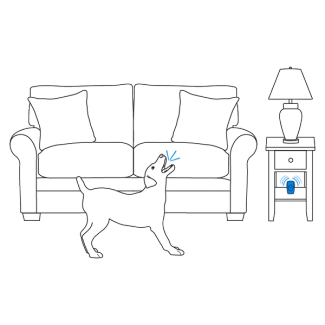
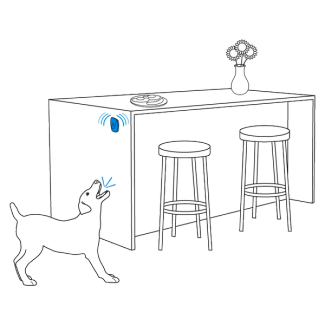
Place Your Indoor Bark Control

Mounted on wall
Placed on flat surface
The Indoor Bark Control may be placed on a flat surface or mounted on the wall. Ensure the microphone on the unit is facing toward an open area.
Mount the Unit (Optional)
To mount the unit, tap two small nails into the wall 3 5/8 inches apart and hang the unit like a picture frame.
Important: Watch the unit closely after it has been placed in a room. If a red light is seen when your dog is not barking, place the unit in a quieter area.
Acclimation
Now that the Indoor Bark Control unit is setup, follow the tips below to help acclimate your dog to understand that hearing the high-pitched tone means to stop barking.
Note: The manual button can also be pressed to discourage behaviors other than barking.
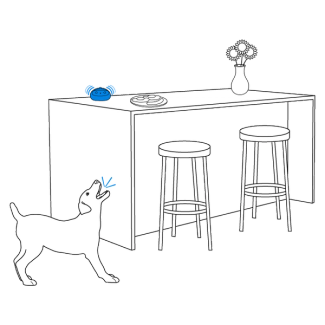
What to do
Place the unit in the desired location and wait until your dog barks.
Reward him when he receives a stimulation and stops barking so he understands what is expected.
Bark-Correction Cycle
If your dog begins to bark at the stimulation, reassure him with calm, soothing tones to teach him that when he becomes quiet, the stimulation stops.
Consistency
Make sure to be consistent in using the unit when he is expected to be quiet to avoid a learning setback.
If the unit powers on, and your dog is not responding, ultrasonic bark stimulation may not be the appropriate solution for your dog. Contact our Customer Care for further assistance with bark control solutions.
Understanding Models PBC00-14661 | PBC00-15266
Up to 25 feet of range.
Requires two CR2032 batteries (included).
Ultrasonic sound discourages excess barking.
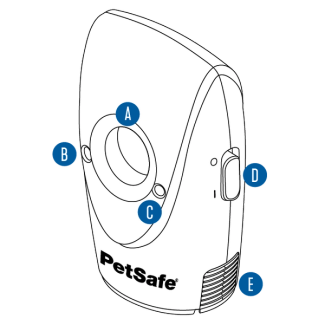
Speaker
Emits a high-pitched tone to correct barking.
Indicator Light
Indicates the current function of the unit.
Microphone
Detects barking to emit a high-pitched tone through the speaker.
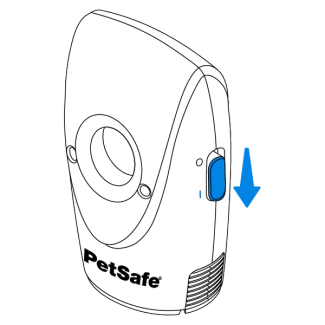
On/Off Switch
Turns the unit on and off.
I- On
O-Off
Battery Compartment
Covers the batteries required to power the unit.
Light Chart

How to Set Up Models PBC00-14661 | PBC00-15266
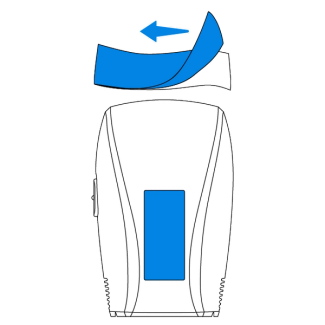
Insert Batteries
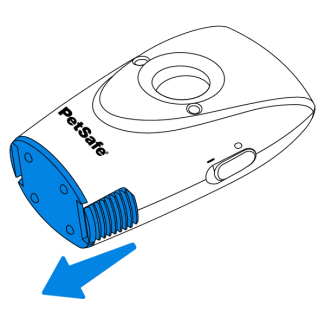
Slide off the battery compartment at the bottom of the unit.
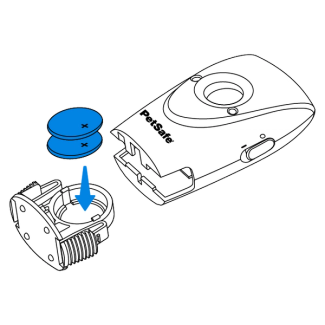
Insert two CR2032 batteries positive side up and insert the battery compartment.
Move the switch to I. The unit will beep and blink green one time.
Battery life lasts up to two months depending on use.
Test the Unit

To test the unit, make a loud noise towards the microphone and watch for the red light.
Important: The tone is set to a pitch intended for dogs to hear.
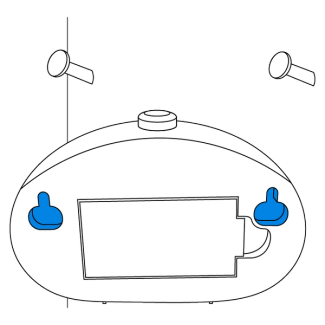
Place Your Indoor Bark Control
Placed on flat surface
Mounted on wall
The Indoor Bark Control may be placed on a flat surface or mounted on the wall. Ensure the microphone on the unit is facing toward an open area.
Peel the mounting tape and place one strip on the back of the unit.

Place the other strip onto the desired surface. Press the two mounting strips together.
Note: The adhesive reaches maximum strength after 24 hours.
Acclimation
Now that the Indoor Bark Control unit is setup, follow the tips below to help acclimate your dog to understand that hearing the high-pitched tone means to stop barking.
What to Do
Place the unit in the desired location and wait until your dog barks.
Reward him when he receives a stimulation and stops barking so he understands what is expected.
Bark-Correction Cycle
If your dog begins to bark at the stimulation, reassure him with calm, soothing tones to teach him that when he becomes quiet, the stimulation stops.
Consistency
Make sure to be consistent in using the unit when he is expected to be quiet to avoid a learning setback.
If the unit powers on, and your dog is not responding, ultrasonic bark stimulation may not be the appropriate solution for your dog. Contact our Customer Care for further assistance with bark control solutions.
Contact Customer Care
If you need further assistance, please contact our customer care team.