How to Use Your Happy Ride® Dog Safety Seat
Table of Contents
Welcome
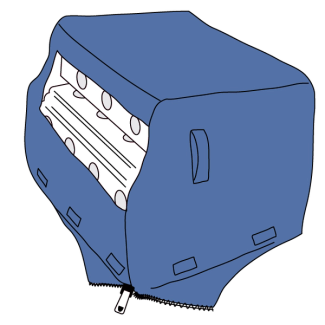
Welcome to your new Happy Ride® Dog Safety Seat.
Keep in Mind:
Acclimation time will vary with each pet.
Proper acclimation is essential for successful seat usage.
A harness will be needed to secure your pet in the seat.
Preparation
Have the following contents available prior to set up:
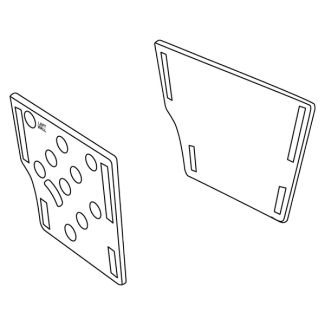
Left and right walls
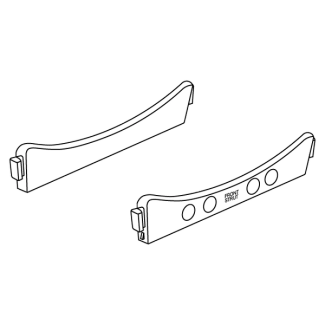
Front and rear struts
Three-panel main seat

Fabric cover
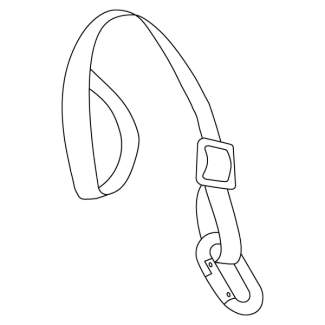
Seat belt tether
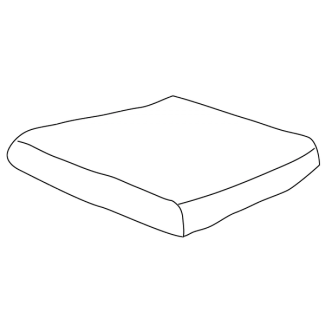
Reversible cushion
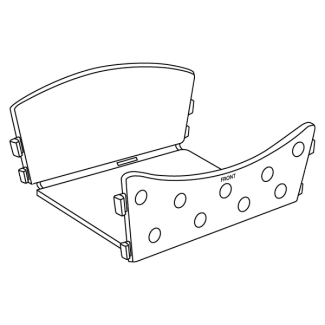
Step 1: Assembly
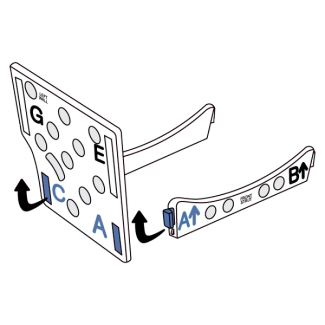
Insert tab A on the front strut into slot A on the left wall. The smooth sides will face inward. Repeat with C for the rear strut.
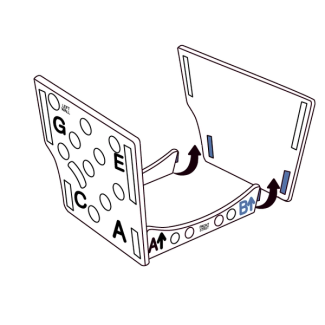
Insert tab B on the front strut into slot B on the right wall. The smooth sides will face inward. Repeat with D for the rear strut.
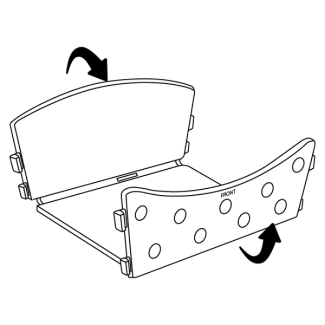
Fold the three-panel main seat into a U-shape.
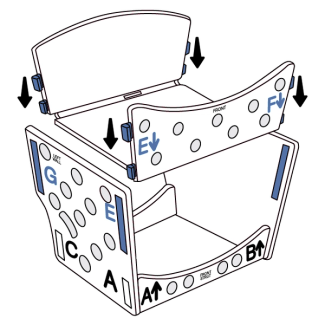
Attach the main seat to the left and right walls by matching tabs E, F, G and H to their corresponding slots. The smooth side of the main seat should face upwards.
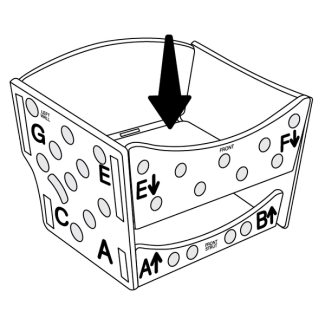
Press down on the main seat to lock it in place.
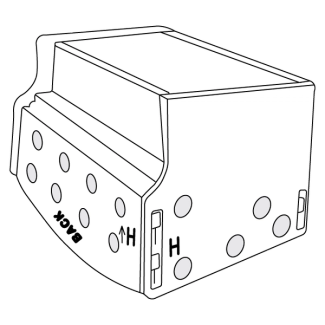
Turn the frame upside down.
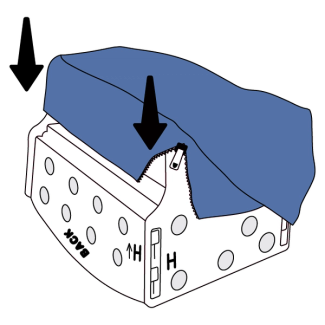
Open the zipper at the back corner of the fabric cover and slide it onto the bottom of the frame. The zipper will line up with corner H.
Continue pulling the cover over the frame until the bottom panel of the cover aligns with the bottom of the frame.
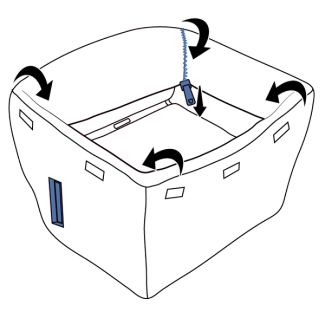
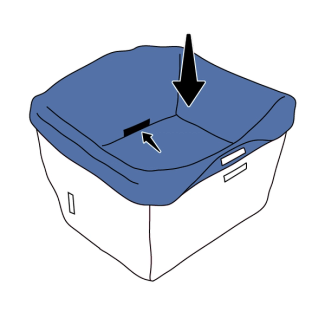
Turn the frame right-side up. Pull the cover over the edges and close the zipper. The seatbelt slits will line up with the holes in the safety seat.
Insert the fabric liner into the seat. The slit in the liner will align with the opening in the back of the seat.
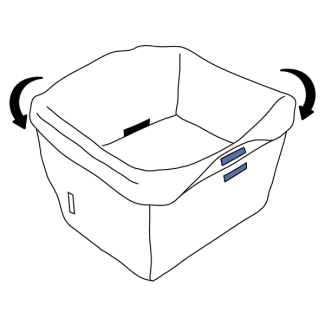
Fold the liner over the edges and press to secure the hook and loop fasteners together.

Insert the large loop of the seat belt tether, opposite the clip, through the opening in the liner and the frame.
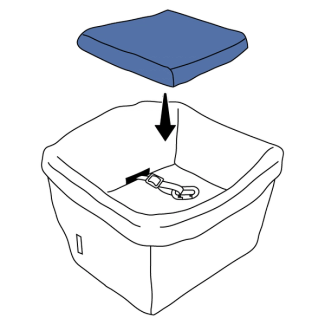
Place the reversible cushion in the seat.
Step 2: Install in Vehicle
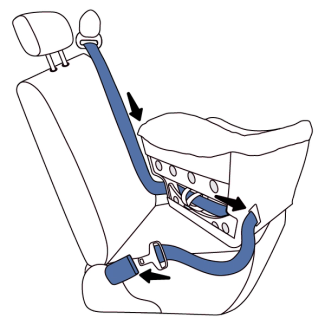
Pass your vehicle’s seat belt through the opening, the seat belt tether, and the opening on the other side of the frame. Buckle to secure.
Important: Refer to your vehicle’s manual for information on locking the seat belt. This is typically found with information regarding child restraint installation.
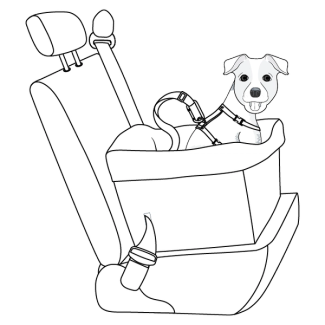
Once your pet has adjusted to the seat, attach the tether to his harness. Adjust the tether so that he cannot jump out of the seat.
Important: Do not attach the seat belt tether to your pet’s collar.
Contact Customer Care
If you need further assistance, please contact our customer care team.