How to Troubleshoot Your Vibration Bark Control Collar
Check Power

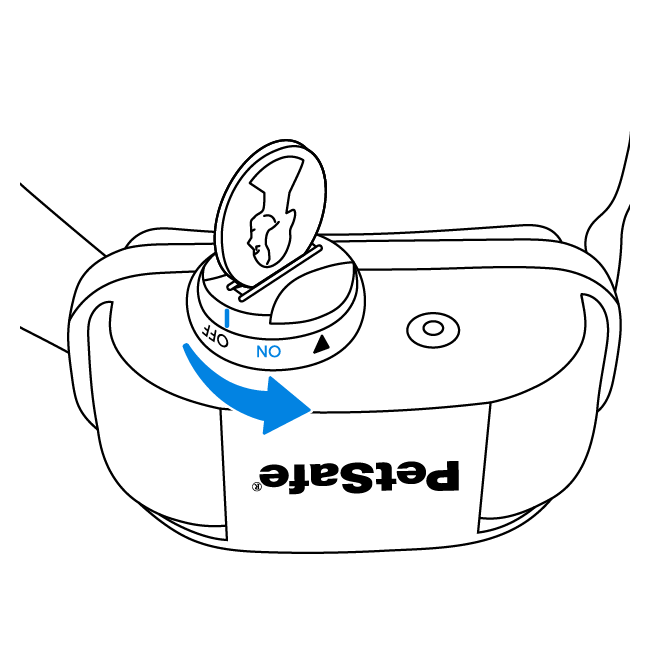
Use a coin to turn the battery to the ON position and look for the light on the opposite side of the collar to flash green.


If a light is not seen, insert a new RFA-188 battery in the unit and try again.
Confirm Activation
Manually Activate


Manually activate the collar by rubbing a key between the probes while blowing into the microphone. The collar will vibrate to indicate it is functioning properly.
Note: The collar uses a combination of 10 vibration sequences to keep your pet from becoming familiar with the sensation. The sequence will be different each time the collar is activated.
Test Mode


Use a coin to turn the battery to the OFF position.


Slowly turn the battery towards the ON position until an orange light is seen. Immediately turn the battery back to the OFF position.
Turn the battery back to the ON position. An orange light will be seen and the collar is now in test mode.


Blow into the microphone. The orange light will flash to indicate the microphone is working properly.


Gently rub between the probes using a grooved object, such as a key. The collar will vibrate to indicate the sensors are working properly.
Turn the battery to the OFF position to exit test mode.
Check the Fit
Turn the battery to the OFF position before fitting to avoid false activation.


Center the probes on your dog’s neck while he is standing.


Check that one finger fits between the probes and your dog’s neck.
Important: If your dog has long fur that sits over the probes, trim the fur to ensure the vibration is felt.
Acclimation Tips
Follow the tips below to help acclimate your dog to understand that feeling the vibration means to stop barking.
Important: Do not leave your dog alone the first couple times he barks with his new bark control collar.
What to Do
Fit the collar properly and wait until your dog barks. To get him to bark, have someone ring the door bell or knock on the door.
Reward him when he receives a correction and stops barking so he understands what is expected.
Bark-Correction Cycle
If your dog begins to bark at the stimulation, reassure him with calm, soothing tones to teach him that when he becomes quiet, the correction stops.
Consistency
Make sure to be consistent in using the collar when he is expected to be quiet to avoid a learning setback.
Contact Customer Care
If you need further assistance, please contact our customer care team.