How To Set Up My PetSafe® ScoopFree® SmartSpin™ Self-Cleaning Litter Box
Before You Begin:
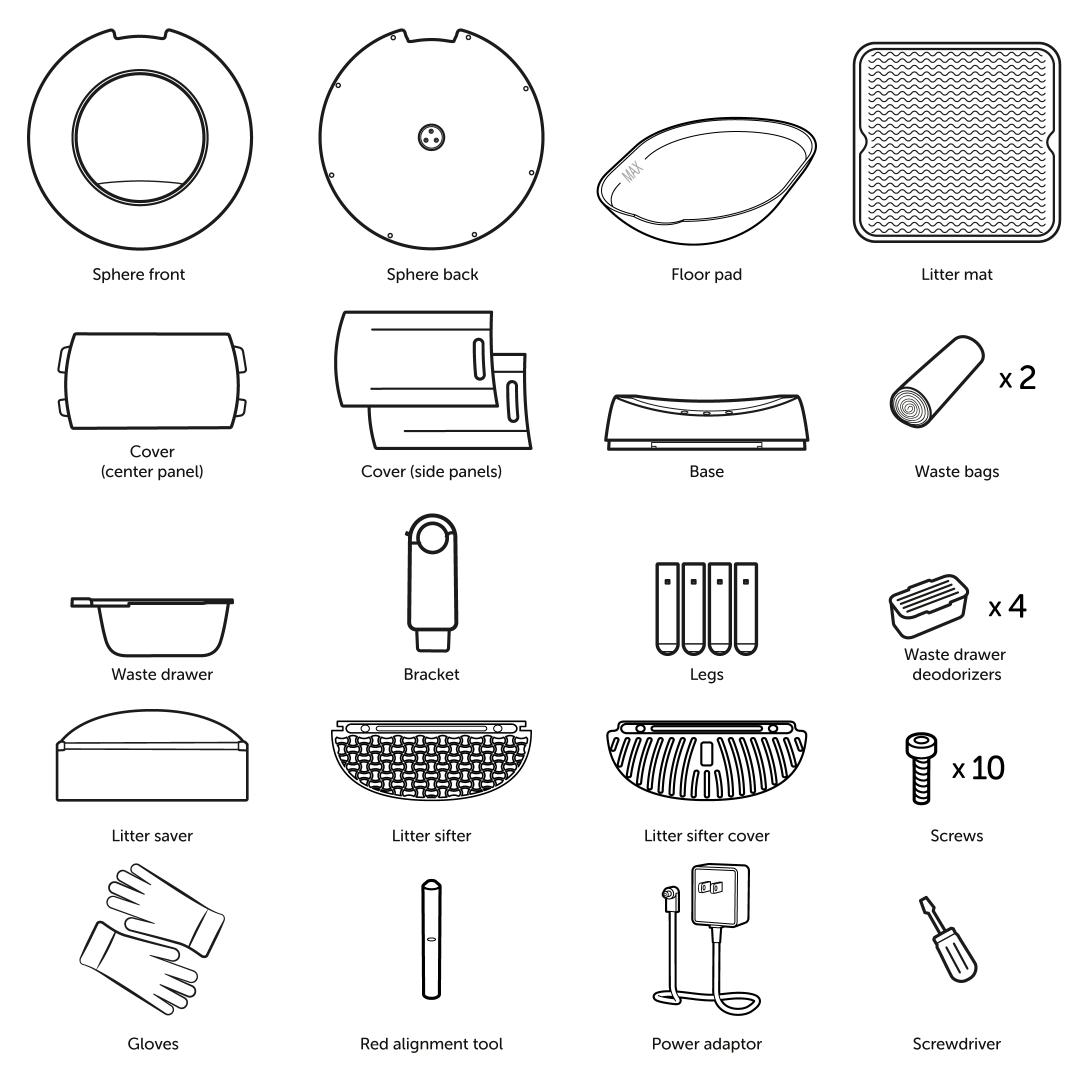
Confirm all the parts are accounted for and that a 2.4GHz Wi-Fi network is available for connection.
Please note that the Litter Sifter Cover only comes with the black model and the newer versions of the white SmartSpin™. If your SmartSpin® did come with a Litter Sifter Cover, set it to the side and save it for later.
Do not throw away any packaging until setup is complete.
Keep cats away from the litter box during setup. The litter box needs to calibrate the sensors and cannot be interrupted during the process. If a cat enters the litter box during this calibration process, the litter box sensors will not detect correctly.
Assembly
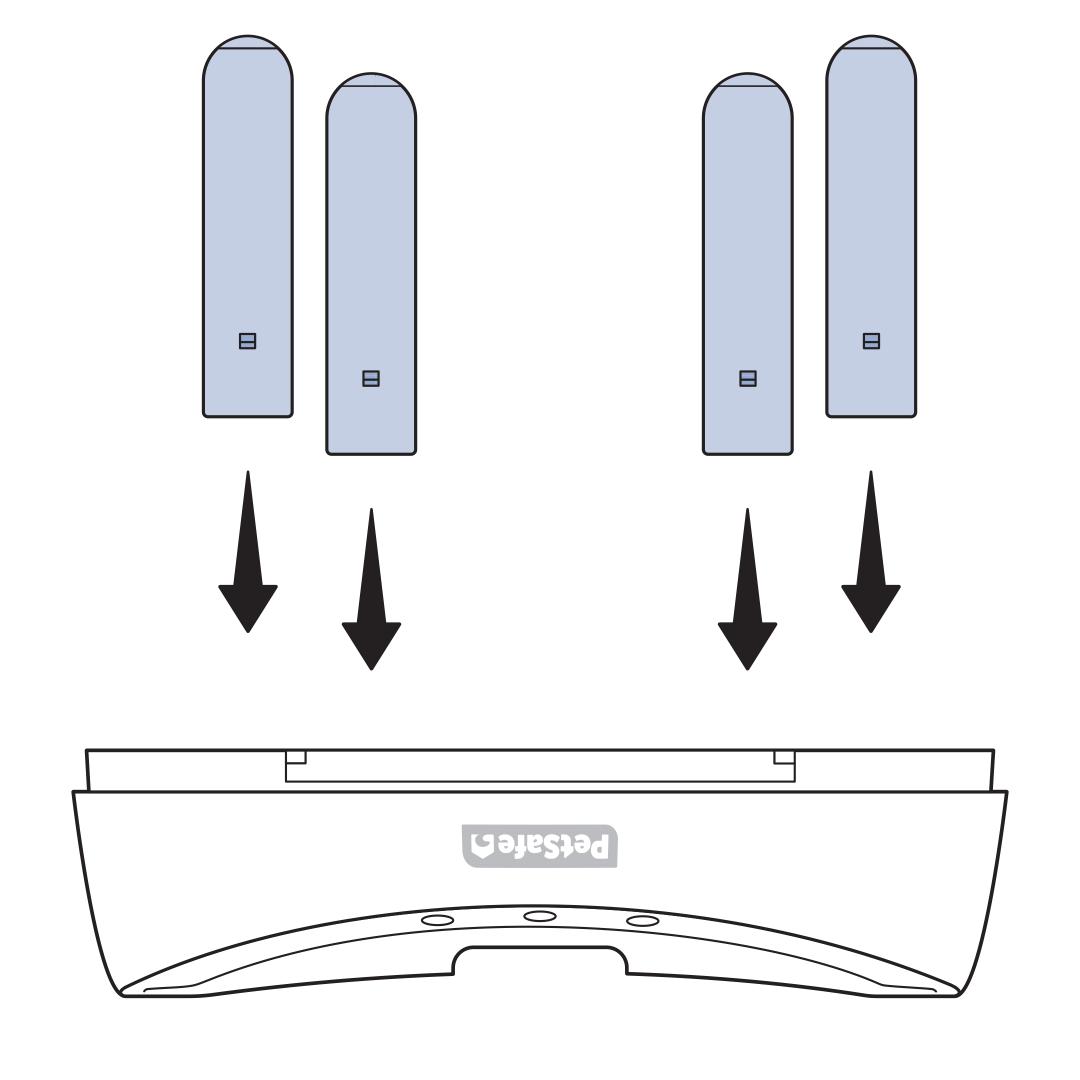
Place the base upside down and insert the 4 wooden legs. Ensure the legs are fully seated into the holes to prevent wobbling.
Turn the base right side up and adjust as needed until there is no wobbling.
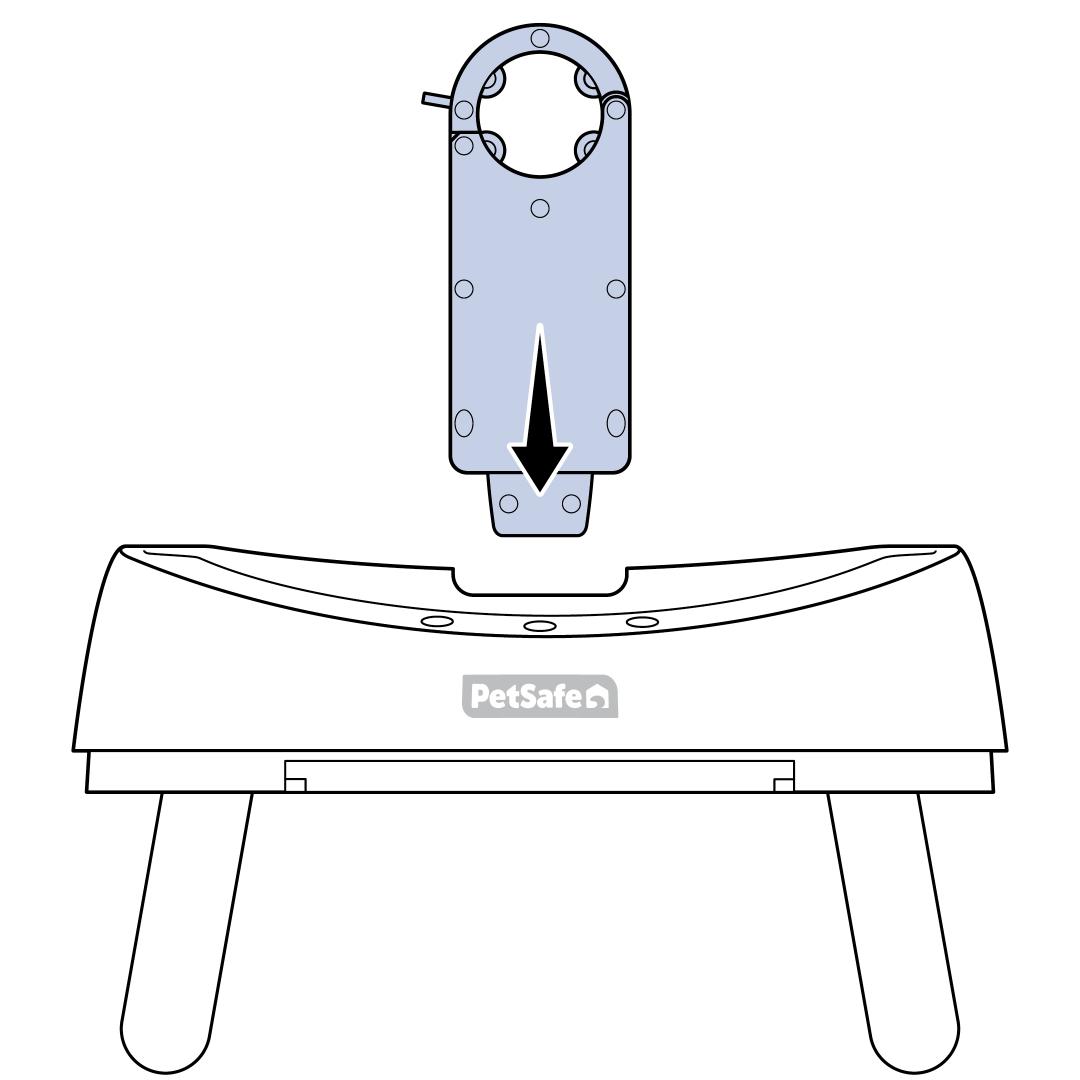
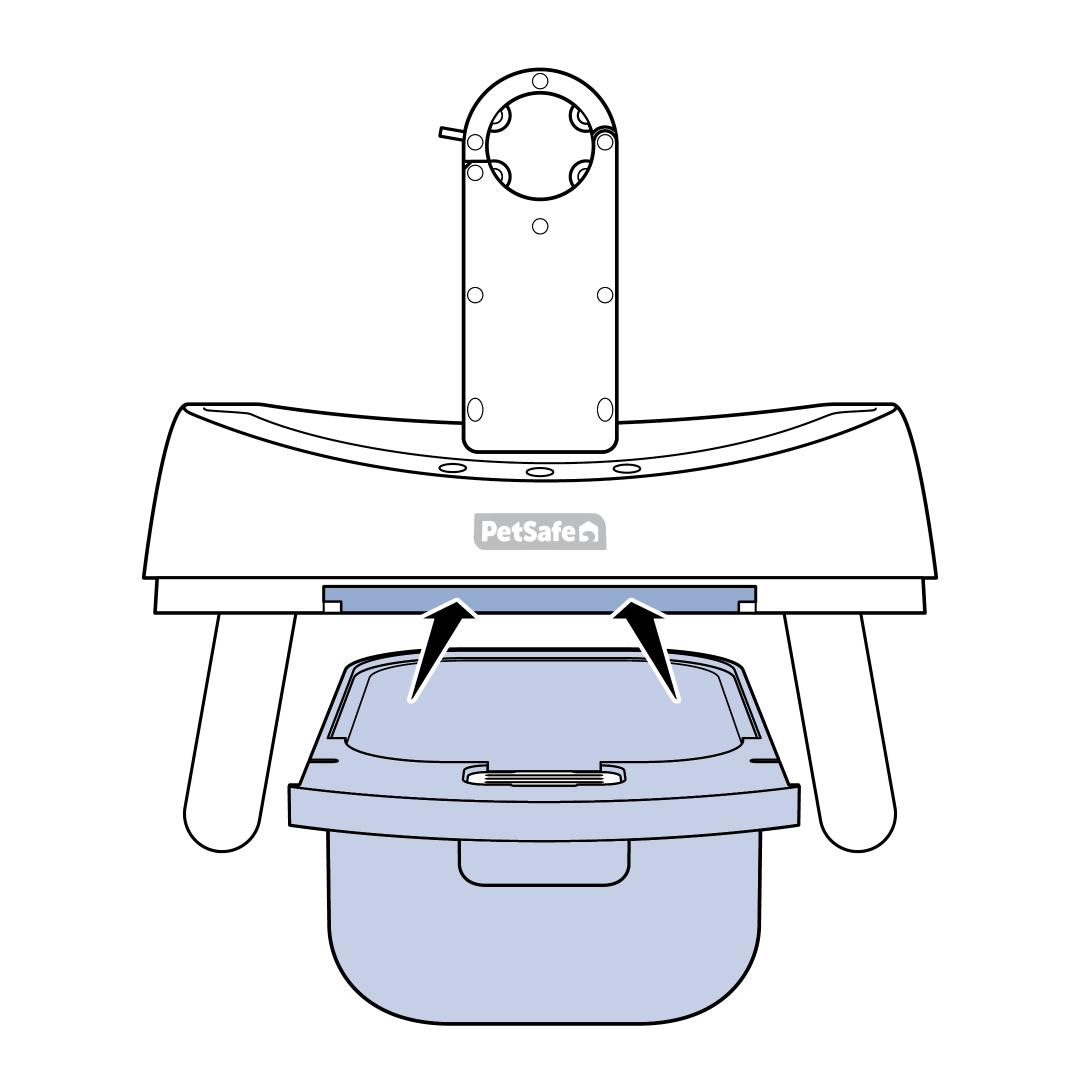
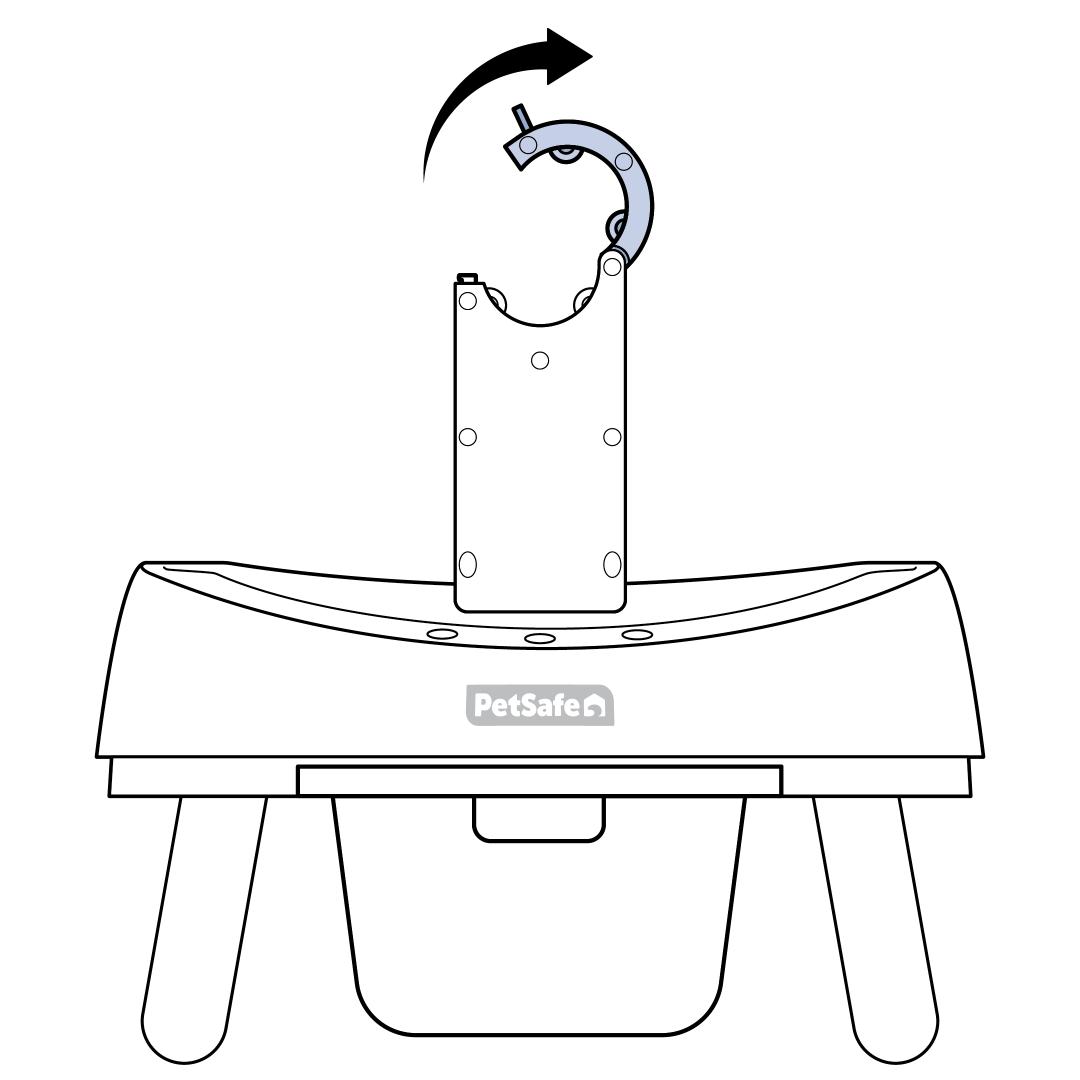
Insert the bracket into the base. A click can be heard when it is locked into place.
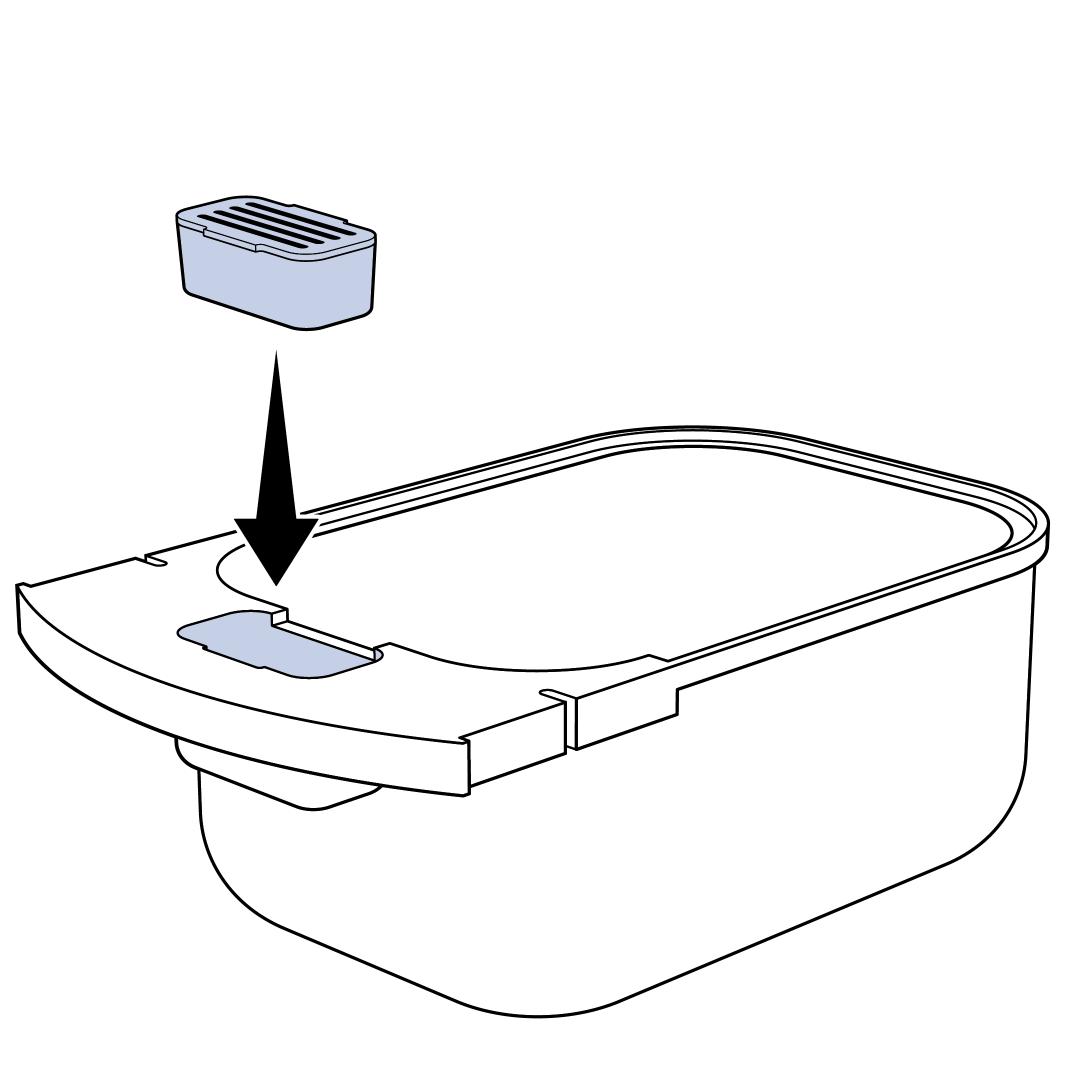
Remove the cover from the deodorizer and place the deodorizer in the holder of the waste drawer.
Insert a waste bin liner by pushing it down in the waste drawer so that it is not blocking the sensors. Fold the top of the liner over the edge of the waste drawer. The liner will not cover the front of the waste drawer. Tuck the edge of the liner into the notches of the waste drawer so that the deodorizer is not covered.
Slide the waste drawer into the front of the ScoopFree® SmartSpin™ base.
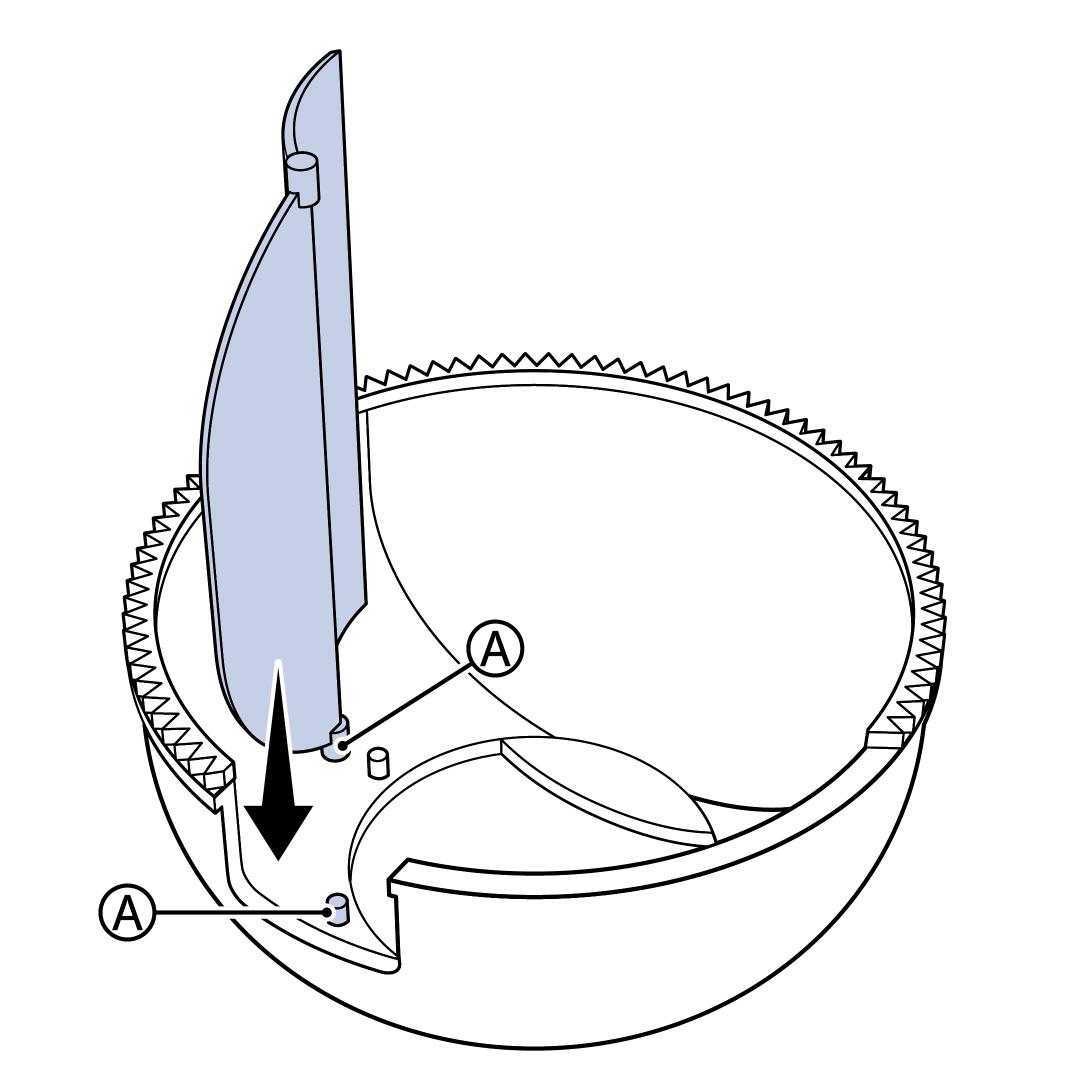
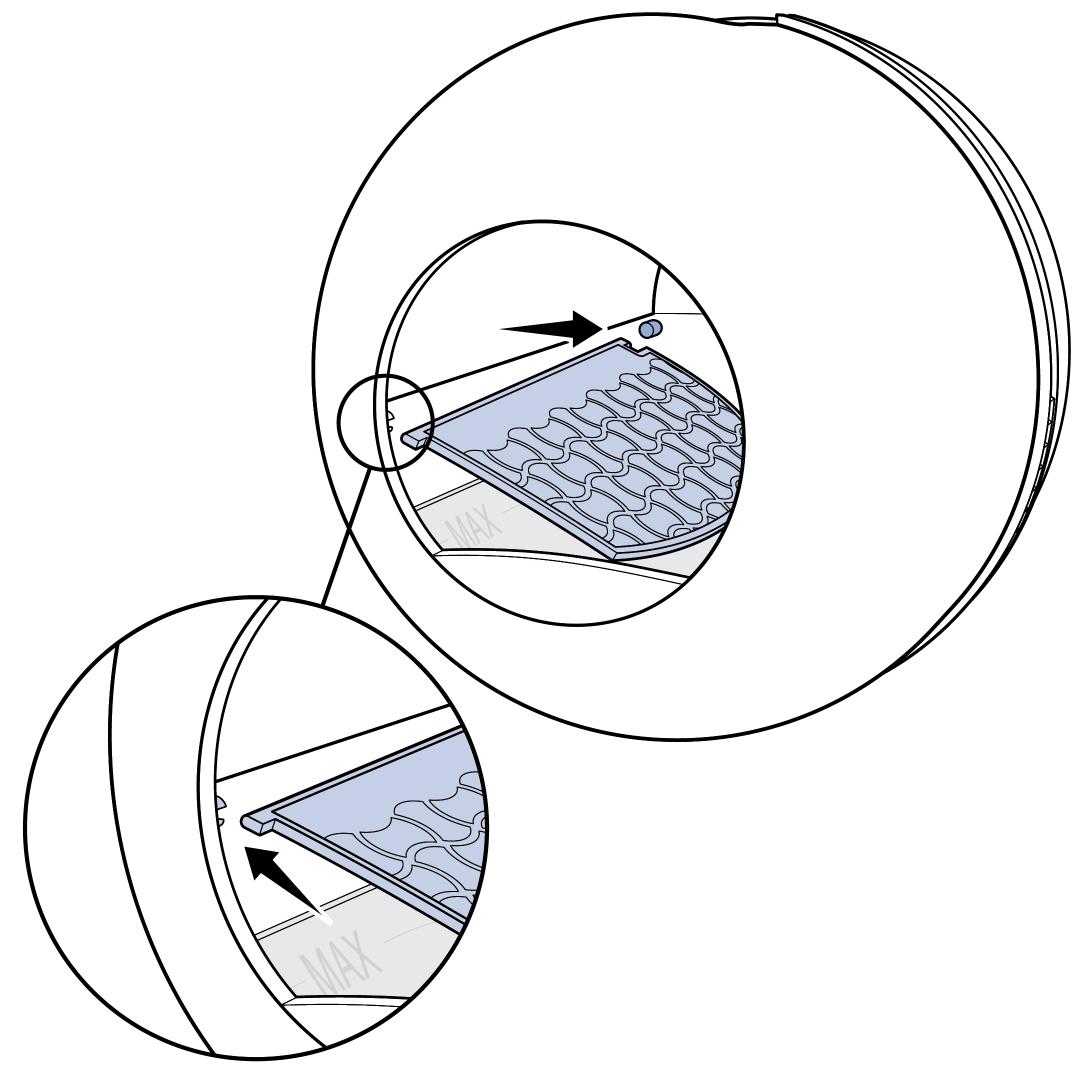
Insert the Litter Saver (A) so that it aligns with sticker (A) inside the sphere. The rounded edge of the Litter Saver will fit in the notch around the entry hole.
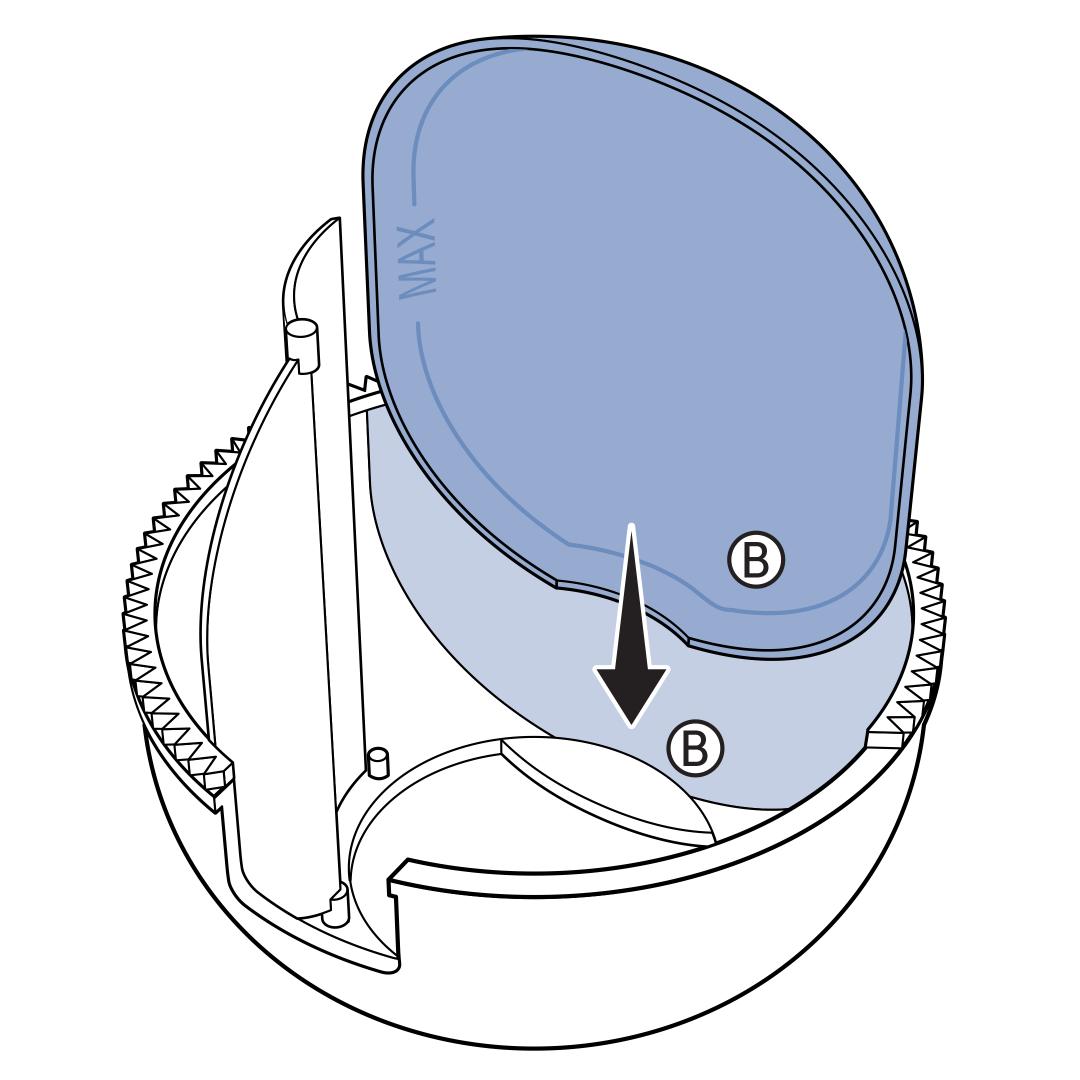
Insert the rubber mat (B) so that it aligns with the sticker (B) inside the sphere.
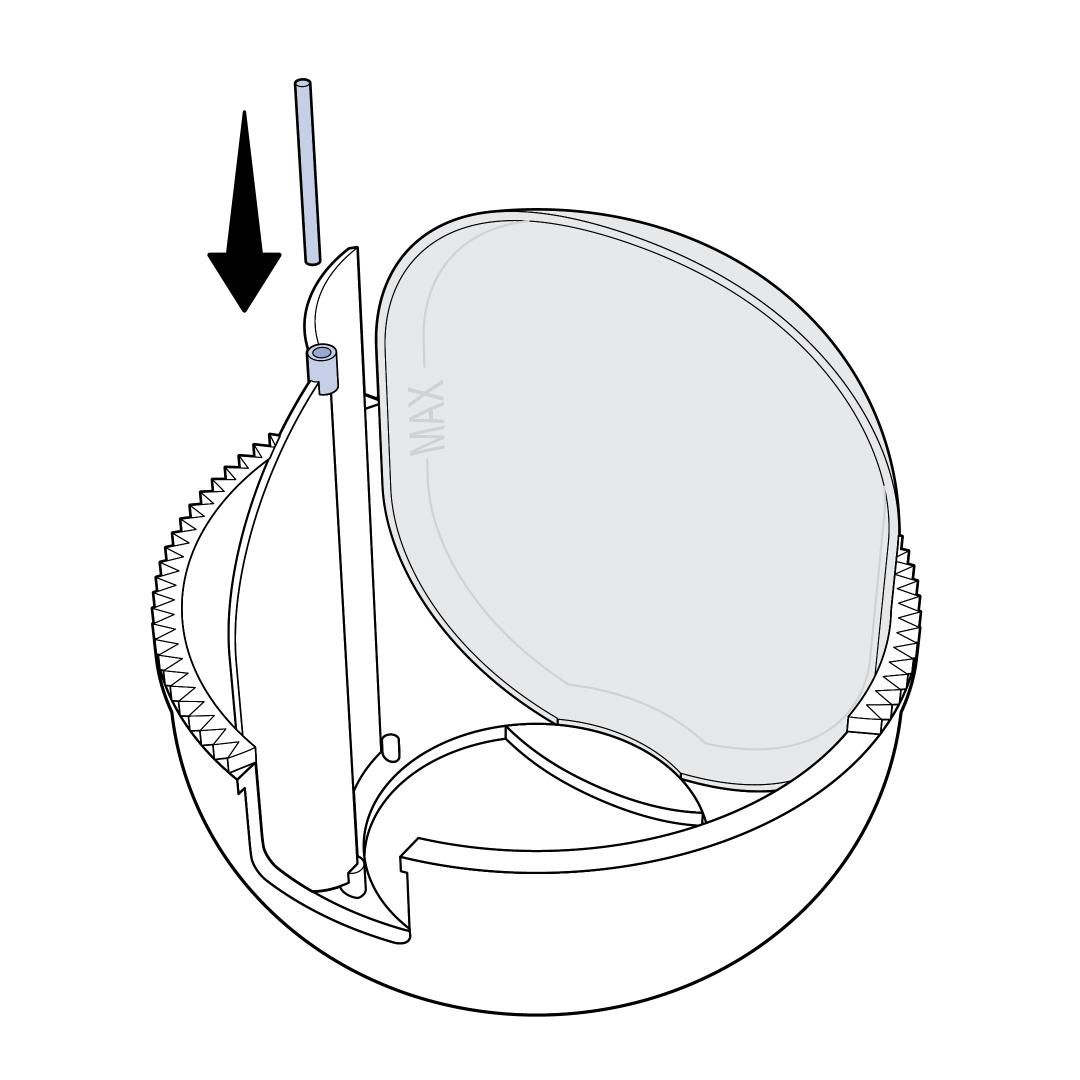
Place the red alignment tool into the hole in the edge of the Litter Saver.
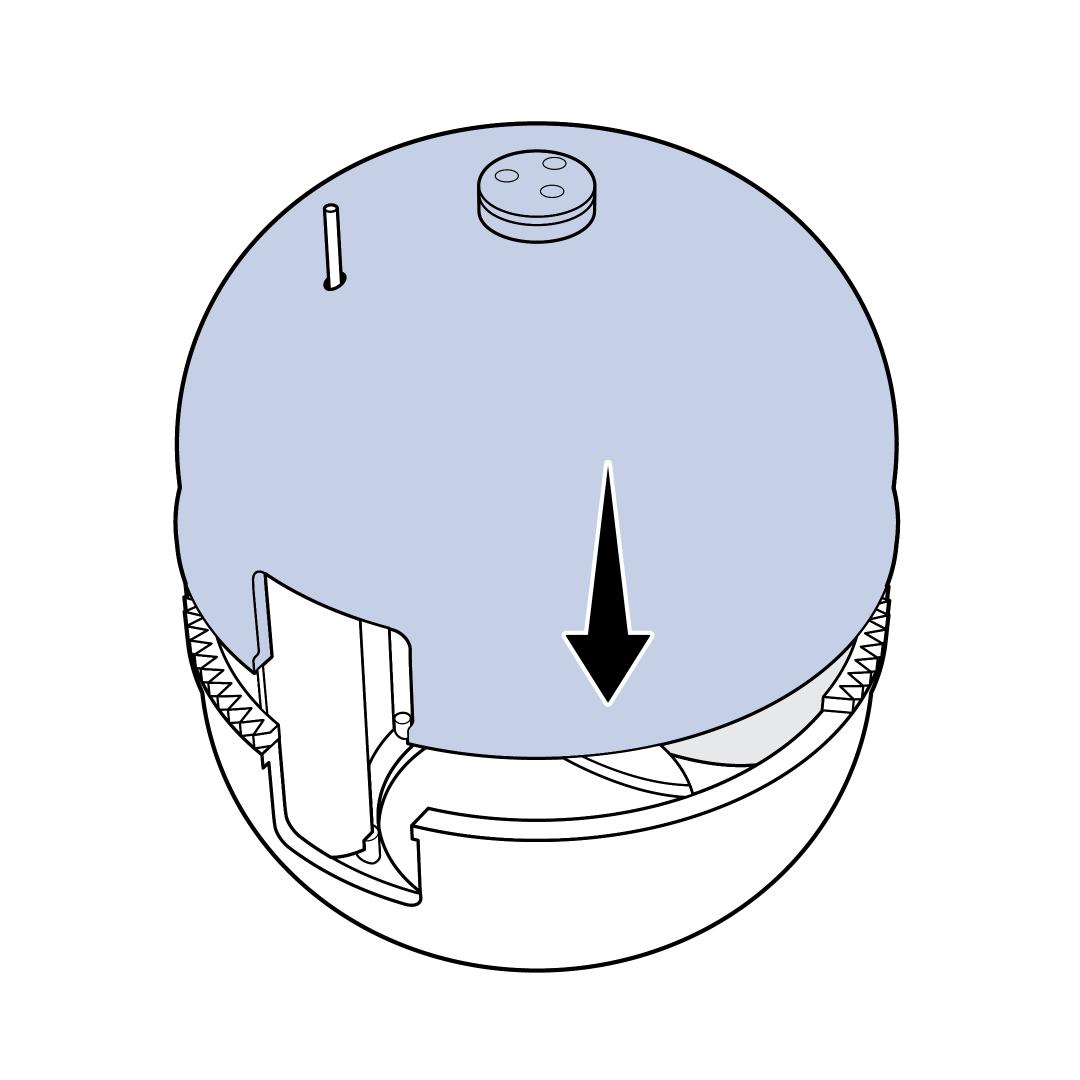
Place the back half of the sphere on top of the front half. Align the top so the alignment tool goes through the small hole.
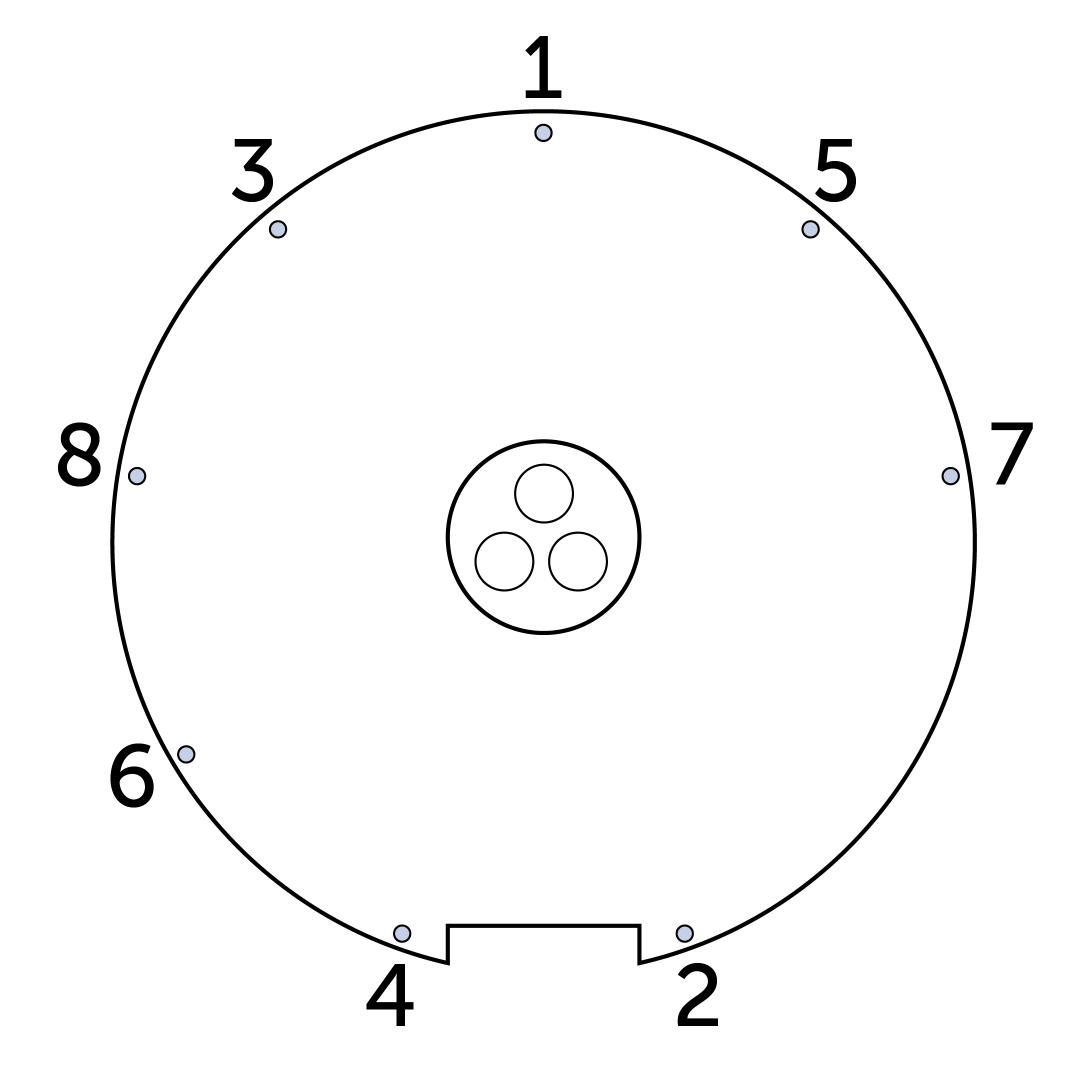
Line the 8 screw holes up and insert the screws, starting in the back of the sphere. Work in a star pattern. Only screw them in loosely.
Once all the screws are loosely in place, tighten each screw until they are hand-tight.
Important: Save the screwdriver and red alignment tool with the litter box. It will be needed for future assembly/disassembly.
Install the Litter Sifter into place inside the sphere. Align the end marked (C) with the sticker C inside the sphere.
Open the bracket latch on the base.
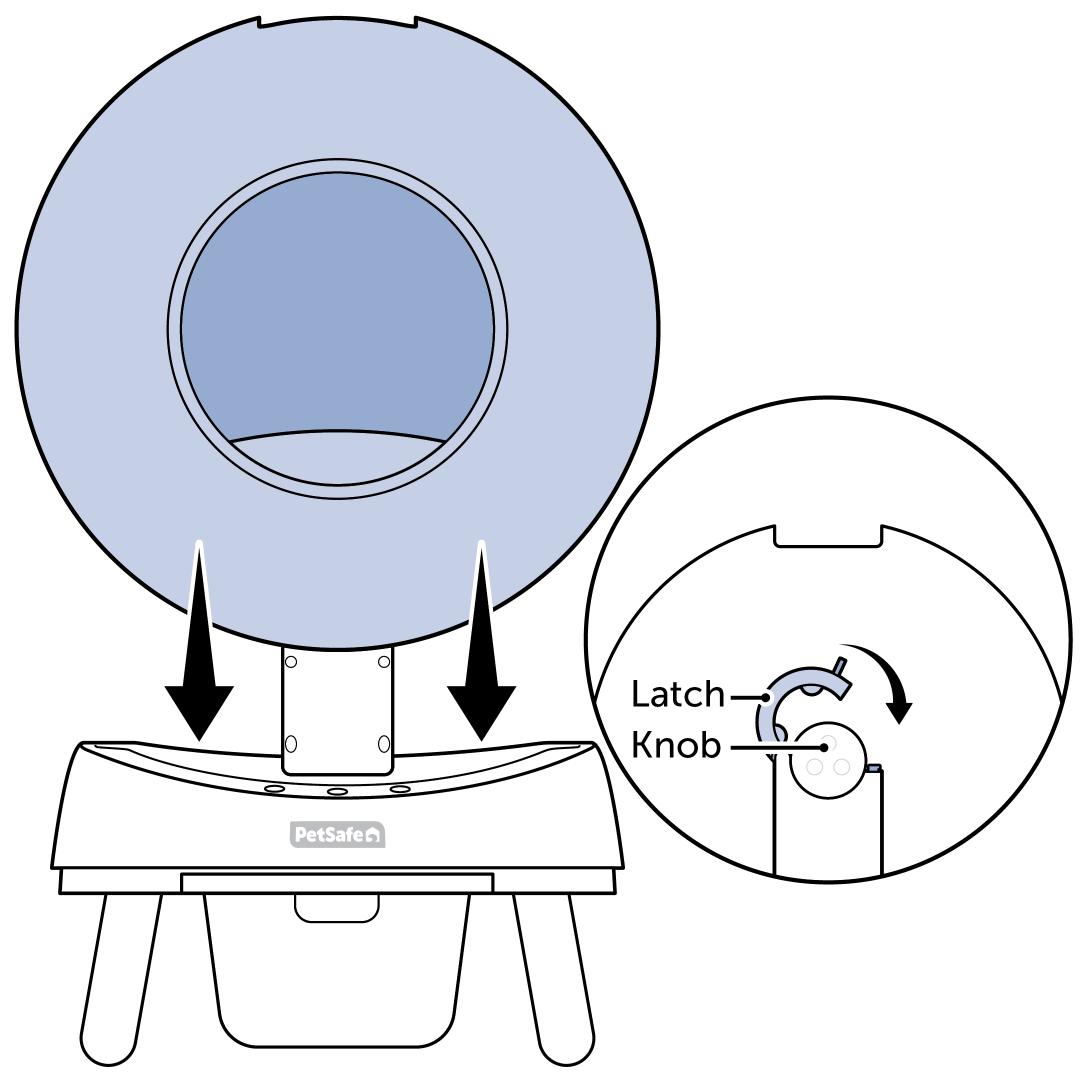
Place the sphere in the base. Close the latch around the knob on the back of the sphere.
- Ensure the raised edge on the back of the sphere is aligned in the notch of the latch.
- The latch will lock if misaligned but will show an error code upon start up.
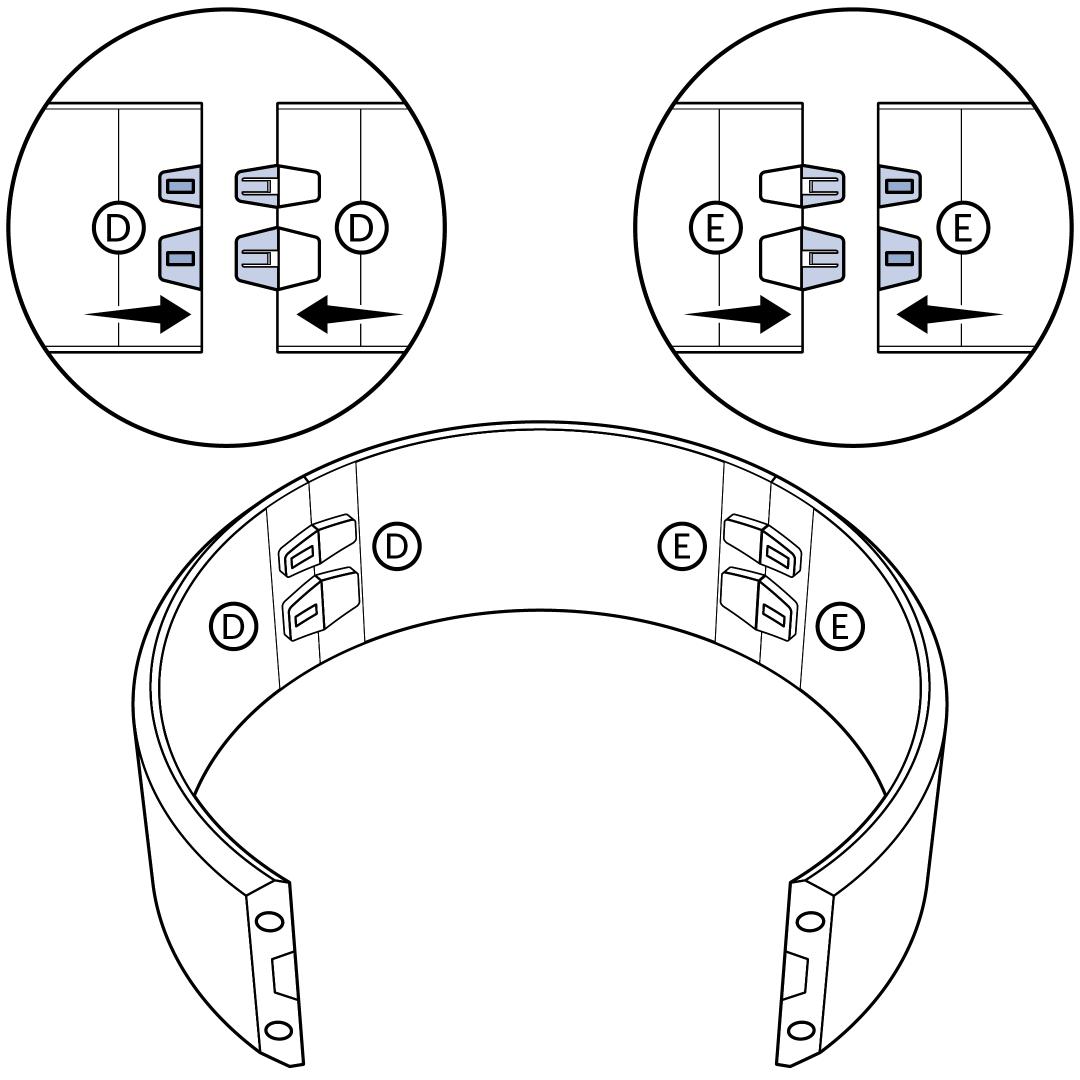
Assemble the cover. Snap the tabs into place by aligning the D stickers together and the E stickers together. The cover will resemble an arch when assembled.
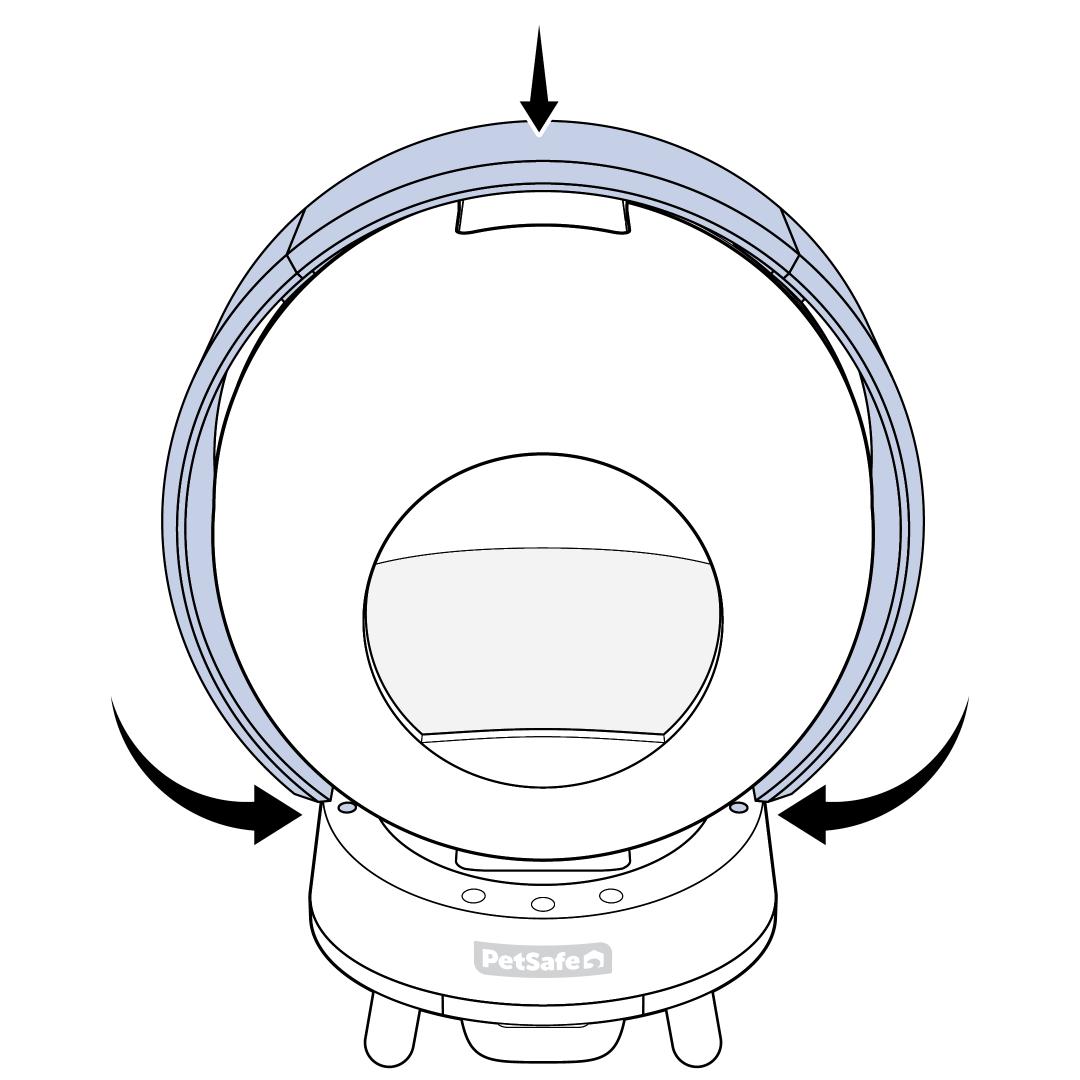
Place the cover over the top of the sphere. Make sure the arrows are pointing toward the front of the litter box. Push the bottoms of the cover in toward the base of the sphere until all 4 magnets are firmly in place.
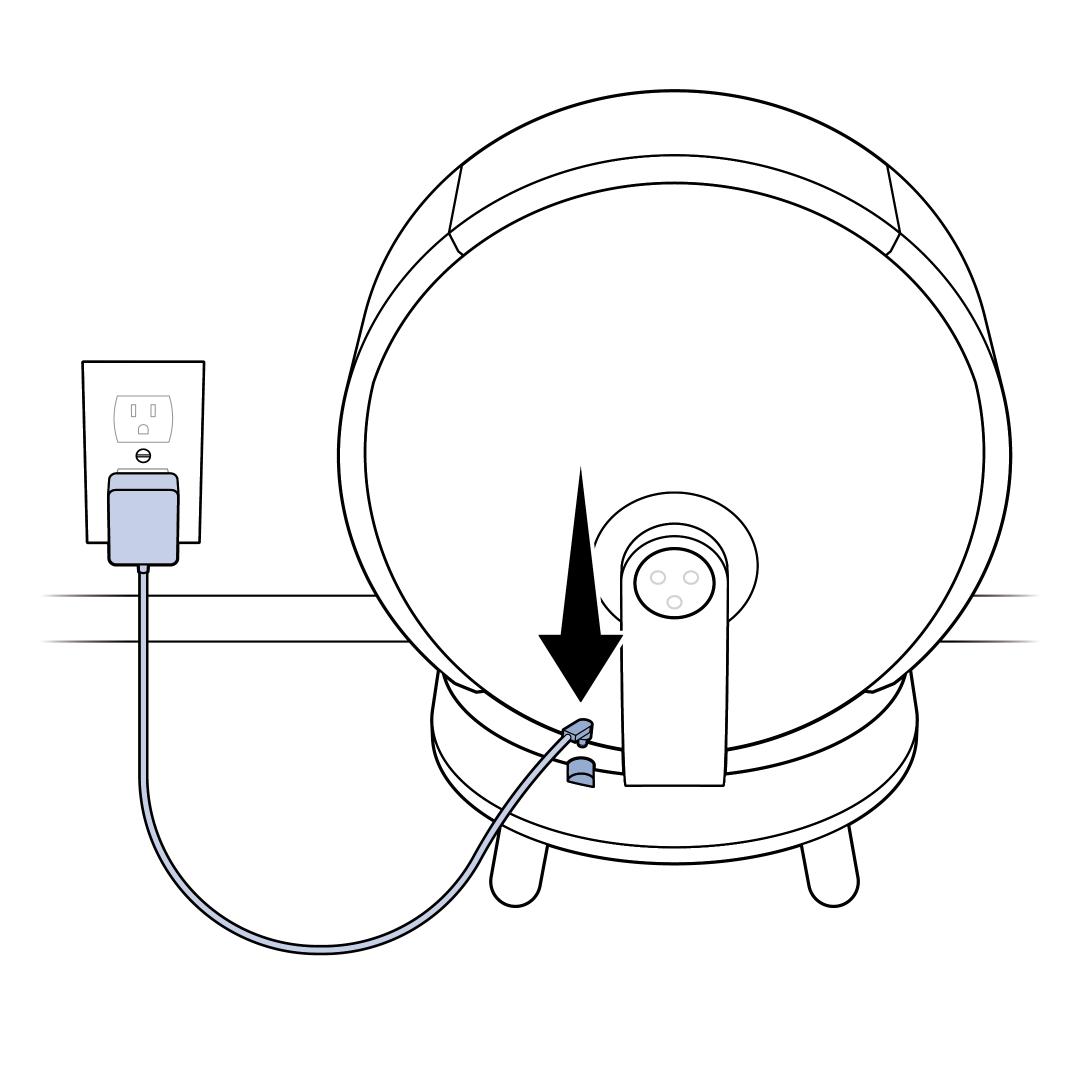
Make sure there is nothing inside the litter box and plug the power adaptor into the port next to the bracket on the back of the ScoopFree® SmartSpin™. Then plug the other end of the adaptor into a wall outlet.

Wait for the litter box to complete the self-check. After 10 seconds, the sphere will rotate 180 degrees. About 2 minutes later, the sphere will return to its starting position, indicating that the self-check is complete.
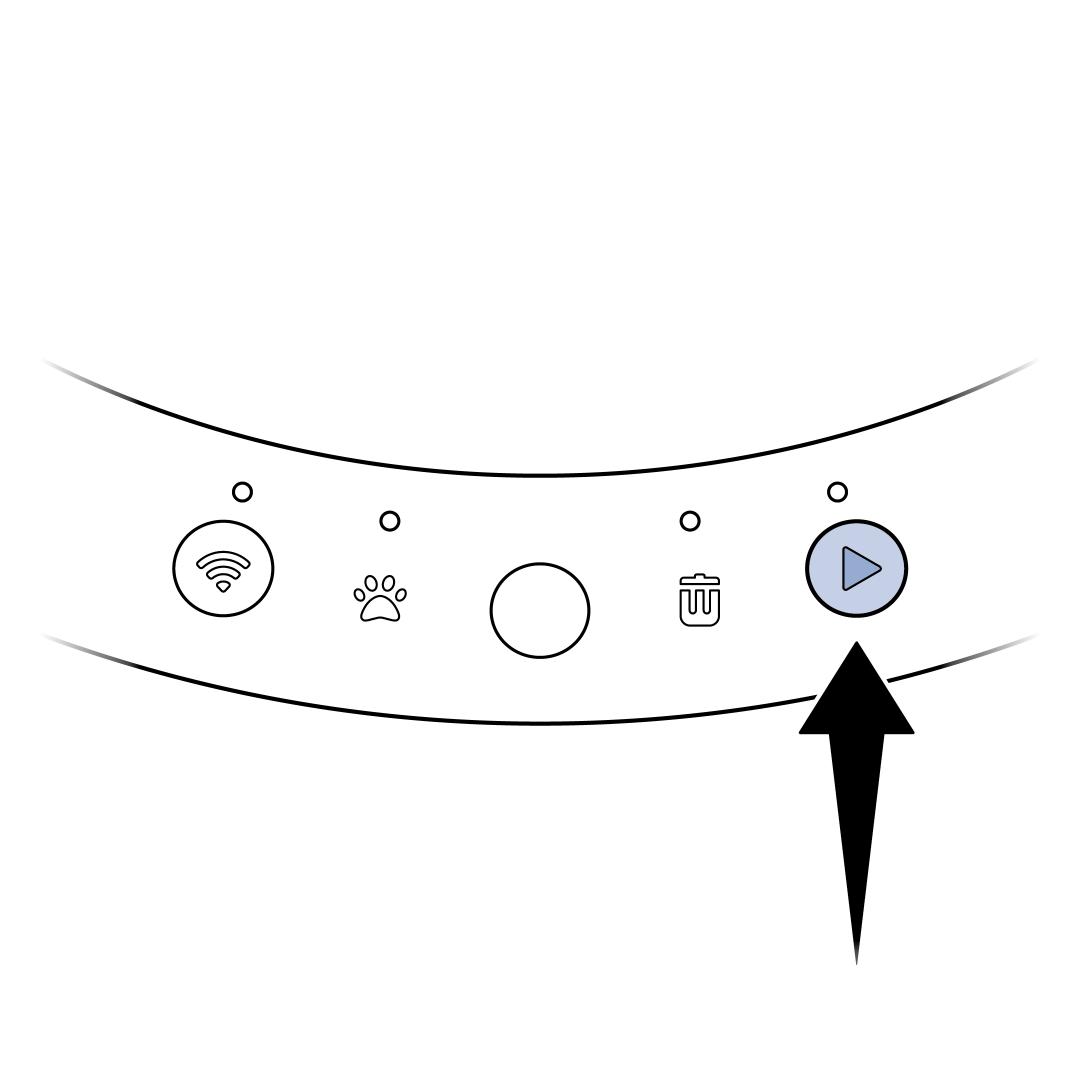
Lightly press and hold the Cleaning Button for 3 seconds and release. If the Cat Entry Light comes on while pressing the Cleaning Button, you are pressing too hard. Wait until the light goes out before trying again. There will be an “A” on the display, indicating Add Litter Mode. Fill the litter box using a high-quality litter to the MAX fill line inside the sphere. Once litter has been added, press and release the Cleaning Button to exit Add Litter Mode.
Download the PetSafe® Pet Companion app. Follow the in-app prompts to connect your SmartSpin™. For additional help connecting to your litter box, visit How To Connect My PetSafe® ScoopFree® SmartSpin™ Self-Cleaning Litter Box to the App.