How To Set Up My PetSafe® Pawz Away® 2.0 Outdoor Wireless Pet Barrier
Important Information
Fully charge the collar before you begin setup. For more information, visit How To Charge My PetSafe® Pawz Away® 2.0 Collar.
Before beginning, you will need:
- 4 Alkaline D-cell Batteries
- Phillips-head Screwdriver
Choose a Setup Type and Location
The outdoor base rock can be set up two ways. Decide which setup works best for your area before proceeding.
- Wireless- The outdoor base rock emits a circular signal centered on the outdoor base rock. The signal range is adjustable, up to 8 feet (2.4m) out from the outdoor base rock which is 16 feet (4.8m) across.
- Wired- Using wire, you can create a custom boundary shape with up to 150 feet (45.7m) of wire.
When choosing a location, do not place the outdoor base rock on a metal surface or near large metal objects such as air conditioning units, metal outbuildings or metal trash cans, as this can interfere with the signal.
Although the outdoor base rock is waterproof, ensure the location is not a low-lying area where water collects as submersion in water is not recommended.
Wireless Setup
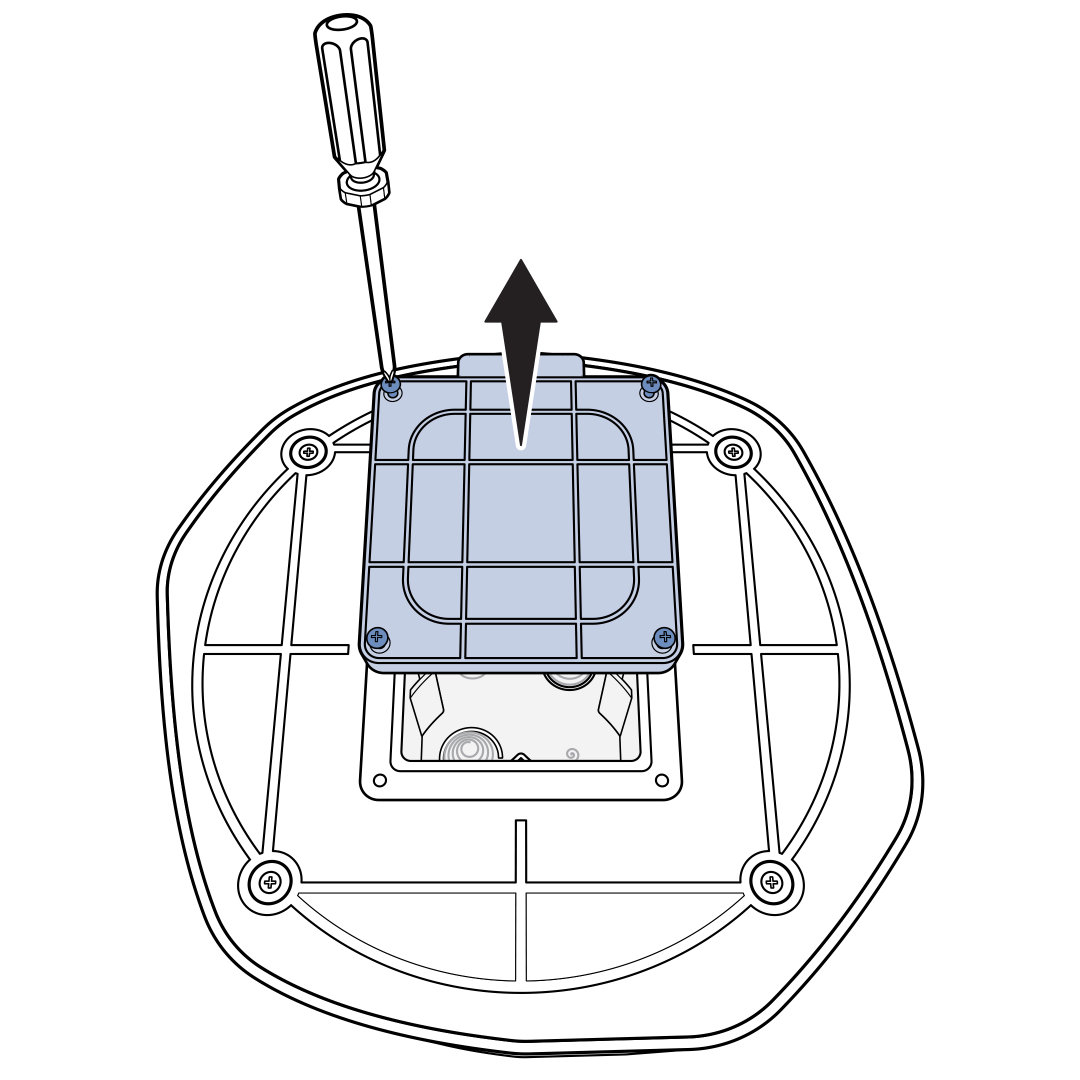
Loosen the 4 Phillips-head screws in the battery compartment cover on the bottom of the outdoor base rock with a screwdriver.
Remove the battery compartment cover. The screws are captive and will remain in the cover.
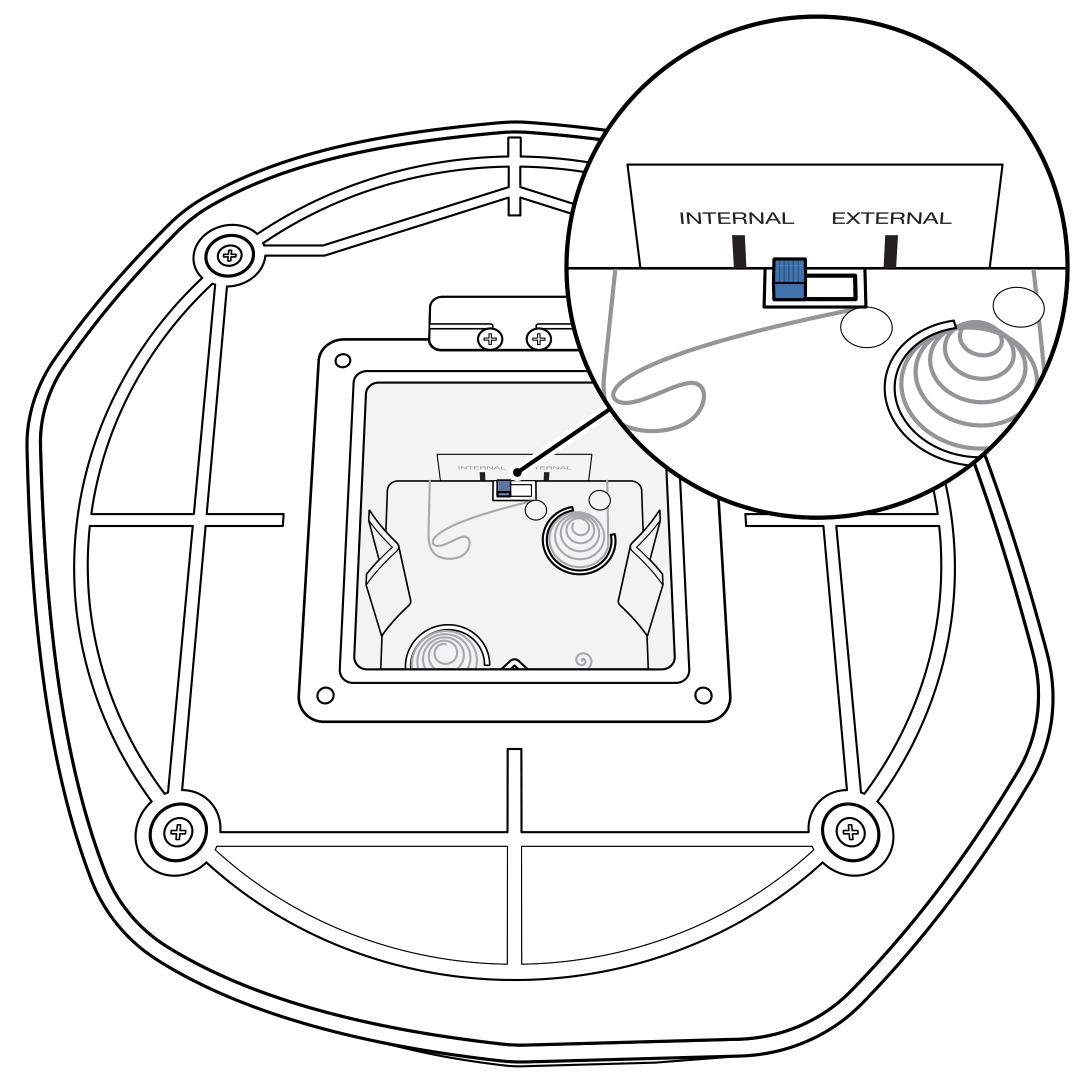
Locate the mode switch inside the battery compartment. For wireless setup, set the mode switch to “Internal”.
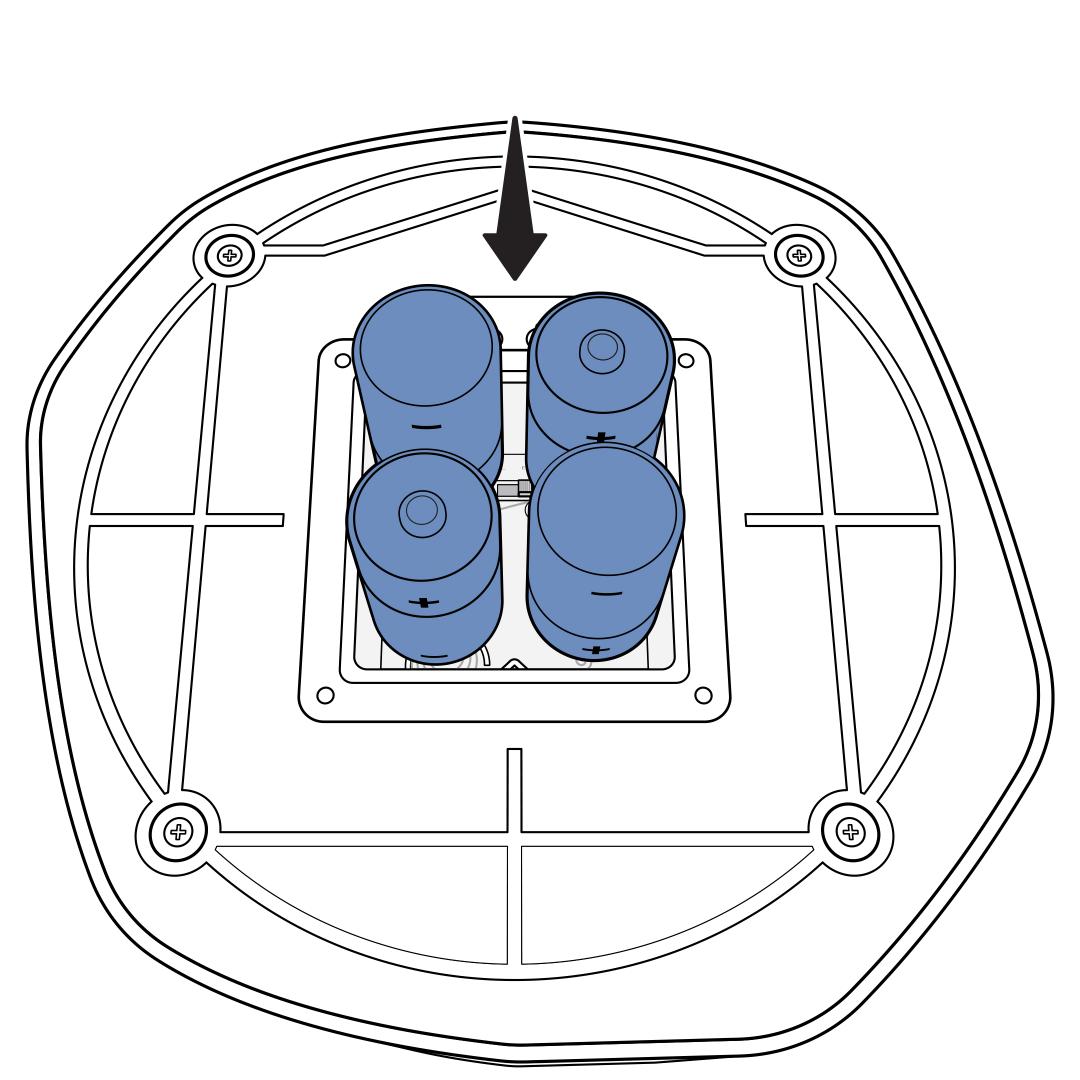
Install 4 alkaline D-cell batteries, ensuring they are placed in the correct direction, indicated by the plus and minus indicators on each slot. The slots with the springs should touch the negative side of the battery.
Replace the battery compartment cover, then use a screwdriver to hand-tighten the screws.
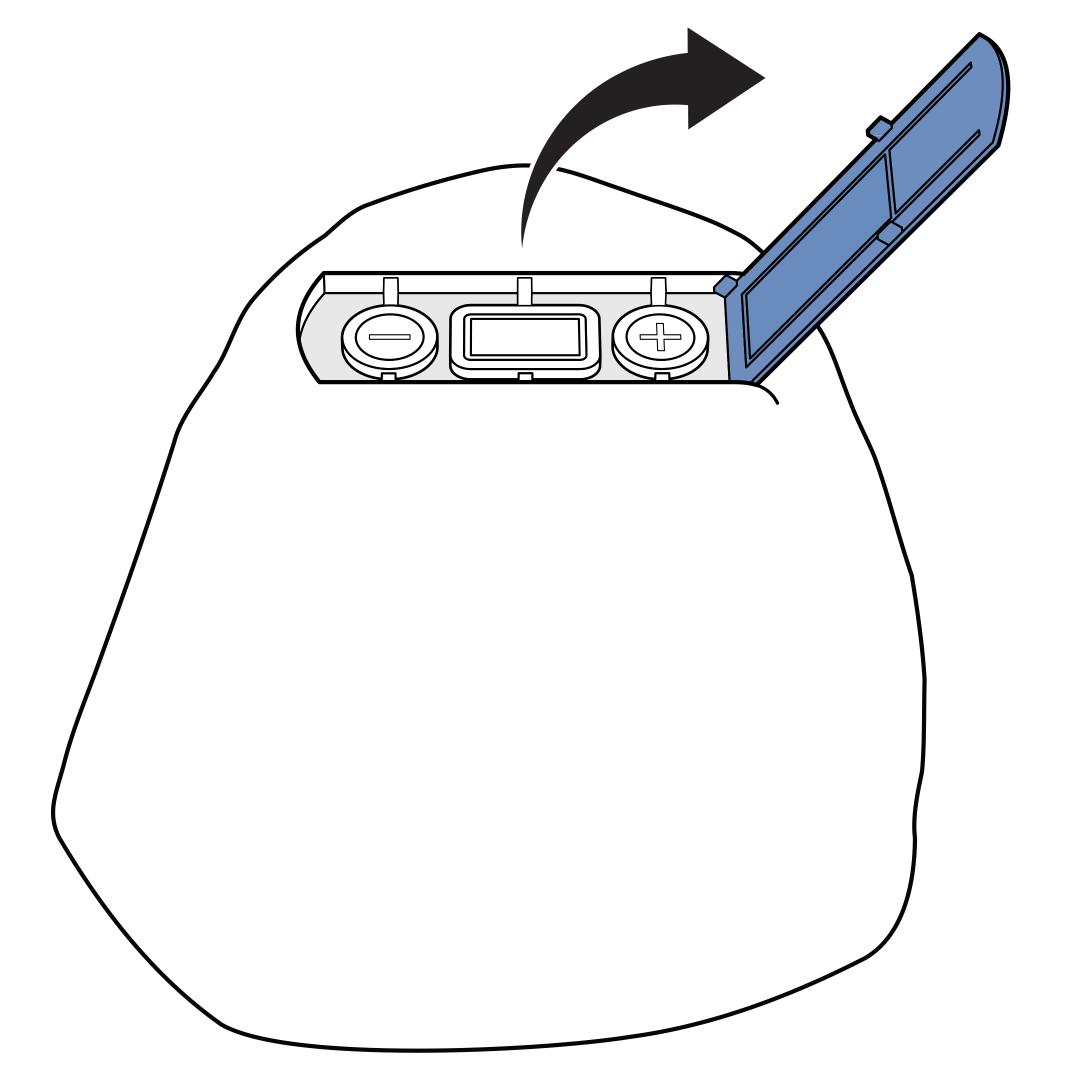
Turn the outdoor base rock upright and open the lid to access the LCD screen and range buttons.
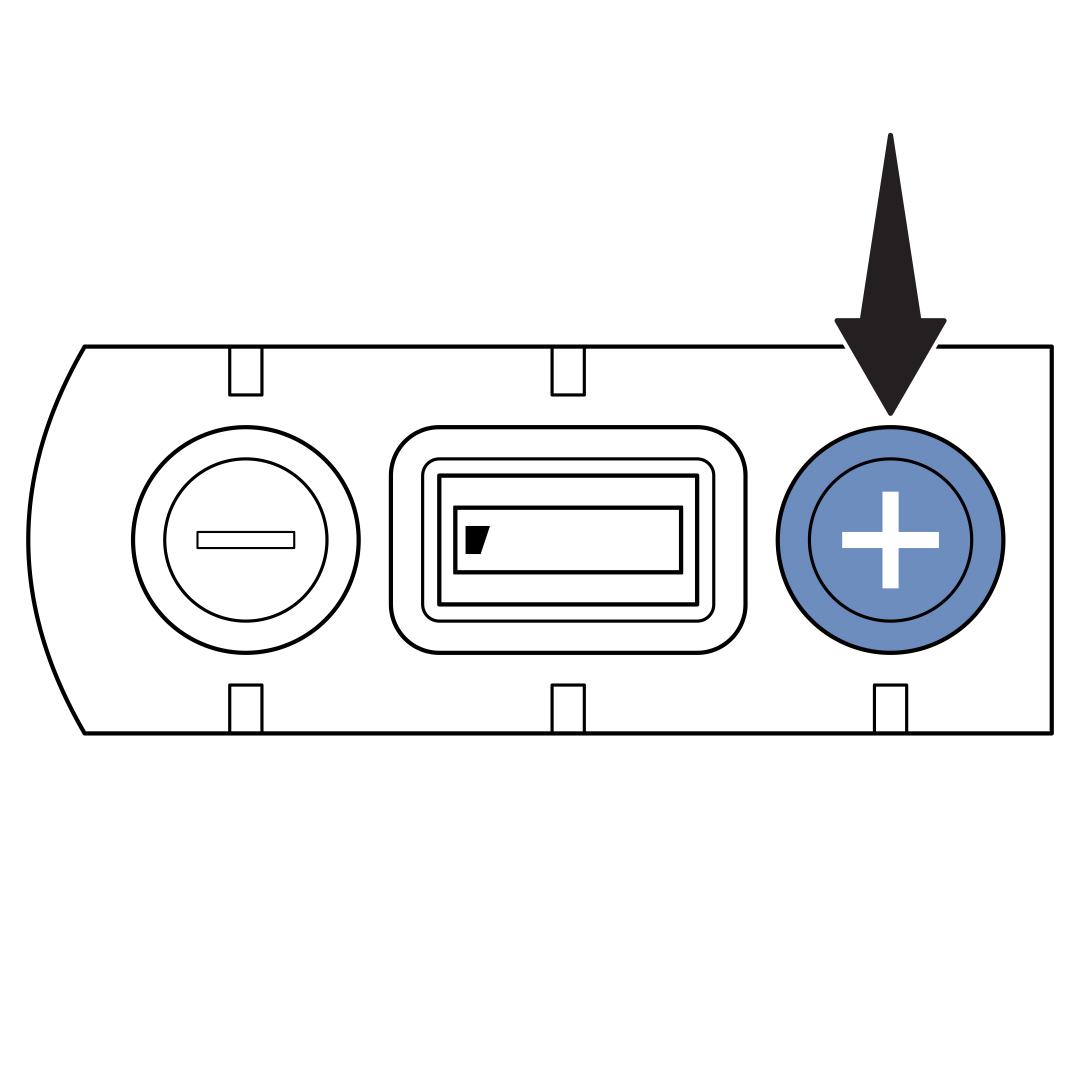
Press the up (+) button once to turn on the outdoor base rock. A single range bar indicates the unit is set to the lowest range.
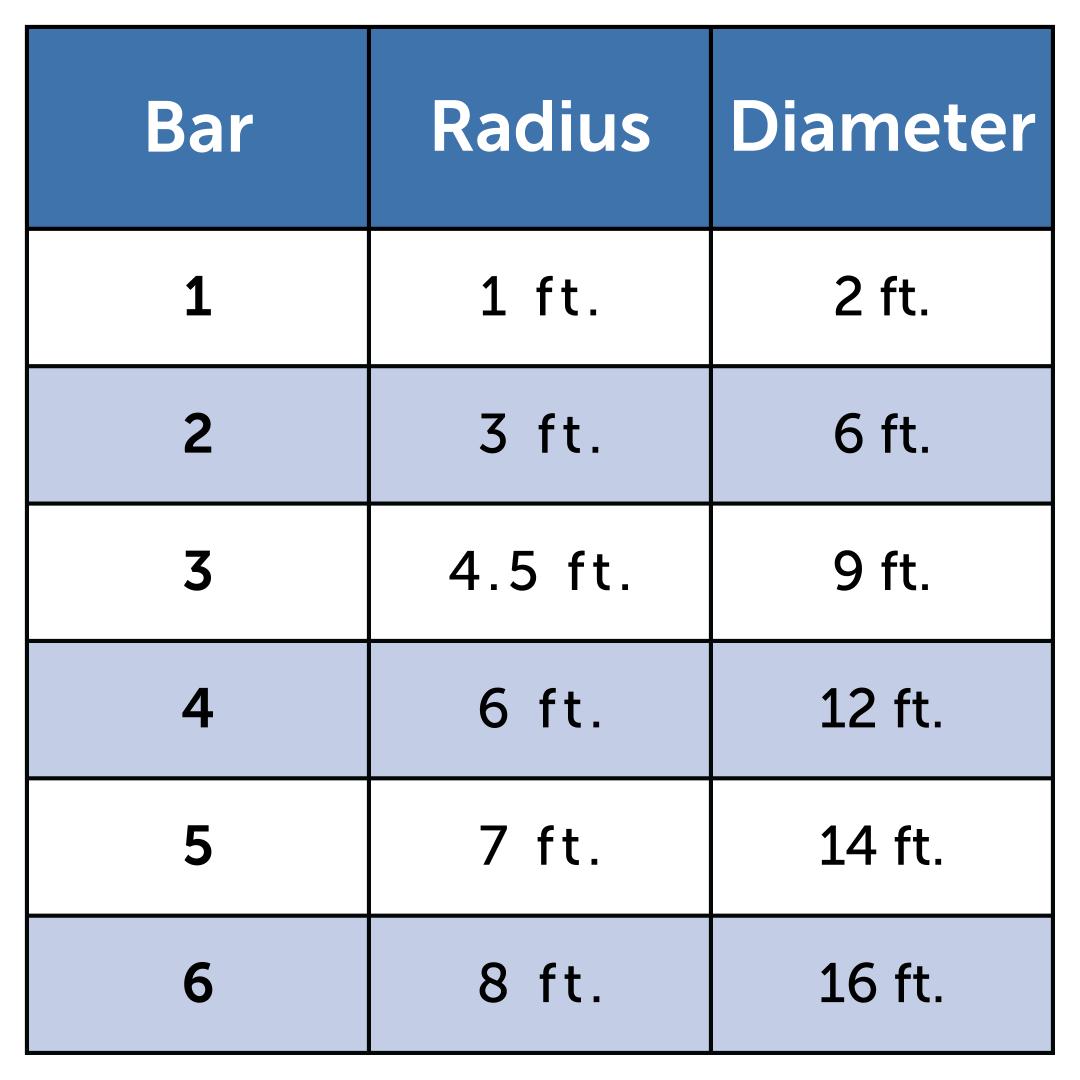
Use the up (+) and down (-) buttons to adjust the range for your desired area according to the chart. You can create an off-limits zone up to 16 feet (4.8m) in diameter. The chart shows close estimates, but the signal may vary a little.
Wired Setup
You will need insulated copper wire, up to 150 feet (45.7m), that is rated for direct burial. We recommend only using 18-20 gauge as thicker gauge wire may not sit in the terminals properly.
Wire can be purchased through our website here.
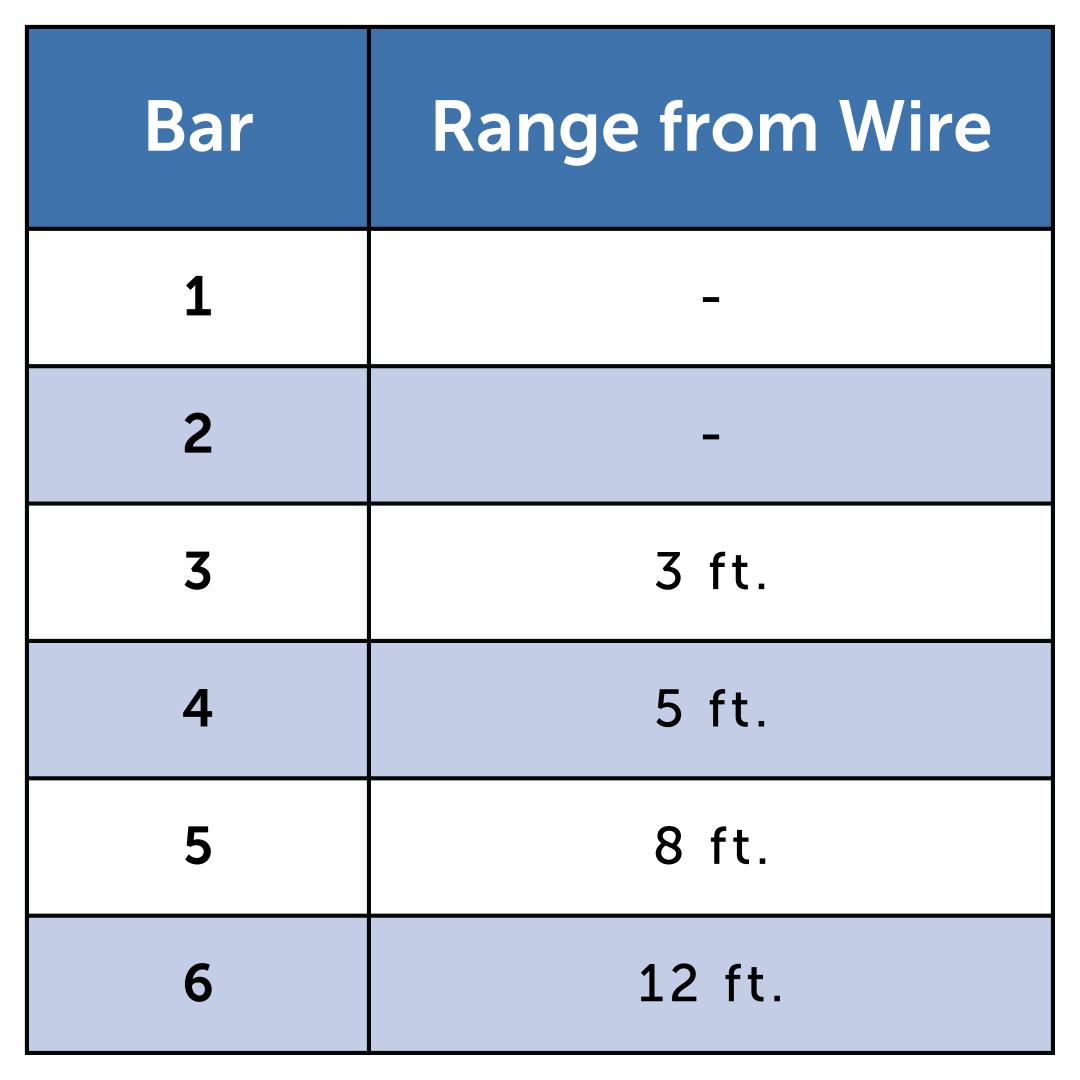
When determining your wire layout, it is important to remember that you will need to set the range to a minimum of 3 bars. If the range is set to 1 or 2 bars, the signal will not be great enough to be detected by the collar. Refer to the chart for the approximate range of the signal from the outside of the wire for each bar.
Wire Layout:
- Do not use sharp turns as this may cause gaps in your boundary. Always use gradual turns and round the corners with a minimum of a 3-foot (1m) radius to produce a more consistent boundary.
- Avoid making passageways too narrow for your dog to move about freely, like alongside a house or fence. The wire should be a minimum of 5 feet (1.5m) apart in these areas.

Once you have determined your layout, place the outdoor base rock in your desired location. Begin laying the wire on the ground around the area that will be restricted to your dog. The wire must start and stop at the outdoor base rock, creating one continuous loop.
Loosen the 4 Phillips-head screws in the battery compartment cover on the bottom of the outdoor base rock with a screwdriver.
Remove the battery compartment cover. The screws are captive and will remain in the cover.
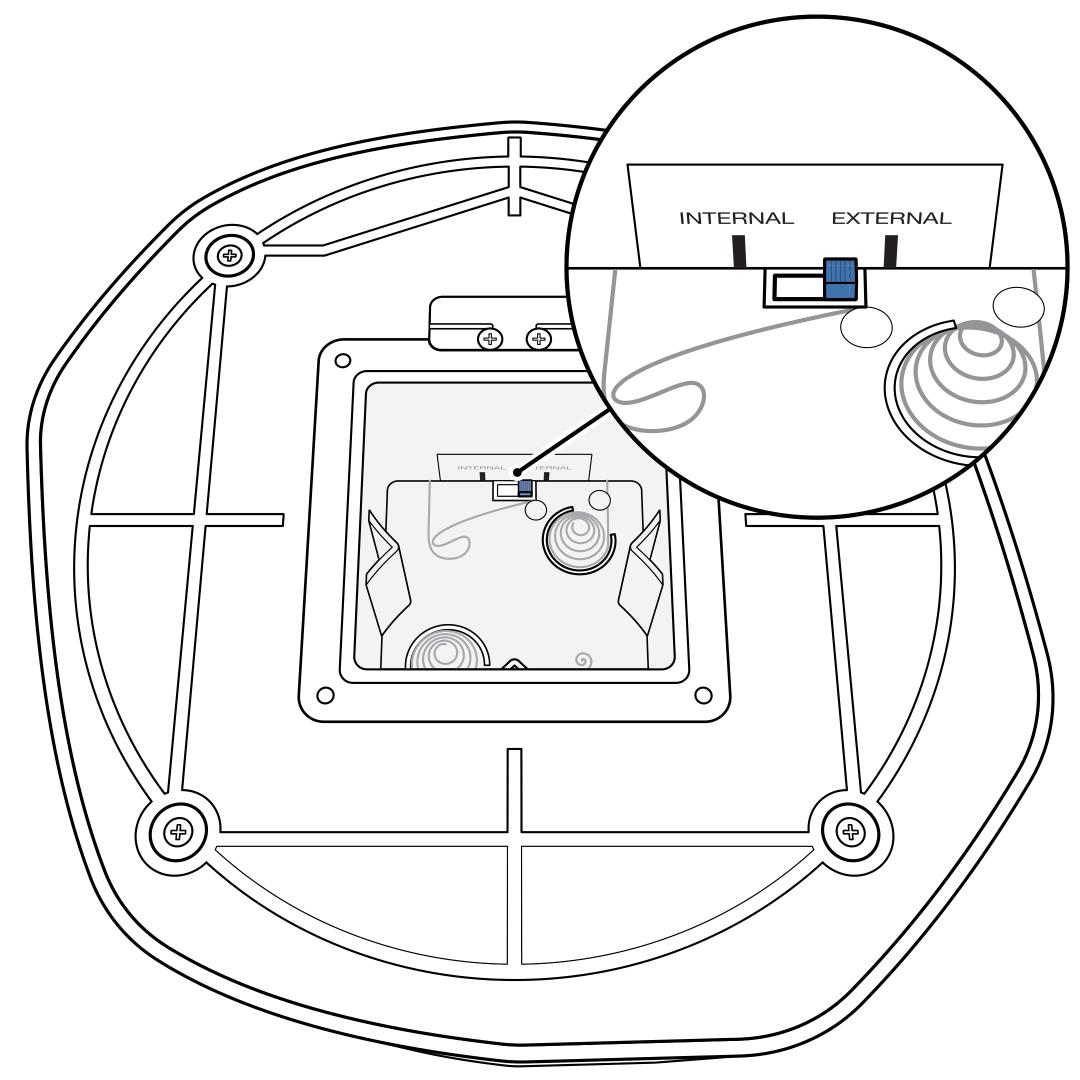
Locate the mode switch inside the battery compartment. For wired setup, set the mode switch to “External”.
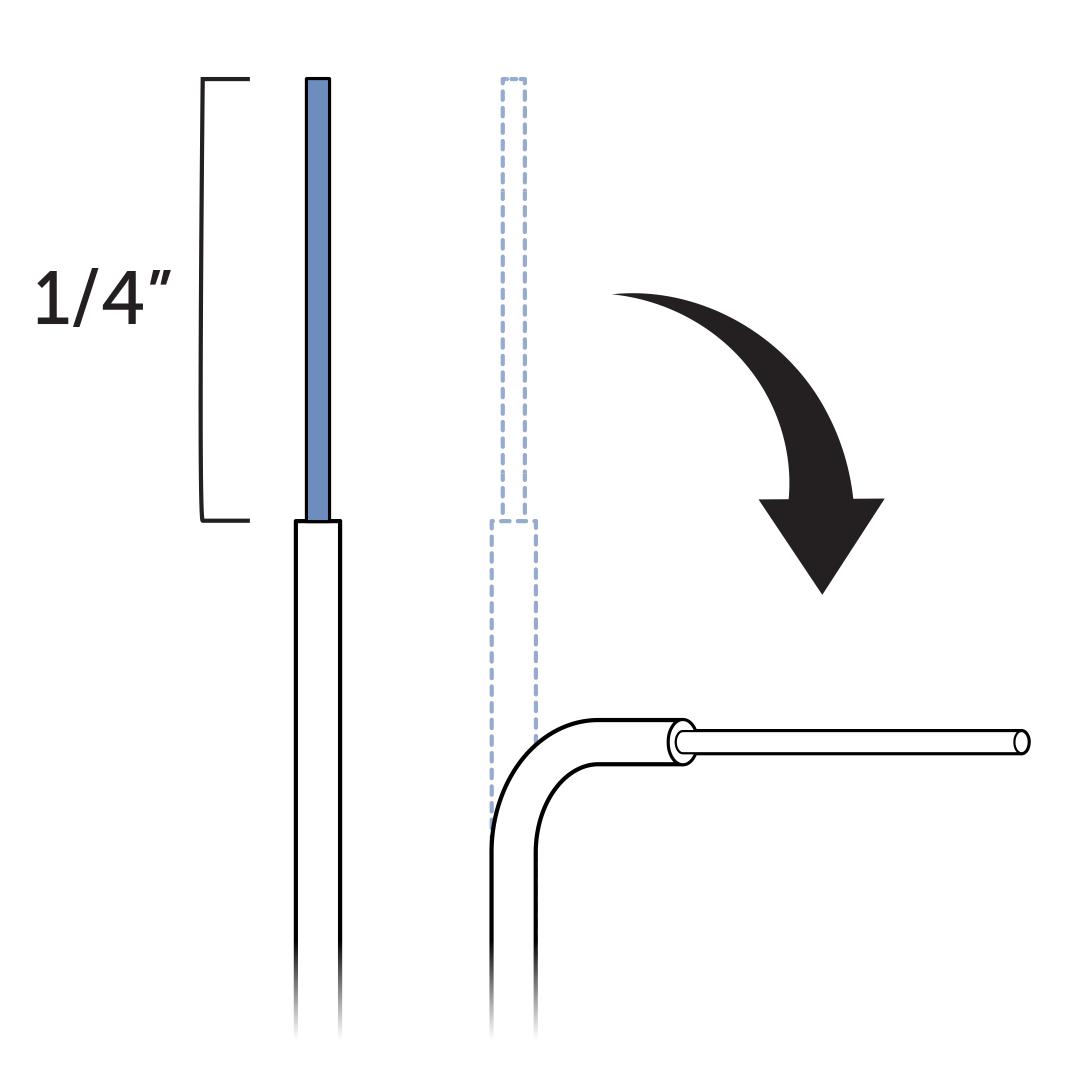
Use wire stripping pliers to strip about ¼ inch of insulation from the ends of the boundary wire. Then bend each end of the wire to a 90-degree angle.
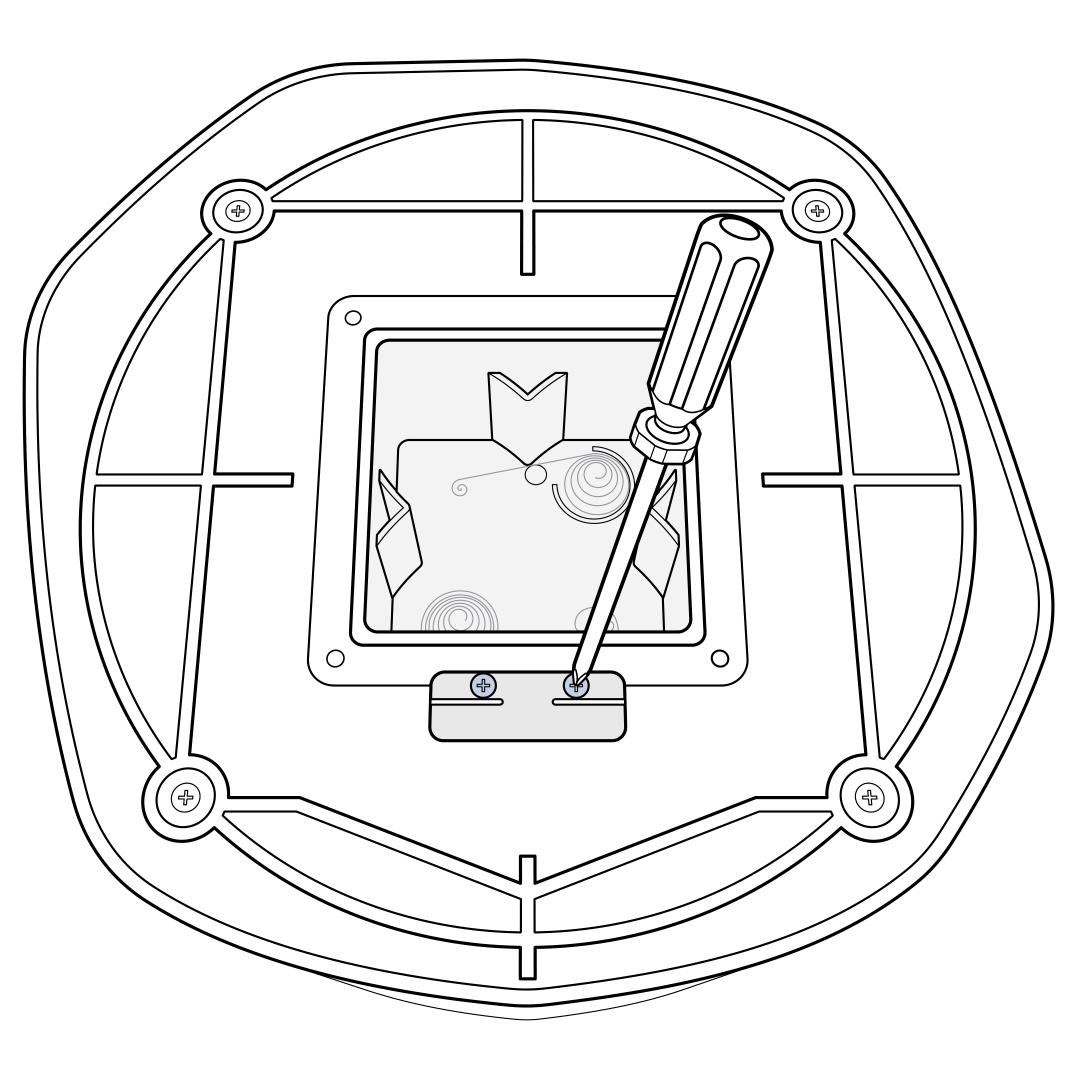
Locate and loosen the two Boundary Wire Channel screws near the battery compartment with a screwdriver.
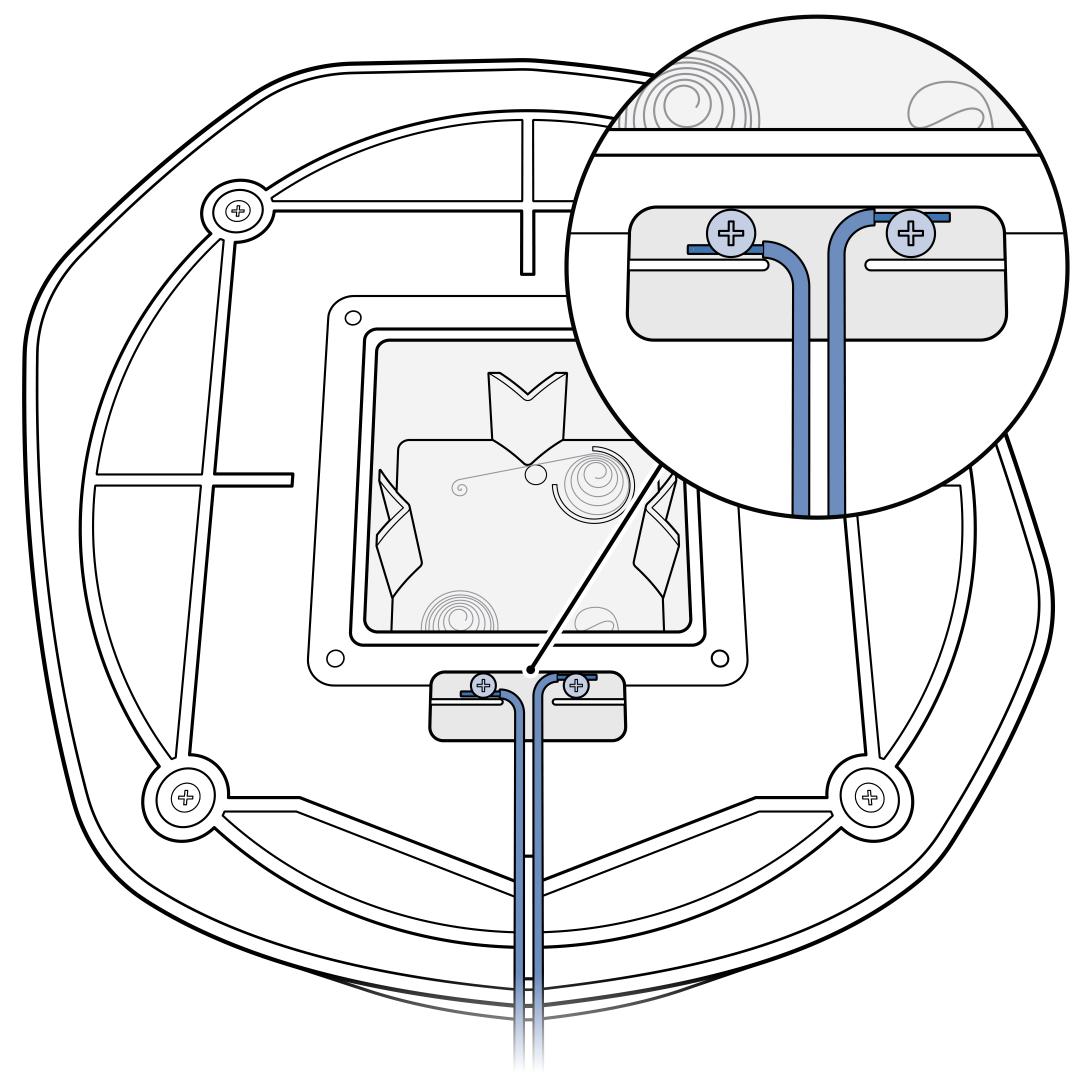
Place one end of the boundary wire into the Boundary Wire Channel. Ensure the wire touches the threads of one screw in the channel, then use a screwdriver to hand-tighten the screw to secure it.
Repeat this step to connect the other end of the boundary wire to the other screw. Make sure the bare wires do not touch each other and each wire end is only in contact with one screw.
Carefully place the wires in the channel so they fit through the slot on the battery compartment cover when closed.
Install 4 alkaline D-cell batteries, ensuring they are placed in the correct direction, indicated by the plus and minus indicators on each slot. The slots with the springs should touch the negative side of the battery.
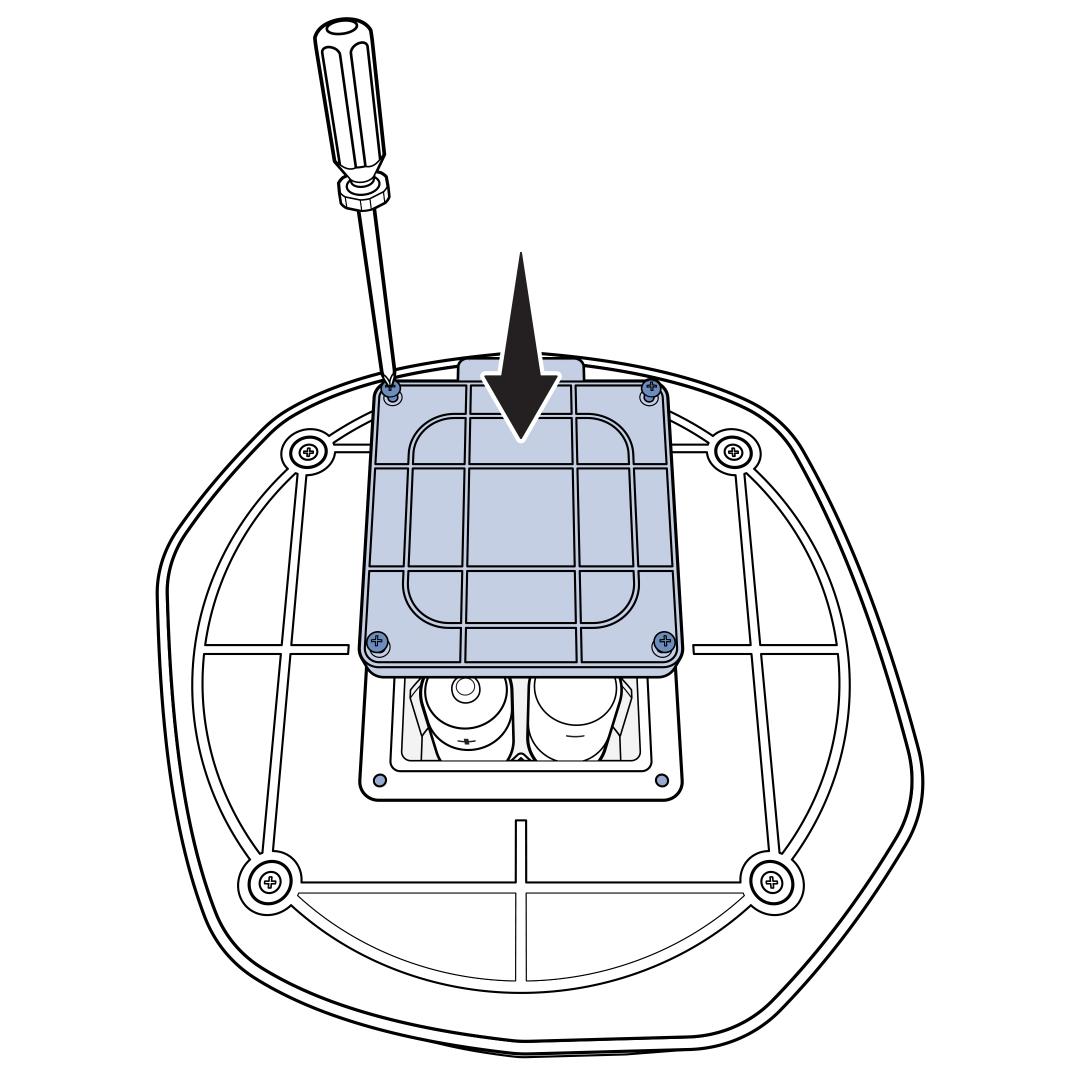
Replace the battery compartment cover and use a screwdriver to hand-tighten the screws.
Be careful not to pull or tug on the wires once you have placed them in the channels.
Use the up (+) and down (-) buttons to adjust the range for your desired area according to the chart. The chart shows close estimates of the distance for the bar setting, but the signal may vary a little.
We recommend burying the wire to prevent the insulation from being damaged, as this can cause issues with the signal.
Always lay the wire and test the system first before burying the wire.
Test the System
Ensure the collar is charged and powered on. To power it on, press the power button for 1 second until the light is green, then release. The collar will tone and the light will remain solid green for 5 seconds. Then the light will indicate the battery status by blinking either a green or red light once every 5 seconds.
If the light is red or there is no light, charge the collar fully before continuing to ensure consistent results. For more information, visit How To Charge My PetSafe® Pawz Away® 2.0 Collar.
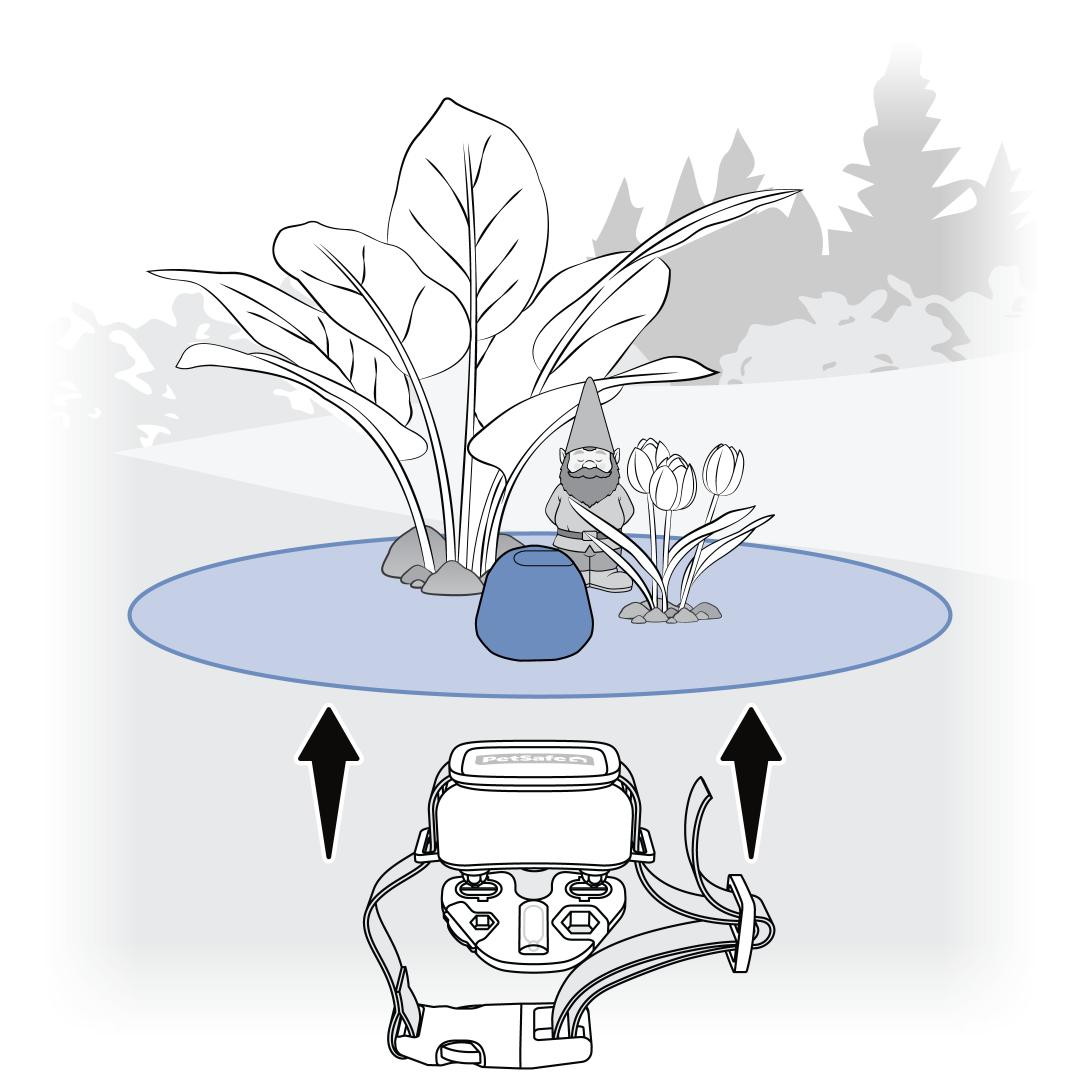
Test the collar by placing the Contact Points on the wires of the Test Light Tool and approaching the outdoor base rock. Be sure to hold it at the height of your dog's neck.
As the collar approaches the off-limits zone, the collar will sound a warning tone. Once the collar enters the zone, it will tone, vibrate and deliver static correction, indicated by an amber flash at the center of the Test Light Tool.
The collar uses Variable Pulse™ technology which starts on the lowest static correction level and pulses in progressively increasing levels of correction strength to the maximum level as the collar stays in the area, up to 15 seconds. The Test Light Tool will increase in brightness as the correction level increases. If the collar times out after 15 seconds of continuous correction, you will need to leave the signal area to allow it to reset before testing again.
When testing outside in bright conditions, we recommend cupping your hand over the Test Light Tool as it may be difficult to see the light activate.
Train Your Dog
Once you have set up and tested the system, it’s time to train your dog. For detailed instructions, visit our article How To Train My Dog to the PetSafe® Pawz Away® 2.0 Outdoor Wireless Pet Barrier.