How to Clean Your Creekside Ceramic Pet Fountain
The fountain should be cleaned at least once a month to avoid mineral buildup and to ensure clean drinking water. It is recommended to clean the pump and change the filter when cleaning the fountain.
Note: Multi-pet households may need to clean every two weeks.
Disassemble the Fountain

Unplug the pump from the wall adaptor and empty the fountain.

Remove the tower from the bowl.

Remove the filter housing from the pump.

Remove the carbon filter from the filter housing and discard.

Peel off the rubber cap from the stem.

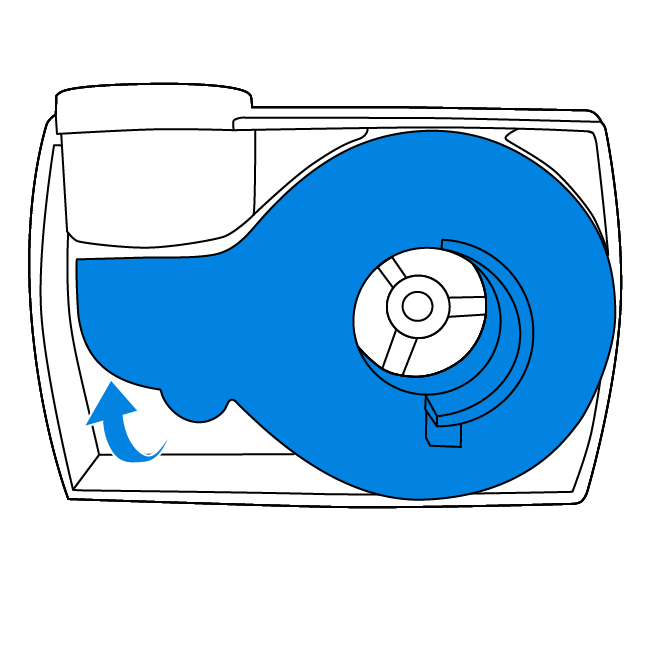
Remove the pump, cord, and foam filter. Set the pump aside.

Clean the fountain and removed parts, excluding the pump, with soap and warm water.
The bowl and tower are dishwasher safe on top rack only.
Note: If there is leftover residue, soak the fountain in white vinegar and warm water for 30 minutes. Wash again with soap and warm water before use.
Disassemble the Pump
Note: Place the pump parts in a safe place to avoid dropping them down the drain.

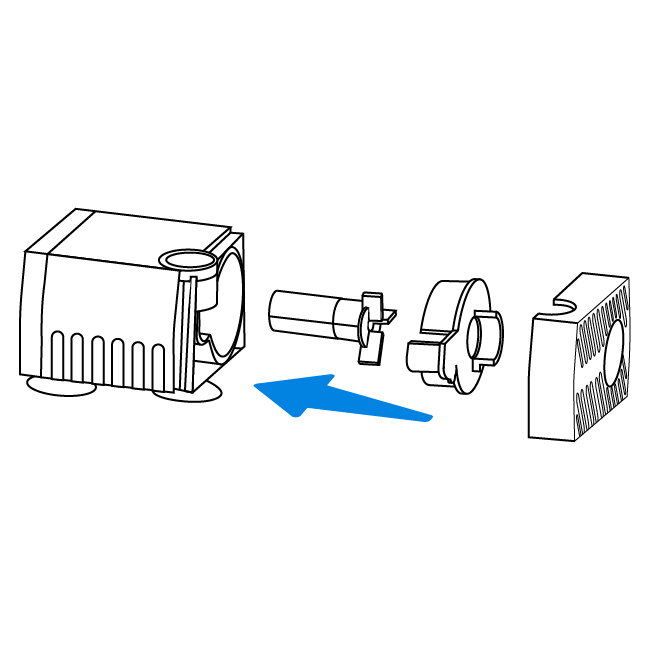
Use a tool with a small, flat edge to remove the blue faceplate on the end opposite of the cord.

Pull up on the small lip to remove the blue stator.

Remove the impeller by pulling up from underneath the white disk.
Note: The impeller is held in place by a magnet. This may give some resistance when trying to remove.
Clean all parts of the pump using soap and warm water with a small brush. Completely rinse the pump, then reassemble.
If hard water build up occurs, soak pump in equal parts vinegar and warm water for 15 minutes, then scrub.
Reassemble the Pump

Place the impeller, stator and faceplate back onto the base to reassemble the pump.
Rinse the Filters
Note: The carbon is made from coconut shells and is safe for your pet.

Rinse the carbon filter under warm water for 30 seconds before use. Loose black particles will rinse out from the filter. If the filter is not rinses thoroughly, particles may be seen in the bowl.

Rinse the foam filter under warm water for 30 seconds before use. This filter will remove hair and other small particles. Replace if damage is noticed.
Reassemble the Fountain

Thread the pump cord through the stem on the bowl. Run the cord through the notch on the bottom of the bowl.

Place the pump in the filter and set into the bowl.

Fold the rubber cap over the stem, allowing the cord to sit in the notch at the bottom of the cap.

Align the carbon filter with the filter housing and insert.

Insert the bottom of the filter housing into the circular hole on the pump.

Place the tower over the filter housing. Align the top of the housing with the opening in the tower. Press down firmly to create the seal.

Pour water into the fountain bowl, leaving an inch of room from the top of the bowl.

Connect the pump cord to the power adaptor and plug it into a standard electrical outlet.
Contact Customer Care
If you need further assistance, please contact our customer care team.