Elite Bark Control Collar Set Up
Table of Contents
Welcome
Welcome to your new PetSafe® Elite Bark Control Collar!
What to Expect
Training time will vary depending on the dog.
The Safety Shut Off feature automatically turns the collar off for three minutes if your dog barks more than 15 times within a 50 second period.
Progressive learning starts with the lowest correction and increases 1 level each time your dog barks within 30 seconds of the previous bark. If your dog does not bark again within 30 seconds, the collar will reset itself to the lowest level of correction.
Refrain from having your dog wear the collar longer than 12 hours at a time to avoid irritation.
Materials
Please have the following in front of you for setup:
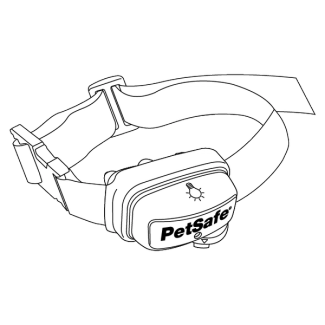
Elite Bark Control Collar
RFA-188 Battery

Coin
Fit the Collar
For proper use, the collar must be adjusted to fit your pet properly. Turn the battery to the OFF position before fitting to avoid false activation.
Adjust Collar

With your dog standing, center the probes on the neck.

Check that only one finger fits between the probe and your dog’s neck.
Adjust Strap
Adjust the strap until the collar is snug. Both probes must be touching skin for correction to be felt.
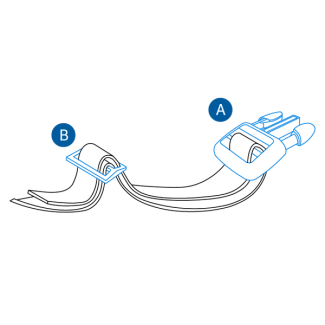
Fasten Buckle
Slide Buckle

To loosen
Move the strap through the Slide Buckle, then pull through the Fasten Buckle.

To tighten
Move the strap up through the Fasten Buckle, then pull through the Slide Buckle.
Important: Refrain from using the collar longer than 12 hours to avoid irritation.
Trim Strap (Optional)

If the strap is too long for your pet, follow the instructions below to trim the excess. The above materials will be needed to begin.
Important: Leave extra room on the strap if your dog is young or grows a thick winter coat.
To begin, follow these steps:

Mark the strap at least 2 inches past the slide buckle.
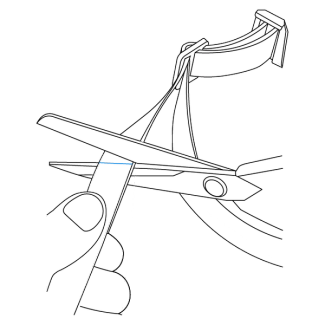
Remove the collar from your dog and trim the strap.
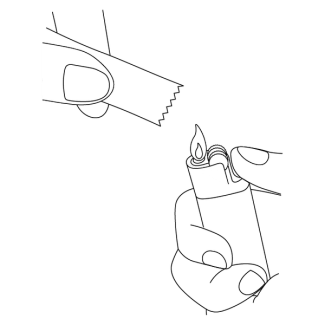
Apply a flame to seal the cut edge.
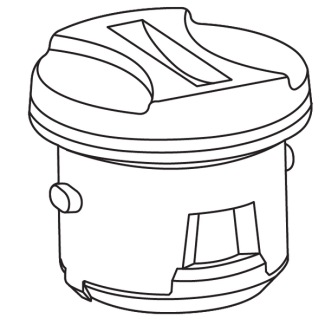
Insert the Battery
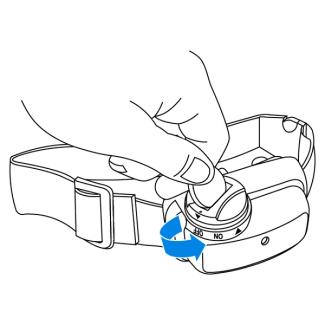
Place the battery into the collar and use a coin to twist to the ON position. The light on the collar will turn green, then orange to indicate the collar is on. If there is no light, replace your battery with a new RFA-188 battery.
Test your Collar
To test the bark collar, both the vibration and sound sensor must be activated.
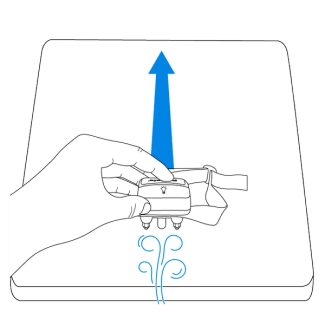
Hold the collar with the light indicator facing up, then quickly drag across a hard surface while blowing air toward the collar. This activates the vibration and sound sensor to send a correction.
Note: Drag across a surface that can withstand scratching, such as a cutting board.
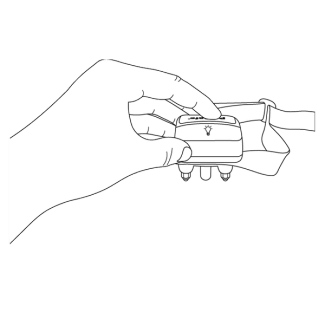
Watch for a red light and listen for a beep to confirm that the collar is activating.
Contact Customer Care
If you need further assistance, please contact our customer care team.